

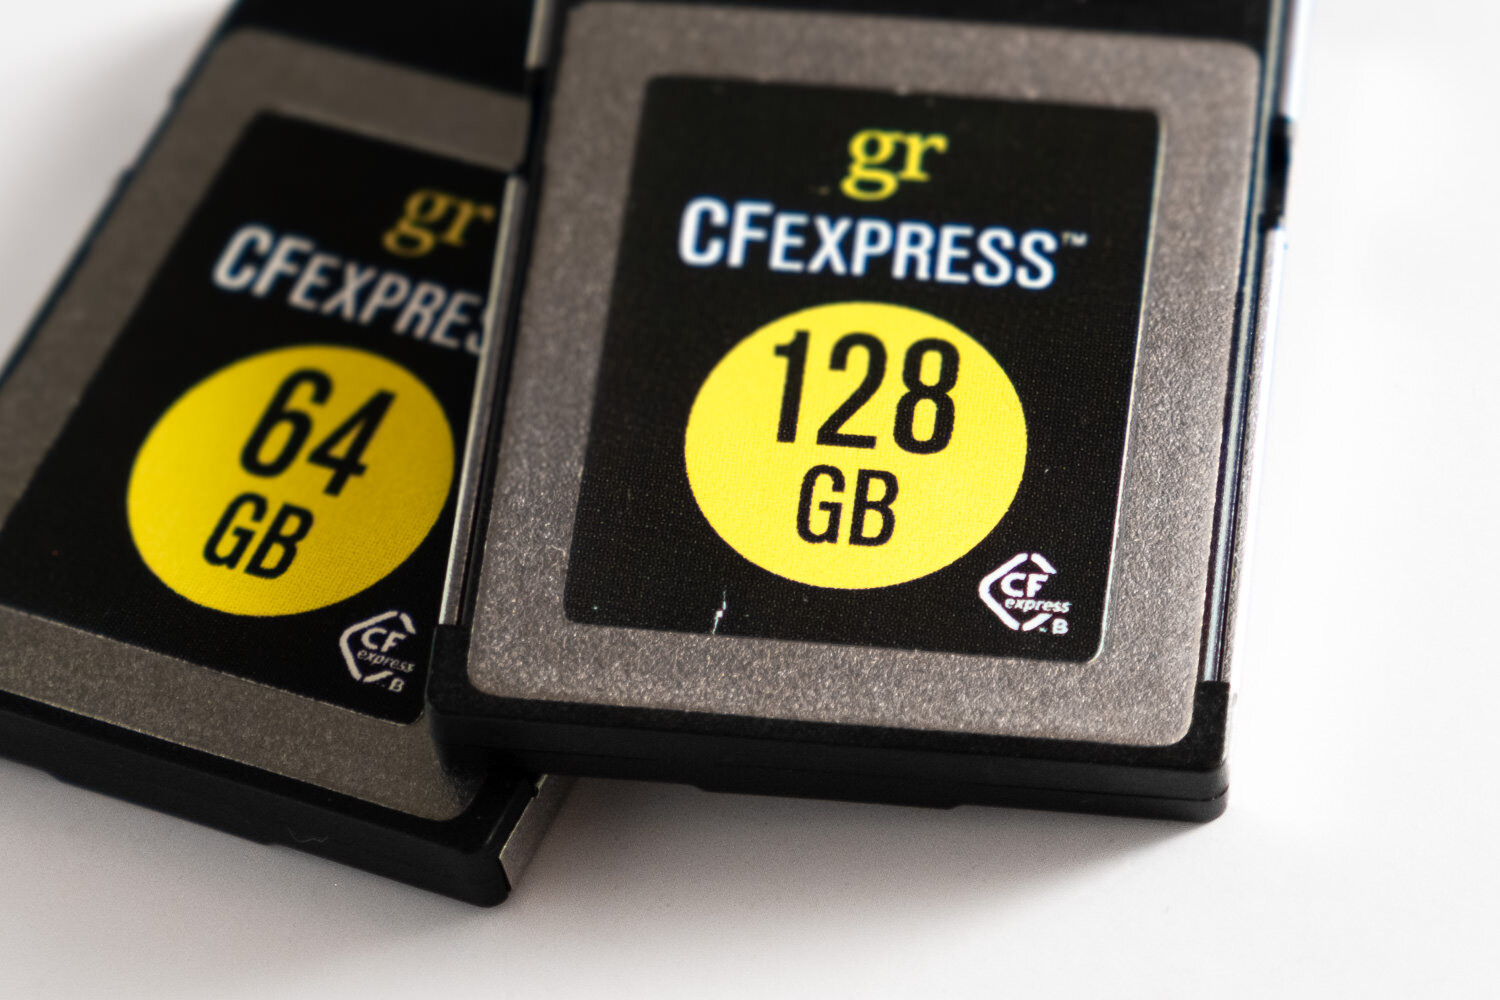
Gear Review // GoRam (Gigaram) CFexpress cards: cheap CFexpress cards for photographers?
64gb and 128gb CFexpress cards for $58 and $98… too good to be true?

64gb and 128gb CFexpress cards for $58 and $98… too good to be true?
6/25/2021 Update: Looks like the brand has been renamed to GoRam from GigaRam, but it still sports the same design and ‘gr’ branding. Everything in the review below should still apply to GoRam CFExpress cards.
CFexpress cards are the hot new memory card on the market and with the latest batch of high end cameras from Canon (R5, 1DX MkIII, C300 MkIII, C500 MkII), Nikon (Z6 ii, Z7 ii, D6), and Panasonic (S1, S1R) featuring a CFexpress (Type-B) slot, the demand for CFexpress cards is rising and fortunately we have some options, unlike the outgoing XQD format.
Unfortunately, compared to the SD cards many photographers are accustom to, CFexpress cards are significantly more expensive. For those photographers upgrading to one of the aforementioned mirrorless bodies, from a Nikon D750 or Canon 5D Mark IV, and want to take advantage of the security of a dual card slot body, adding a couple CFexpress cards is essential. With prices averaging around $100-$150 for 64GB and $165-$200 for 128GB CFexpress cards from the major brands, it can be incredibly expensive to stock up on a few cards. But perhaps there’s a cheaper option... Enter the Gigaram CFexpress Type-B memory cards.
Buy @ Amazon
Gigaram 64GB CFExpress Card, $58 @ Amazon
Gigaram 128GB CFExpress Card, $98 @ Amazon
What is CFexpress?
CFexpress is the evolution of the formerly popular CompactFlash format. Using faster technology (PCI-express and NVMe) it allows these new memory cards to read/write significantly faster to keep up with the demands of incredibly large, high bitrate, video footage. CFexpress comes in three form-factors, Type A, Type B, and Type C. For this review, we’ll be focused on Type B which is the same size/shape as XQD cards used in select Nikon, Sony, and Phase One cameras from 2012-2018.
Who is Gigaram?
To be honest, I’m not entirely sure. Their website hasn’t been updated since 2005, the last article mentioning them is also from 2005 in an Anandtech article, and it appears to be the house brand of OEMPCWorld, a store based in Santa Clara, CA. Despite that, there’s plenty of lesser known brands in the computer chip/memory industry and their lack of presence in the consumer market isn’t necessarily a bad thing.
Initial Impressions
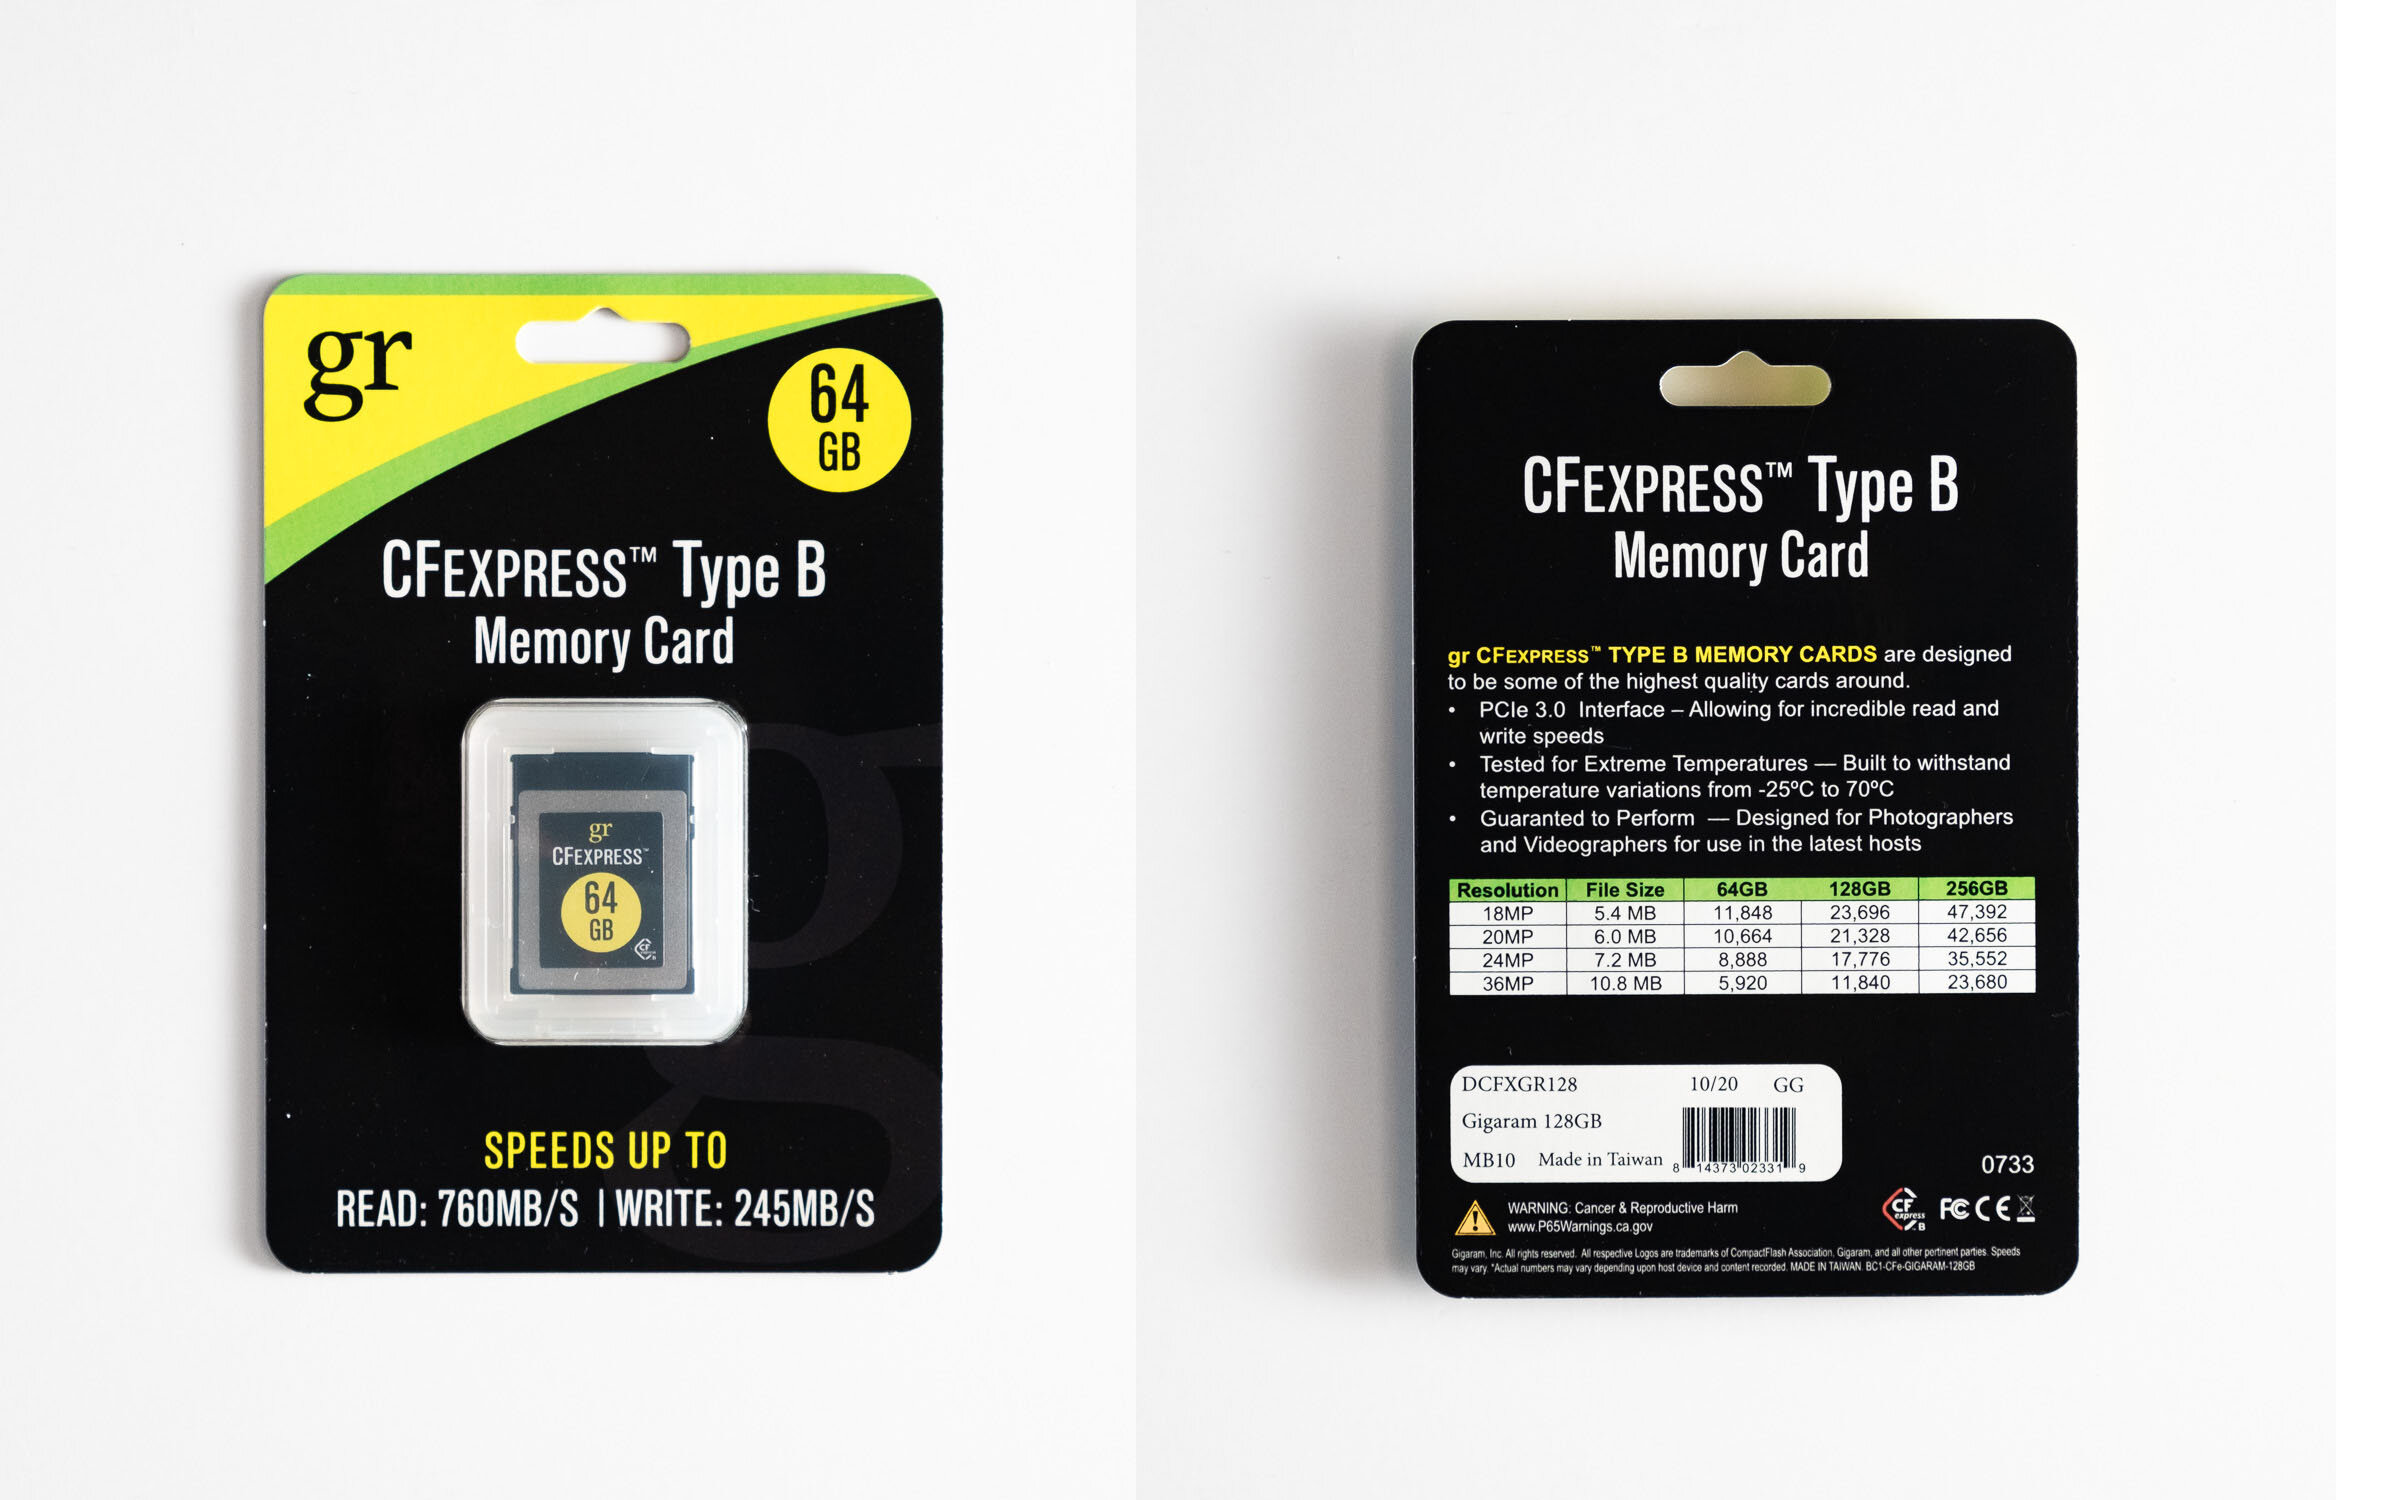
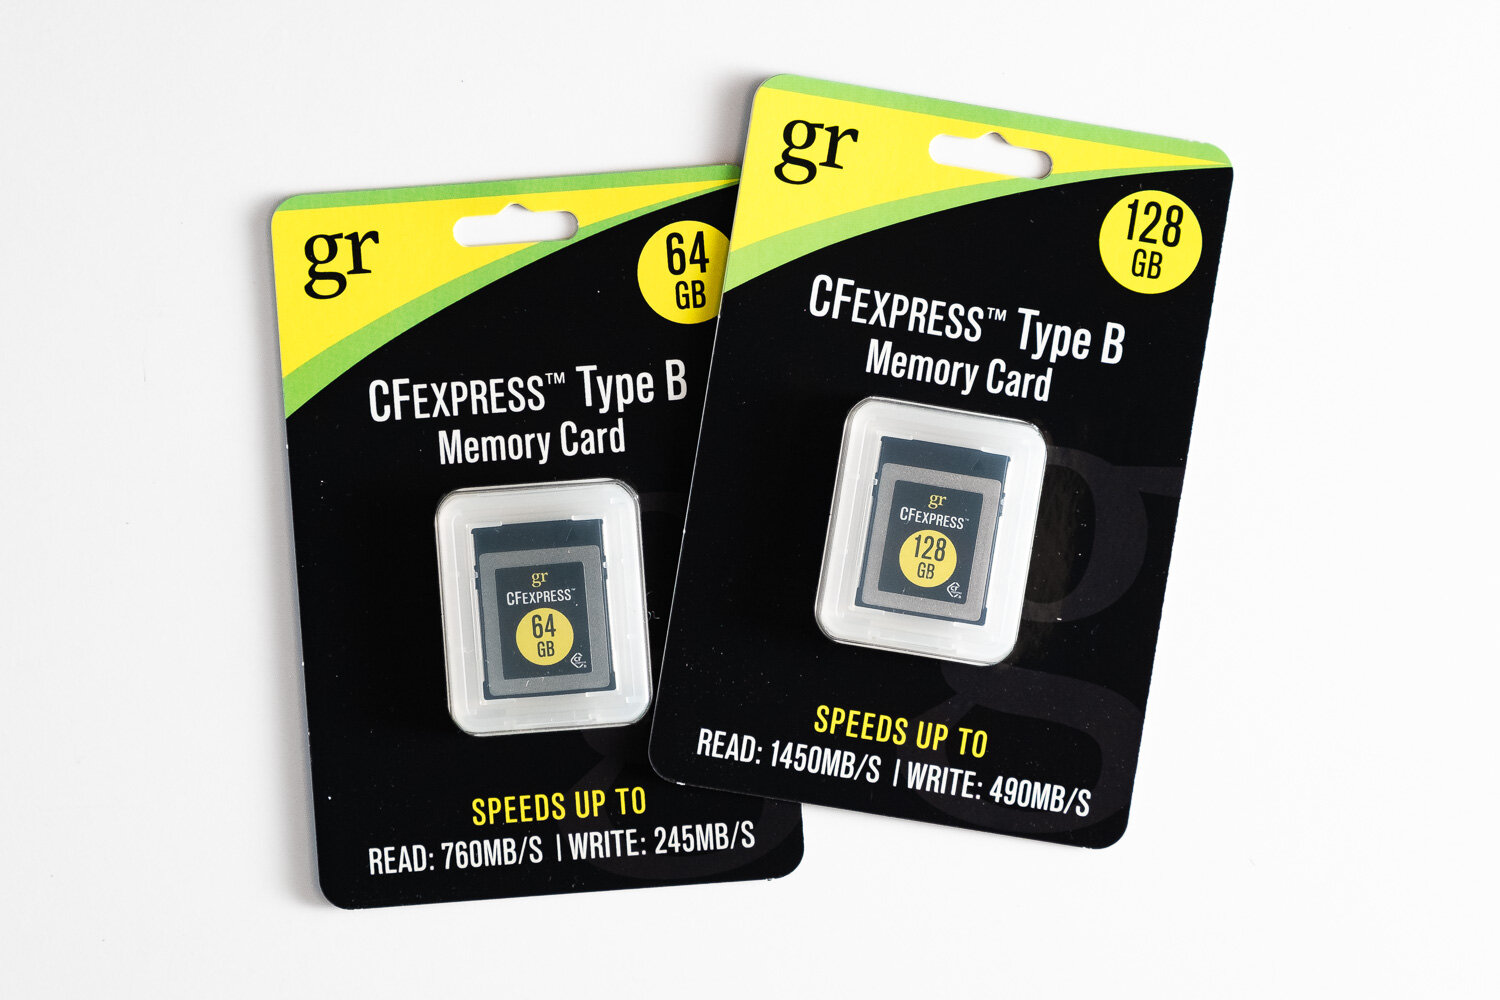
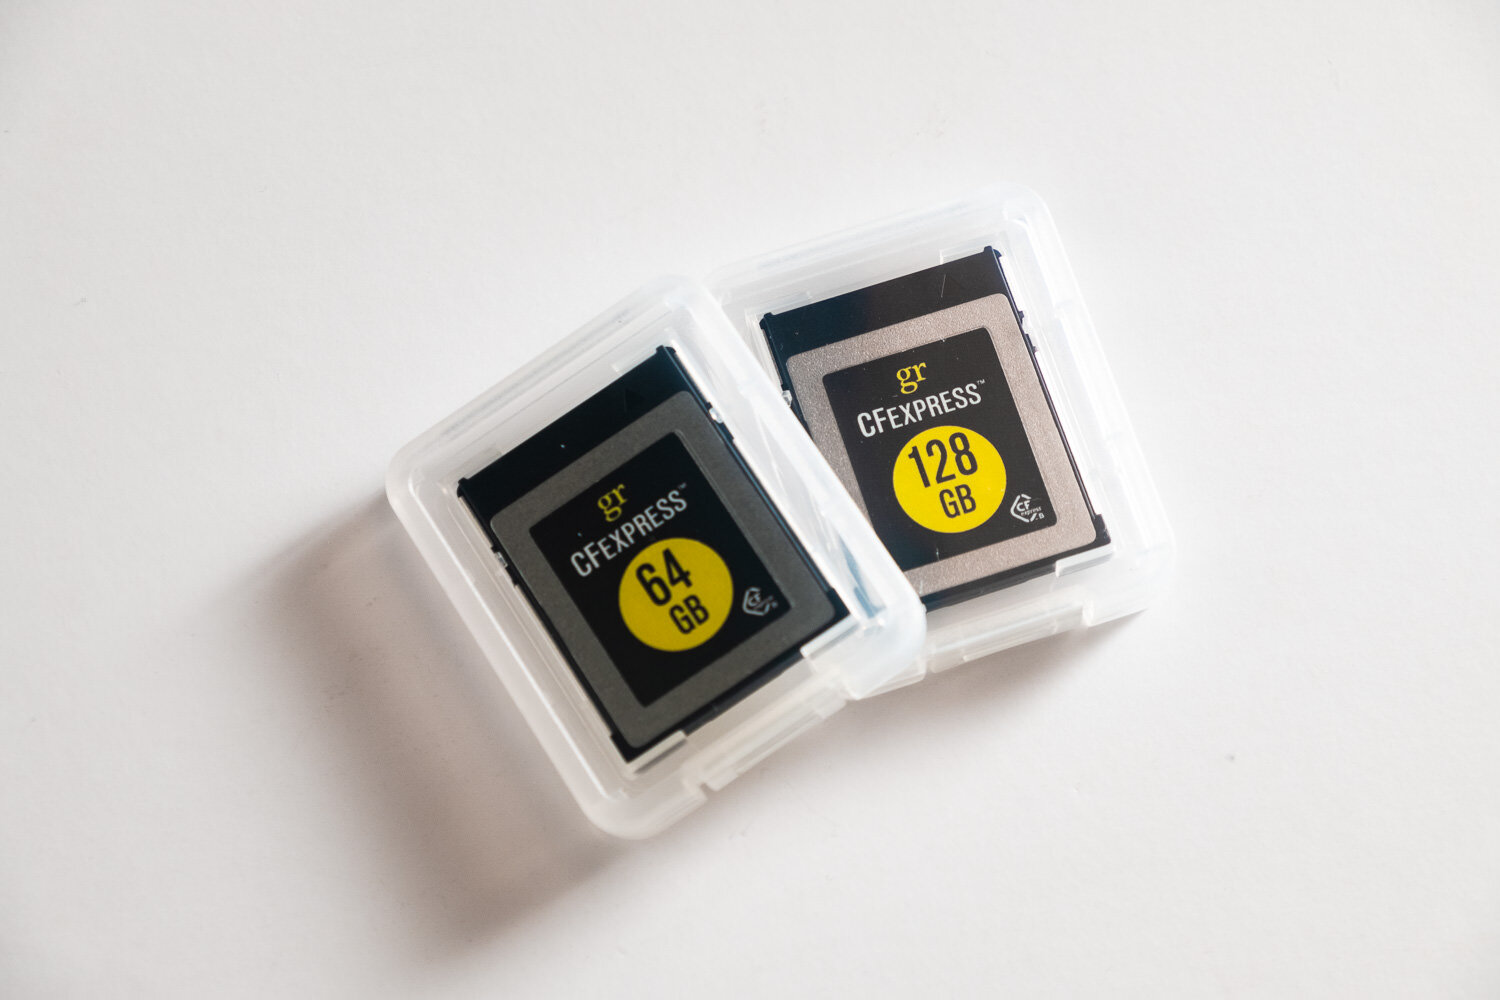
Nothing spectacular on the packaging or branding. The cards come in a basic paper blister packaging and a clear plastic card case. Advertised speeds are considerably lower than its competitors but is still significantly faster than most SD cards and are similar in speed to the outgoing XQD cards. The cards appear as well built as the Delkin and Sony offerings.
Performance

Gigaram CFexpress cards. How does it stack up?
As far as general usage goes. They work perfectly fine in my Nikon Z6ii through the handful of sessions I’ve used them on and throughout testing out the Z6ii. Buffer clears pretty quickly and as far as I can tell I haven’t had any instances where I wish they were faster. Memory card speed isn’t a very important factor when it comes to stills. Given I’d be always be shooting to both a CFexpress and an SD card, the SD card will likely be the bottleneck in terms of speed far before a CFexpress card, even these slower ones, would be.
It’s difficult to thoroughly and objectively assess the performance of memory cards. For the sake of comparison, I’ve tested both memory cards, as well as a Delkin and Sony brand CFexpress card and a couple of SD cards AmorphousDiskMark to assess their maximum read/write capabilities. It’s worth noting these synthetic tests aren’t a be-all-end-all test but they do provide some form of analytical metric for those who like hard statistics/numbers such as myself.

AmorphousDiskMark speed test results (SEQ1M QD1)
The test results show four tests for both write and read. The most important metric for the application of these cards is the 2nd row, SEQ1M 1QD, which is a larger sequential write by 1 client, which would be the camera writing one image file. I’ve also run the test in two different sizes; 5x 1GiB and 9x 32MiB. This is effectively equal* to writing and reading a 1GB file 5 times and a 32MB file 9 times. I chose the 32MiB test to replicate writing the average 24-30 megapixel raw file that comes in around 20-40MBs.
*GiBs and GB, and MiB and MB, aren’t 1:1, but it’s close enough for the sake of this test.


The takeaway from this test is all of the CFExpress and XQD cards are significantly faster than the majority of the SD cards still photographers are using. Also worth mentioning is how egregiously generous Gigaram was on their speed claims. The 64GB claims up to 245/760MB/s write/read and the 128GB claims up to 490/1450MB/s write/read but in my tests managed only ~230/550MB/s and ~165/700MB/s on the 64GB and 128GB cards, respectively. I’m impressed how close the 64GB write speed tested to the claimed performance and the lower read speed isn’t too far from the major brand CFexpress cards and ultimately will make very little difference in my workflow.
Conclusion
In short, the GoRam/Gigaram CFexpress cards seem to be great options for photographers as their lower performance, compared to the competition, will make little to no difference in use. If you’re a videographer recording super high-bitrate 4k or 8k, you might need to look elsewhere for a faster card, but for the price it might be worth trying.
If you’re a professional photographer shooting events, you absolutely should be using both slots as redundancy to protect yourself from data failure. In this case, these cards are a great option as having a backup is better than no backup at all. In the world of data storage, two is one and one is none. I can’t speak to their reliability but until I have a failure of any sort I have no reason to think they won’t be reliable in the long haul.
6/25/2021 Update: I’ve been using the cards fairly regularly over the past 6 months and haven’t noticed a single issue with them. Everything still performs as expected and I haven’t had any corrupted data/images from them either.
Where to Buy
If you found this review helpful and would are interested in picking up some of these CFexpress cards, please consider using the following Amazon affiliate links to support me and my ad-free content!
Alternatively, you can also purchase them at Newegg and (directly?) from OEMPCWorld (non-affiliate links)

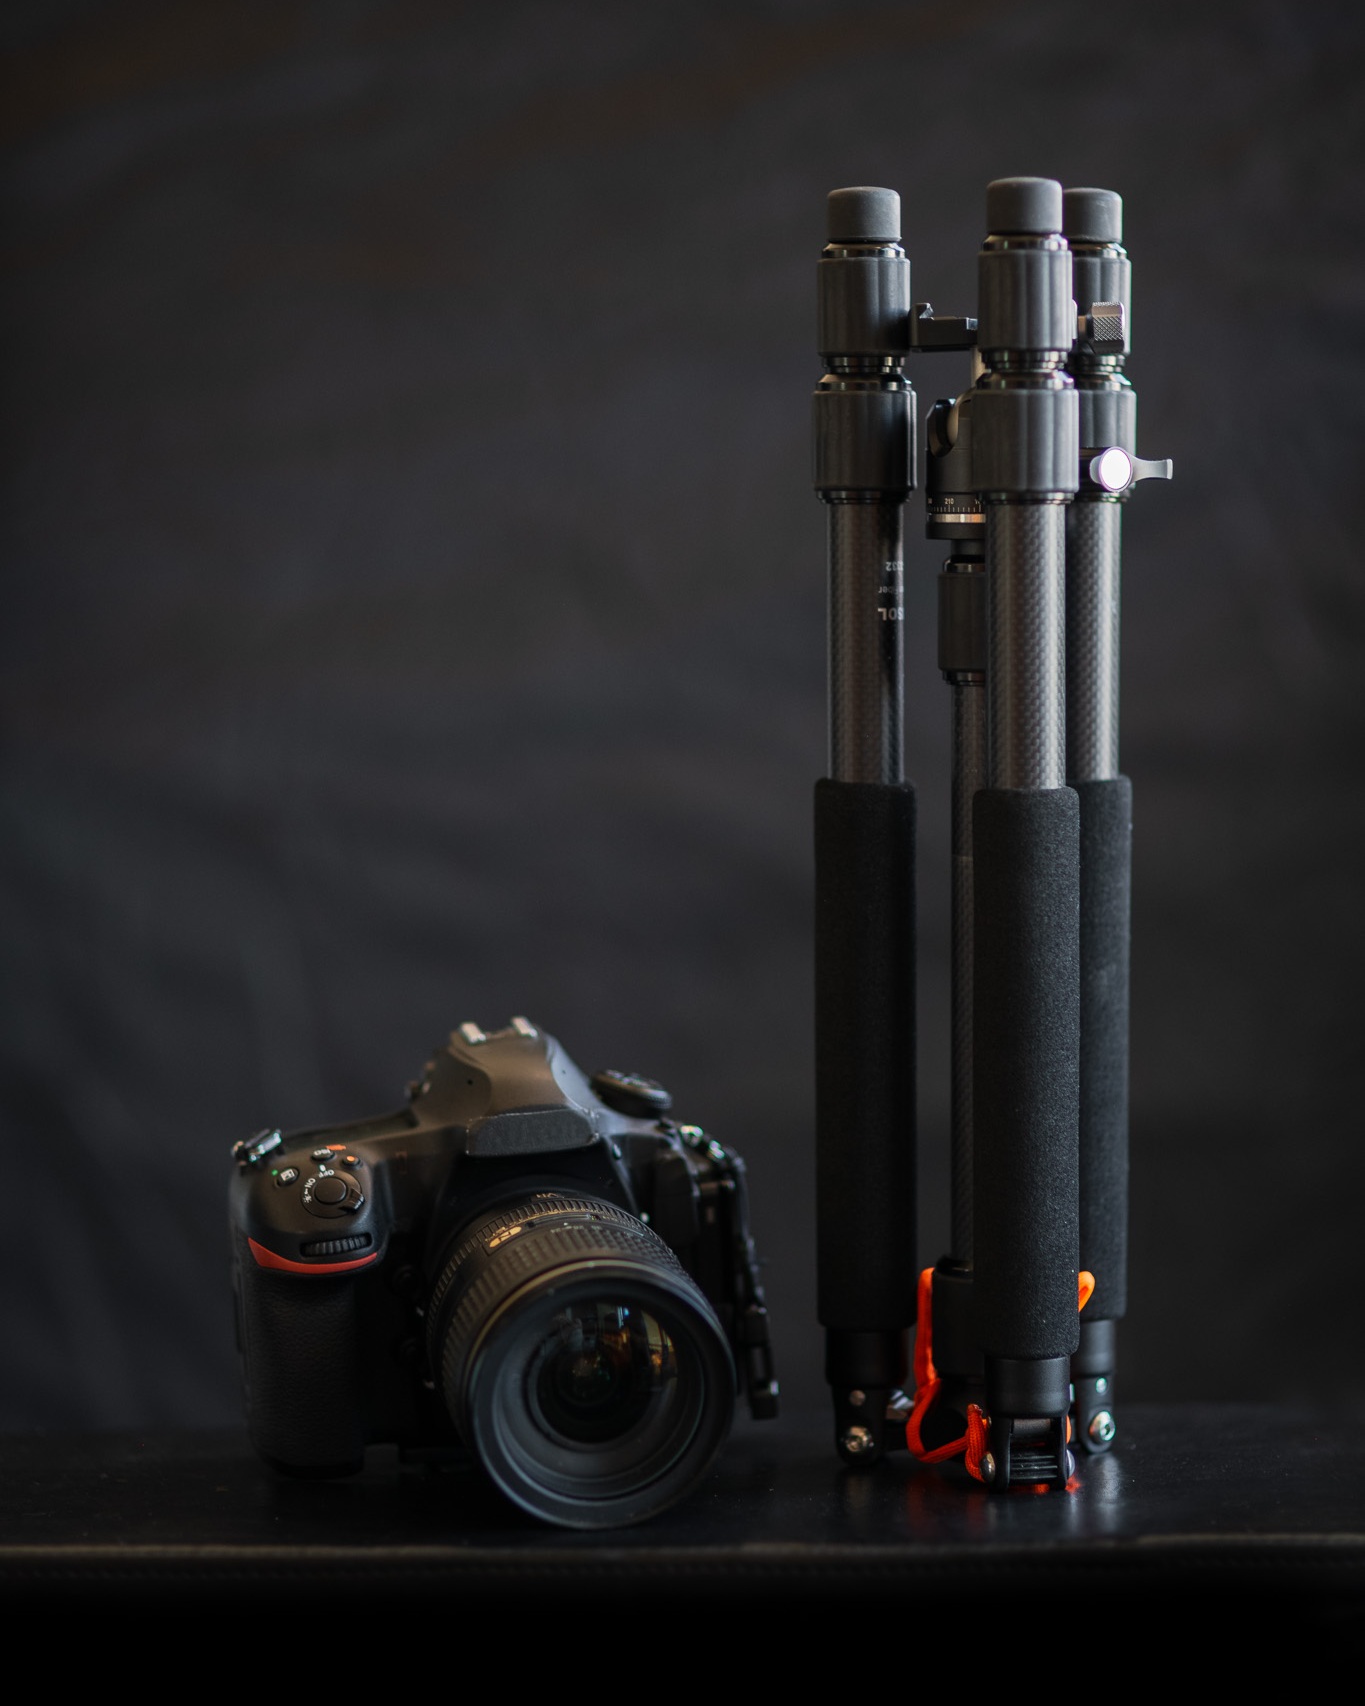
Gear Review // Fiesol CT-3332 Tripod // The Lightest (real) Travel Tripod
It’s nearly $400 for a tripod that doesn’t get to eye level? Why on earth would would somebody want that you might ask? Because it’s light, super duper light. And despite that light weight, it’s still sturdy enough to support a full frame DSLR body and mid range zoom.

(So I wrote most of this article about a year ago and never got around to taking photos of the tripod itself and thus posting the review at all, so if you happen to stumble upon it without photos of the actual tripod in the review, I apologize)
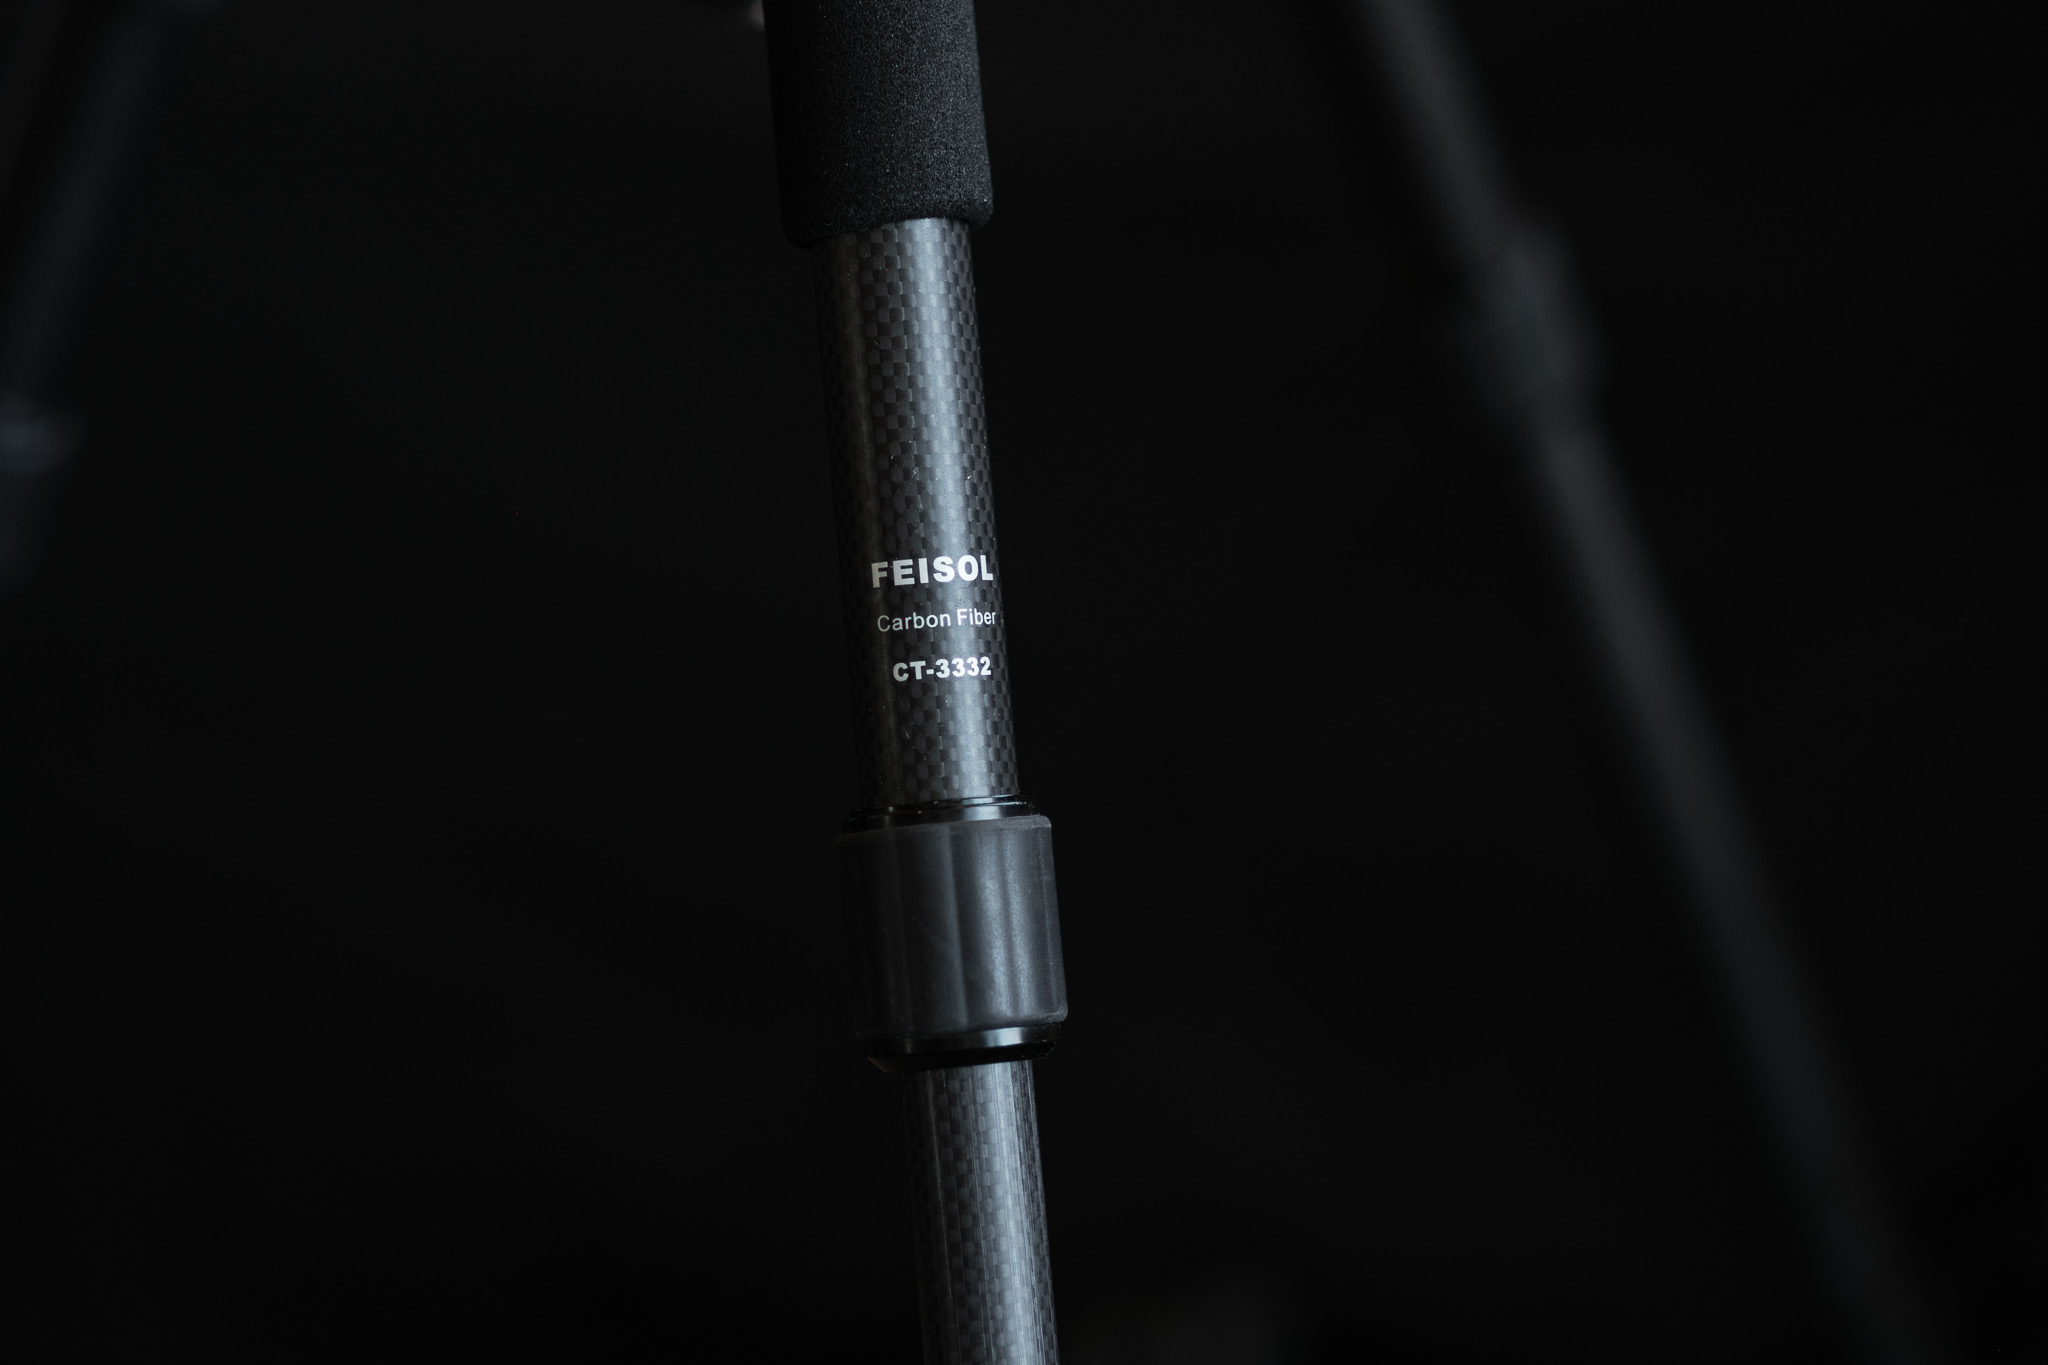
Since nobody seems to have a review on this little guy, I thought I’d share my thoughts on the Feisol CT-3332 carbon fiber travel tripod.
Quick spec overview:
Weight: 1.79lbs (810g)
Folded length: 15.75in (40cm)
Maximum height (center column not extended): 38.58in (0.98m)
Maximum height (center column extended): 53.94in (1.37m)
Before picking up this tripod, I had been using a Benro Travel Angel A-169M8, an aluminum 4-section tripod, as my small form factor and lightweight tripod for times where my big and bulky series 3 Gitzo wasn’t appropriate or needed (hikes, short trips). While the Benro had performed admirably to the tasks I’d thrown at it, I wanted something lighter, but not at the expense of stability. Searching high and low, from every tripod manufacturer I could find and think of, I settled on this, a Feisol CT-3332.
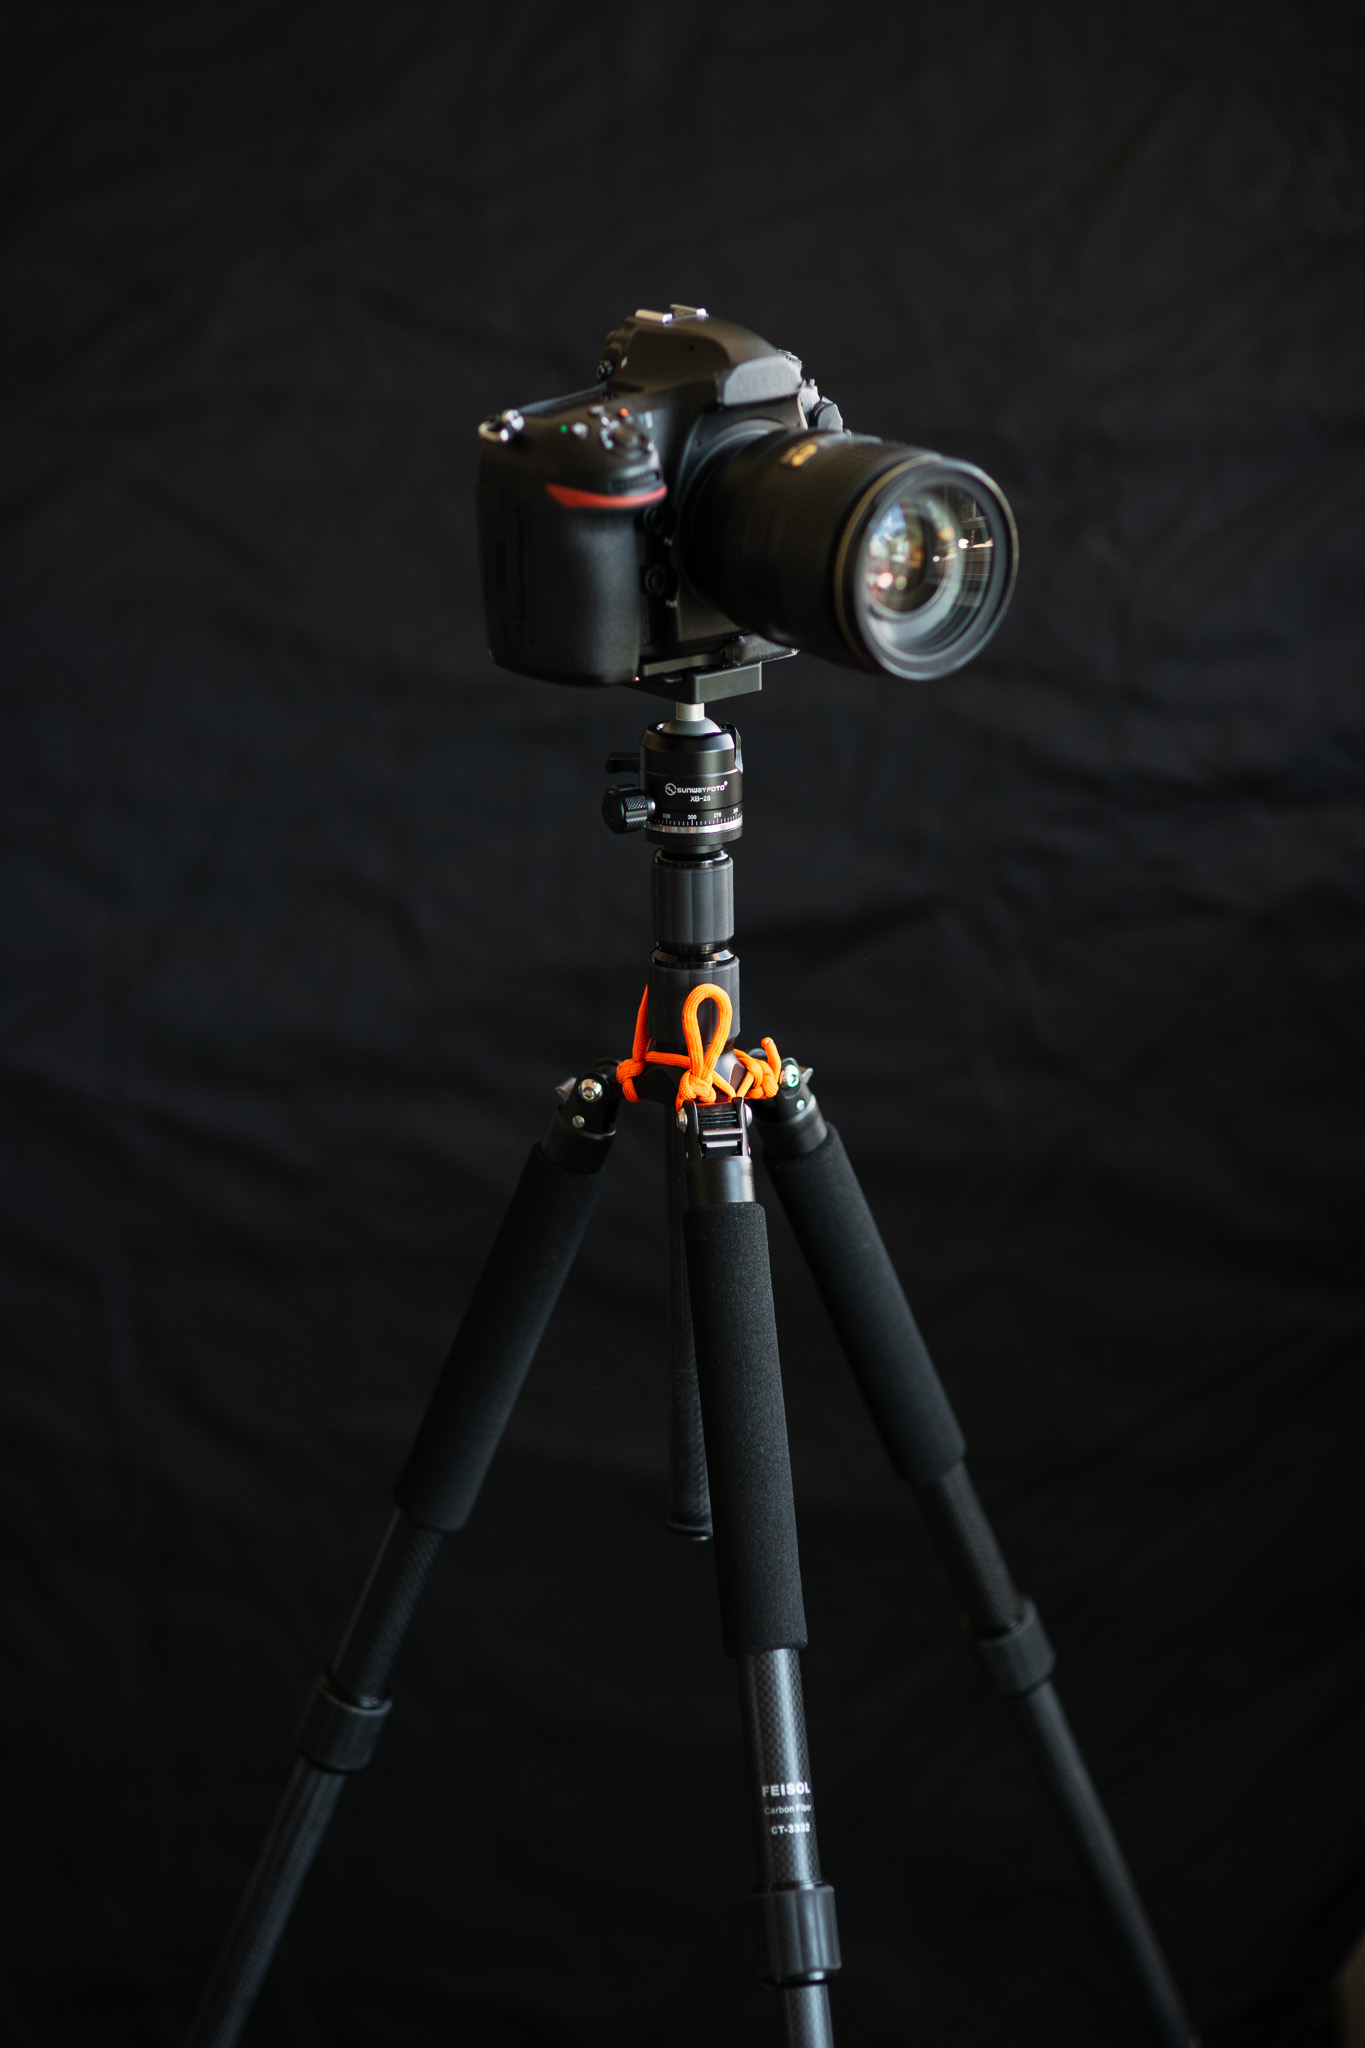
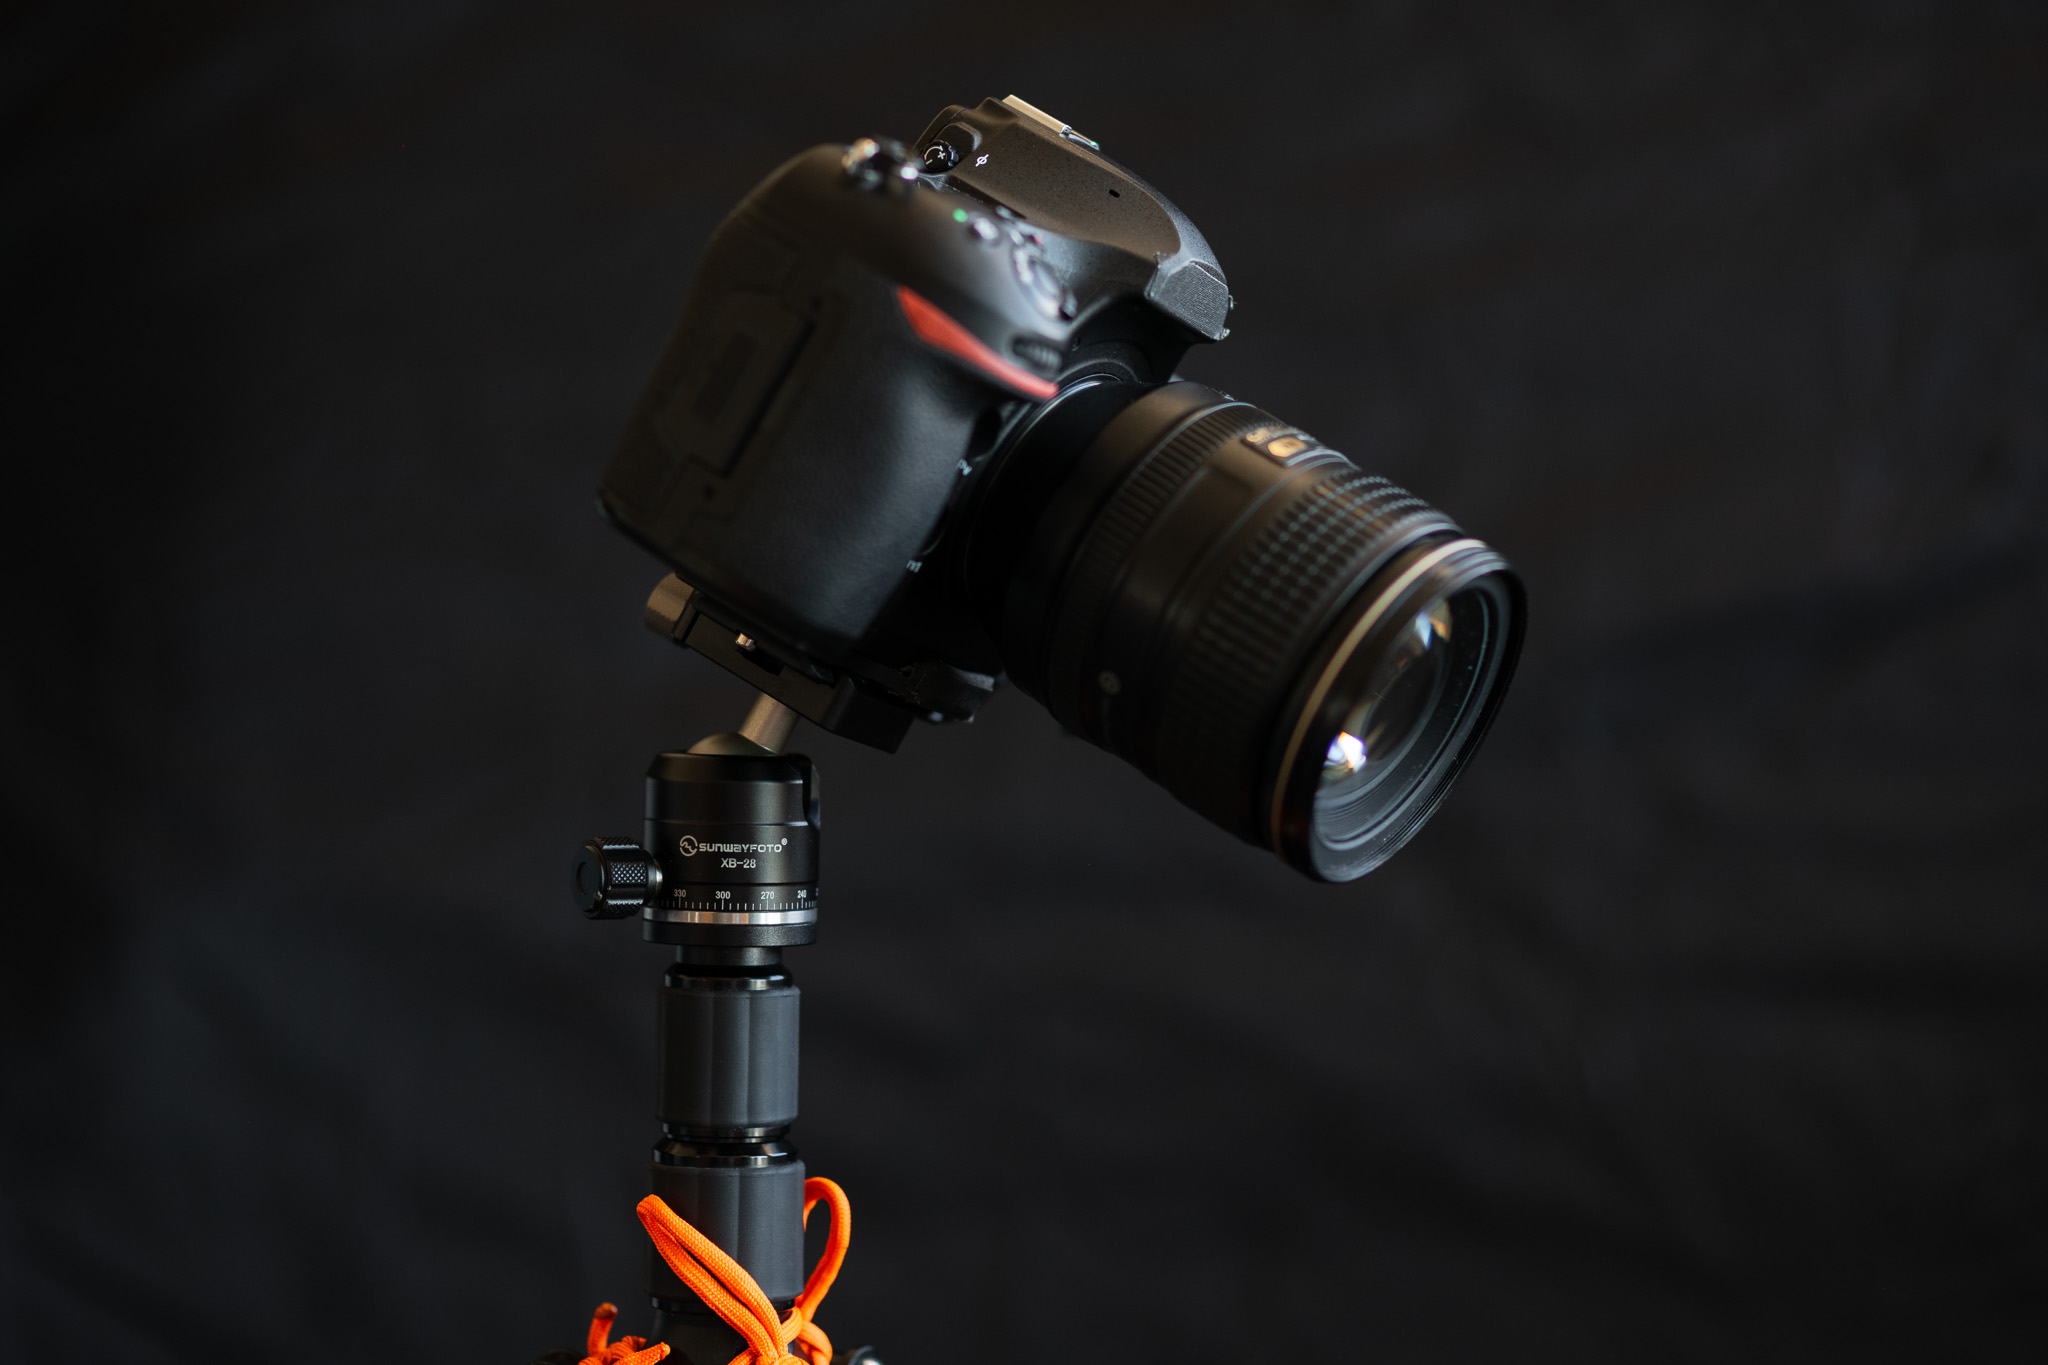
Why the Feisol CT-3332? Weight and stability.
This tripod is crazy light. It’s listed at 1.79lbs (810g), making it the one lightest full featured tripods on the market. Paired with the Sunwayfoto XB-28, a small low-profile ballhead, the total tripod weighs only 2.2lbs (1000g), significantly lighter (470g, over a pound) than my previous travel tripod setup and most other travel tripod options on the market. Since weight was a huge factor in my purchase, being able to shed over a pound is impressive.
For reference, Mefoto's travel tripod offerings, the Backpacker, carbon fiber Roadtrip, and carbon fiber Globetrotter weigh 2.6lbs (1200g), 3.1lbs (1400g), and 3.7lbs (1680g) respectively. The Backpacker, while very small folded up and fairly light, the center column is fixed in an extended position which greatly compromises the camera stability. Once you move up to the Roadtrip and Globetrotter, the weight starts to add up pretty quickly.


In regards to stability, the Feisol’s advantage begins at its leg tube diameter. While a 24mm top leg tube diameter isn’t thick by means, many of the travel tripods on the market utilize a 4 or 5 leg section design where the legs gradually get smaller as you extend each leg section and as a result, the final leg sections are usually the thickness of a pencil (ok, more like a Sharpie, but that’s not much better) and that equates to instability.
With my Benro, I nearly never extended the bottom leg section in order to preserve stability while landscape shooting, because if it’s a situation where I’m using a tripod, stability is paramount. The Feisol is only a 3 leg section tripod, which reduces the number of tubes that must be stacked inside one another, allowing the bottom leg section to maintain a sizable diameter at full extension. I so seldomly need the extra height, it would be a waste to purchase a tripod with 4 or 5 leg extensions, just to carry them and keep them tucked in for 95% of my travel tripod shooting.
With landscape shooting, I’m frequently battling wind or moving water and, even with carbon fiber legs (which dampen vibrations better than aluminum), slight instability at the joints and leg sections is something I can’t have if I want sharp images at longer exposures.
Of course, the short fold up size combined with the 3-section legs comes at the cost of maximum shooting height. At only 38.58in with the legs extended, it’s not even remotely a tall tripod. However given my shorter stature (5’7”) and its use primarily as a landscape tripod, the height usually isn’t an issue, since I frequently shoot from a fairly low height. If I do find myself in a situation where I need the height, the 2-section center column adds quite a bit of additional height. Unfortunately doing this makes the unit very top heavy once a camera is mounted on top and stability in tough conditions is kind of out the window.

Panorama of Vestrahorn in Stokksnes, Iceland.
Nikon D850 + Nikon 18-35mm f/3.5-4.5G // 7 frame panorama // 24mm, 1/4 sec, f/10, ISO 64
The center column cannot be replaced with a short center column or removed completely (to further reduce weight), per a Feisol representative. I’m sure there’s a way to DIY a solution to remove the center column, but I haven’t looked into it too much. If anyone has any ideas, I’d love to hear them.
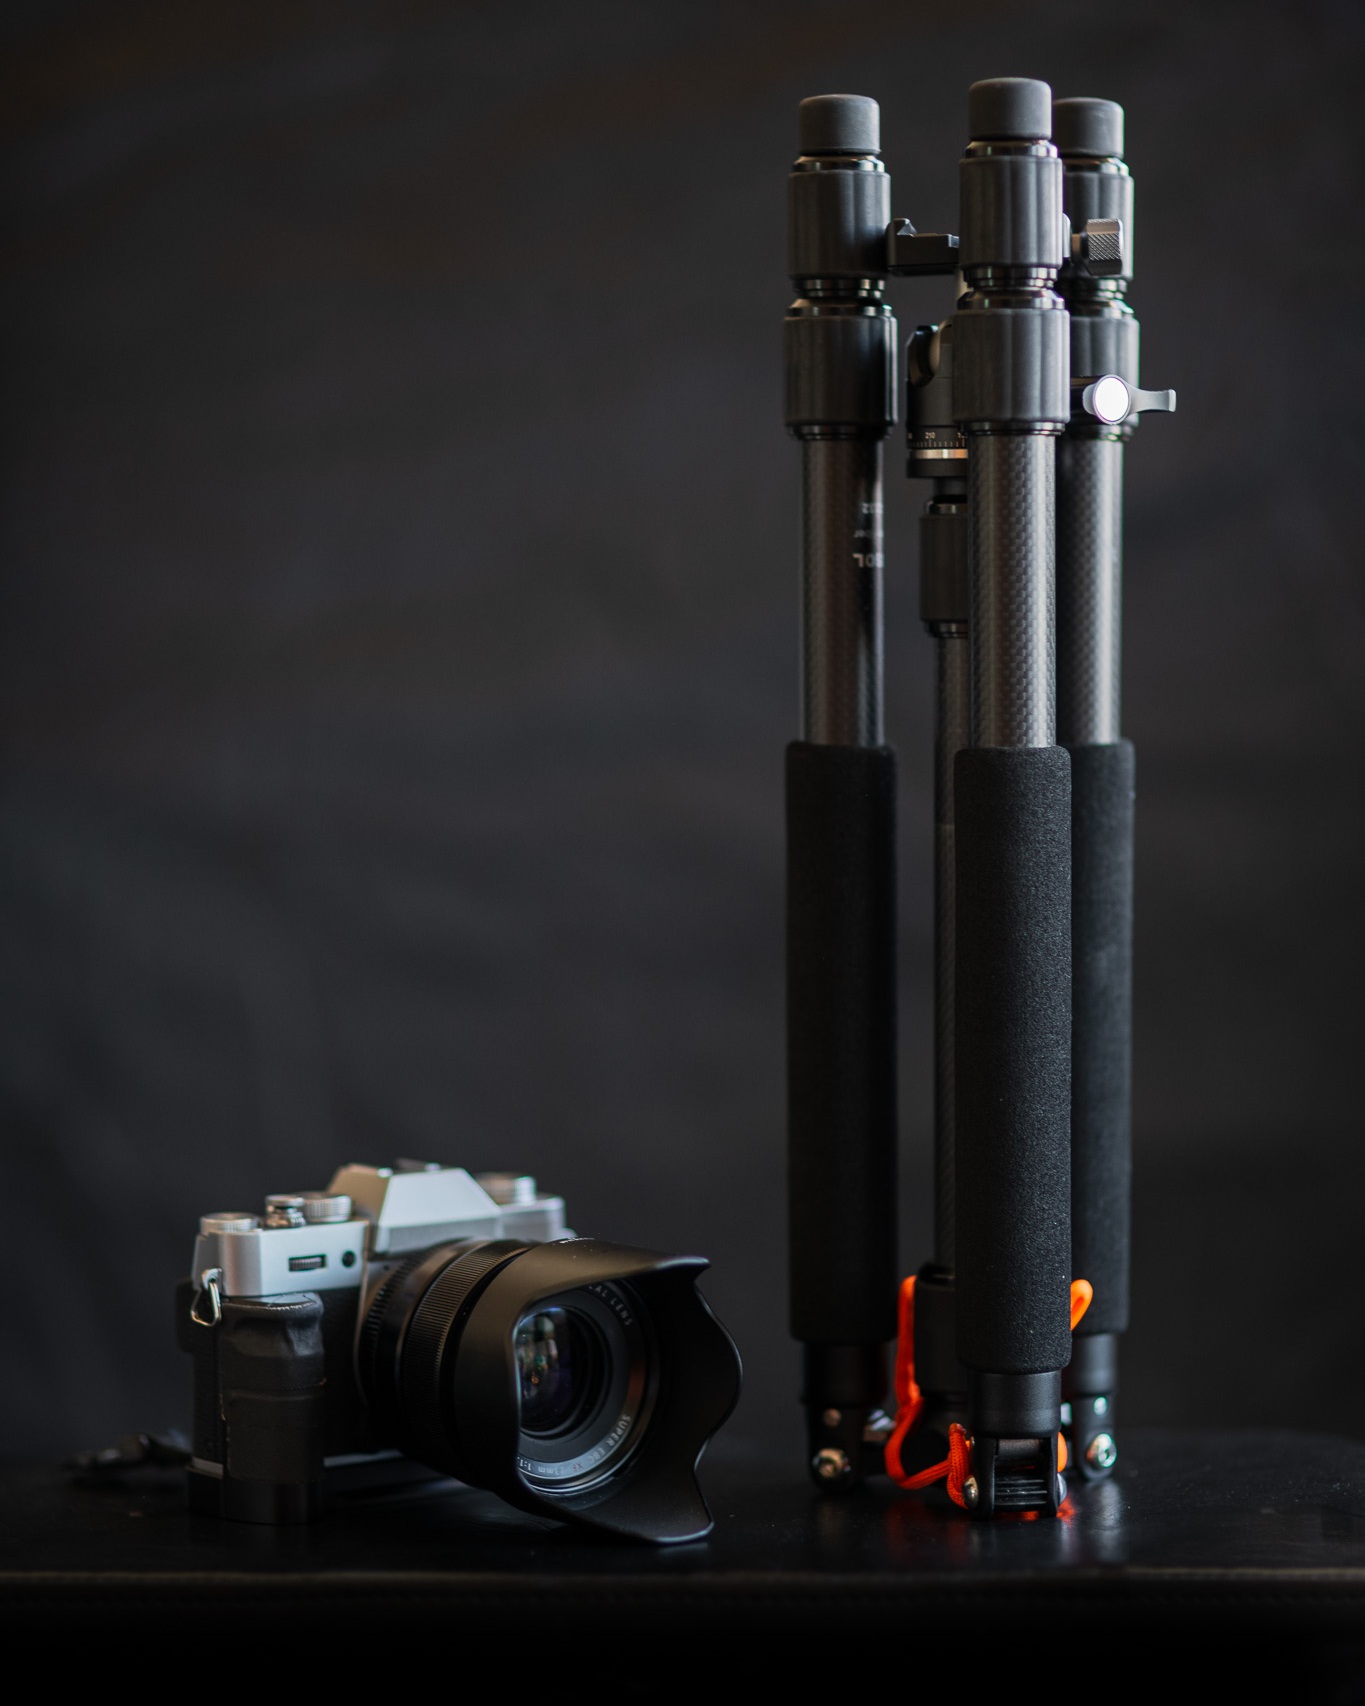
So you might be wondering what I’m mounting on this little guy. If I’m trying to keep my weight down, which is often the case when this tripod is in use nowadays, it’s supporting a Fujifilm XT-20 and the 18-55mm f/2.8-4 kit lens, a Samyang 12mm f/2 or the Fujifilm XF 55-200mm f/3.5-4.8. However, when I first got this tripod, it very frequently supported my Nikon D600 and 18-35G or 24-120 f/4 VR and still to this day supports my D850 and those lenses. I don’t hesitate for a second to put on my D850, however I would draw the line should it need to support anything over 200mm.

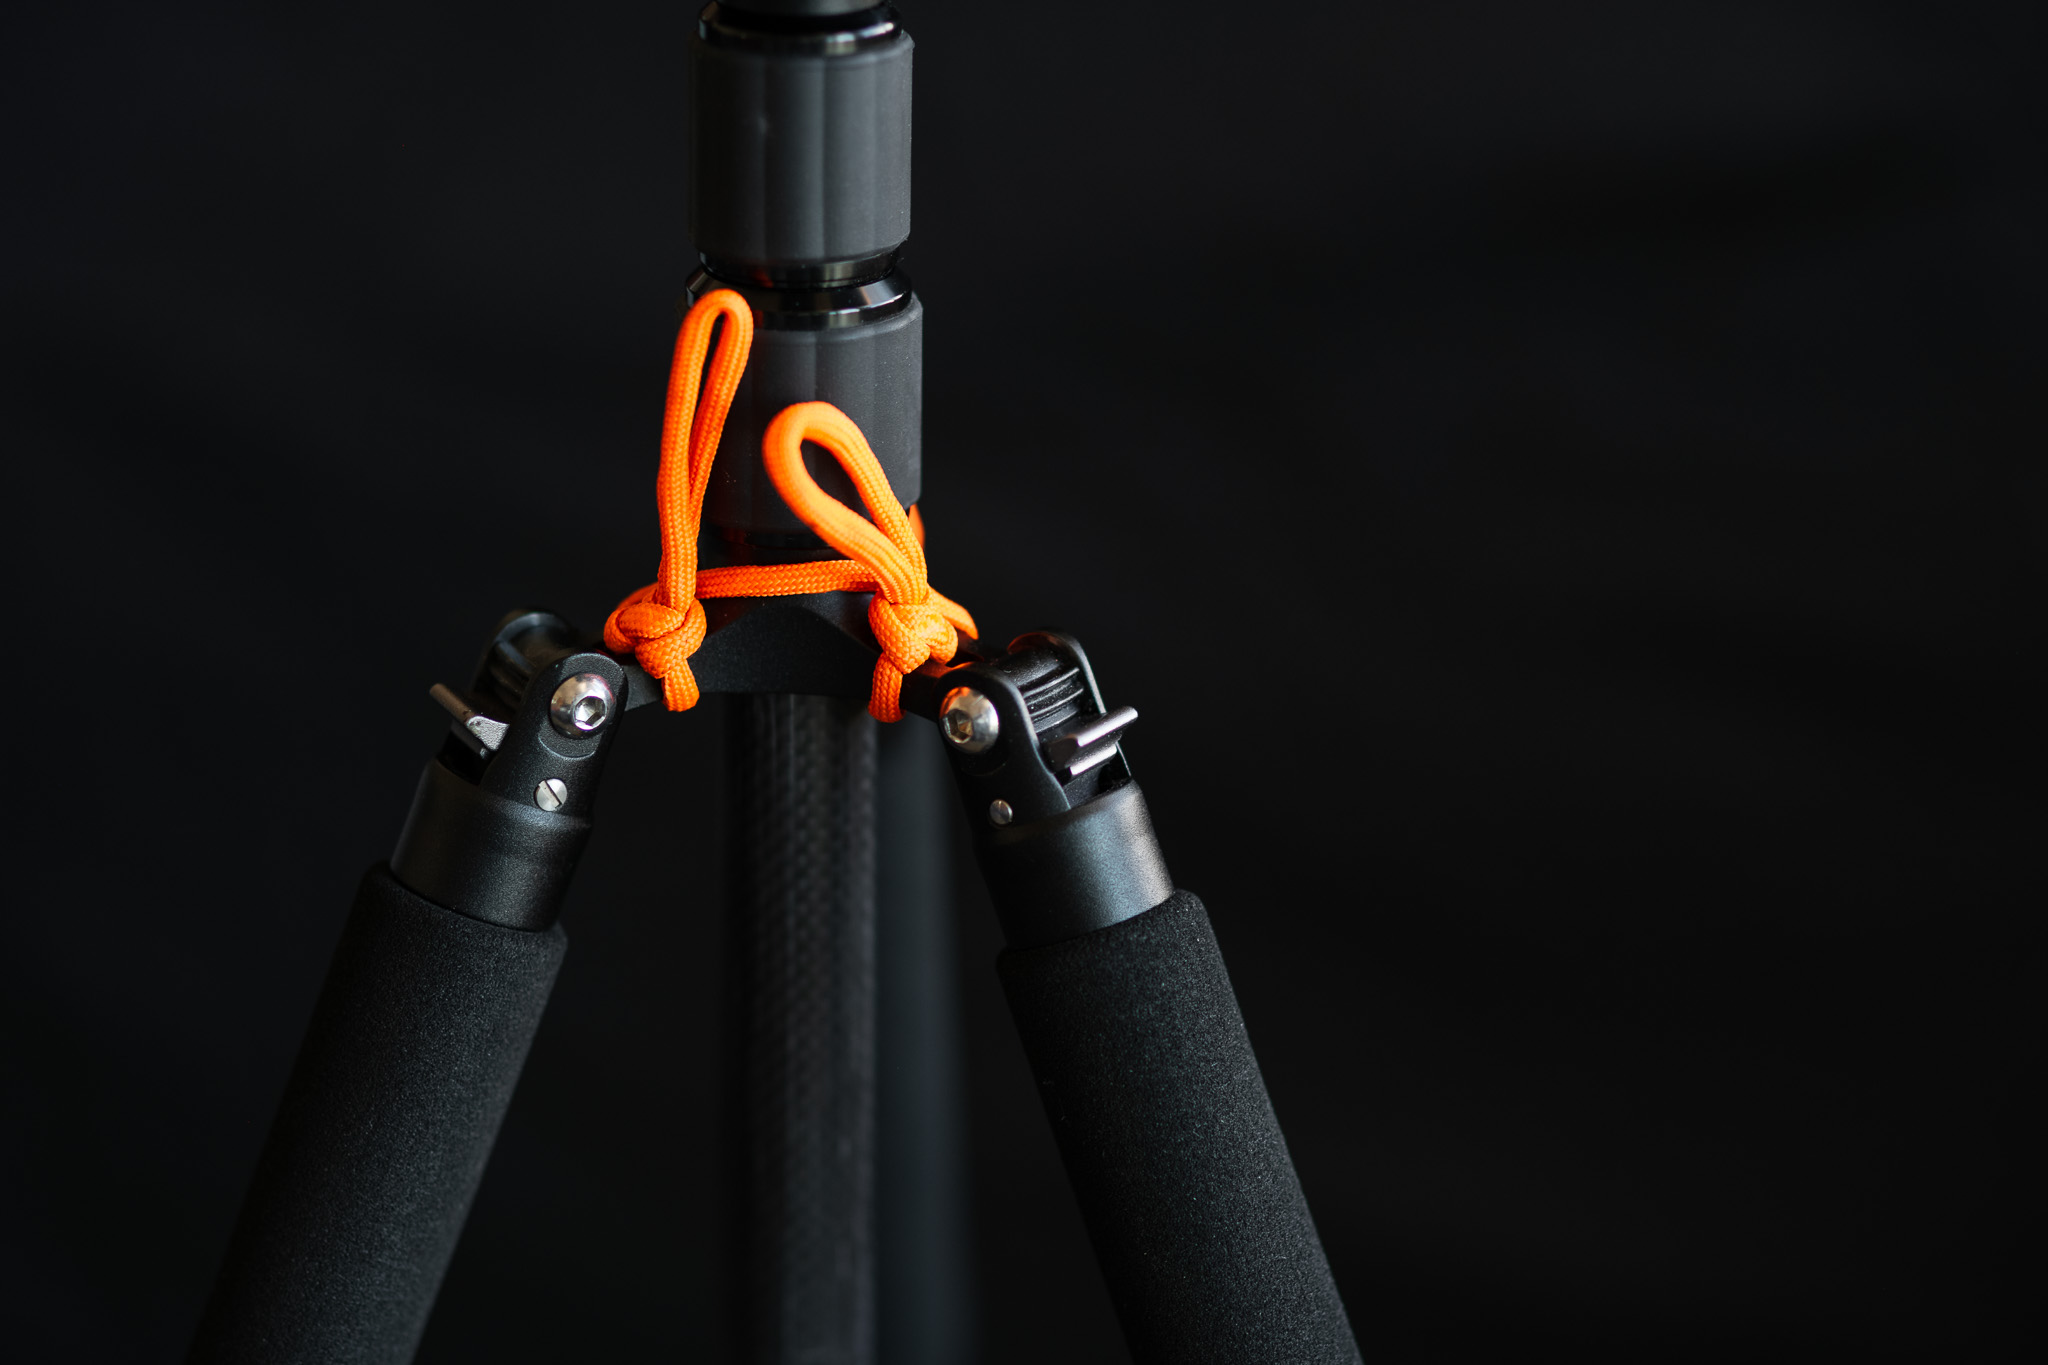
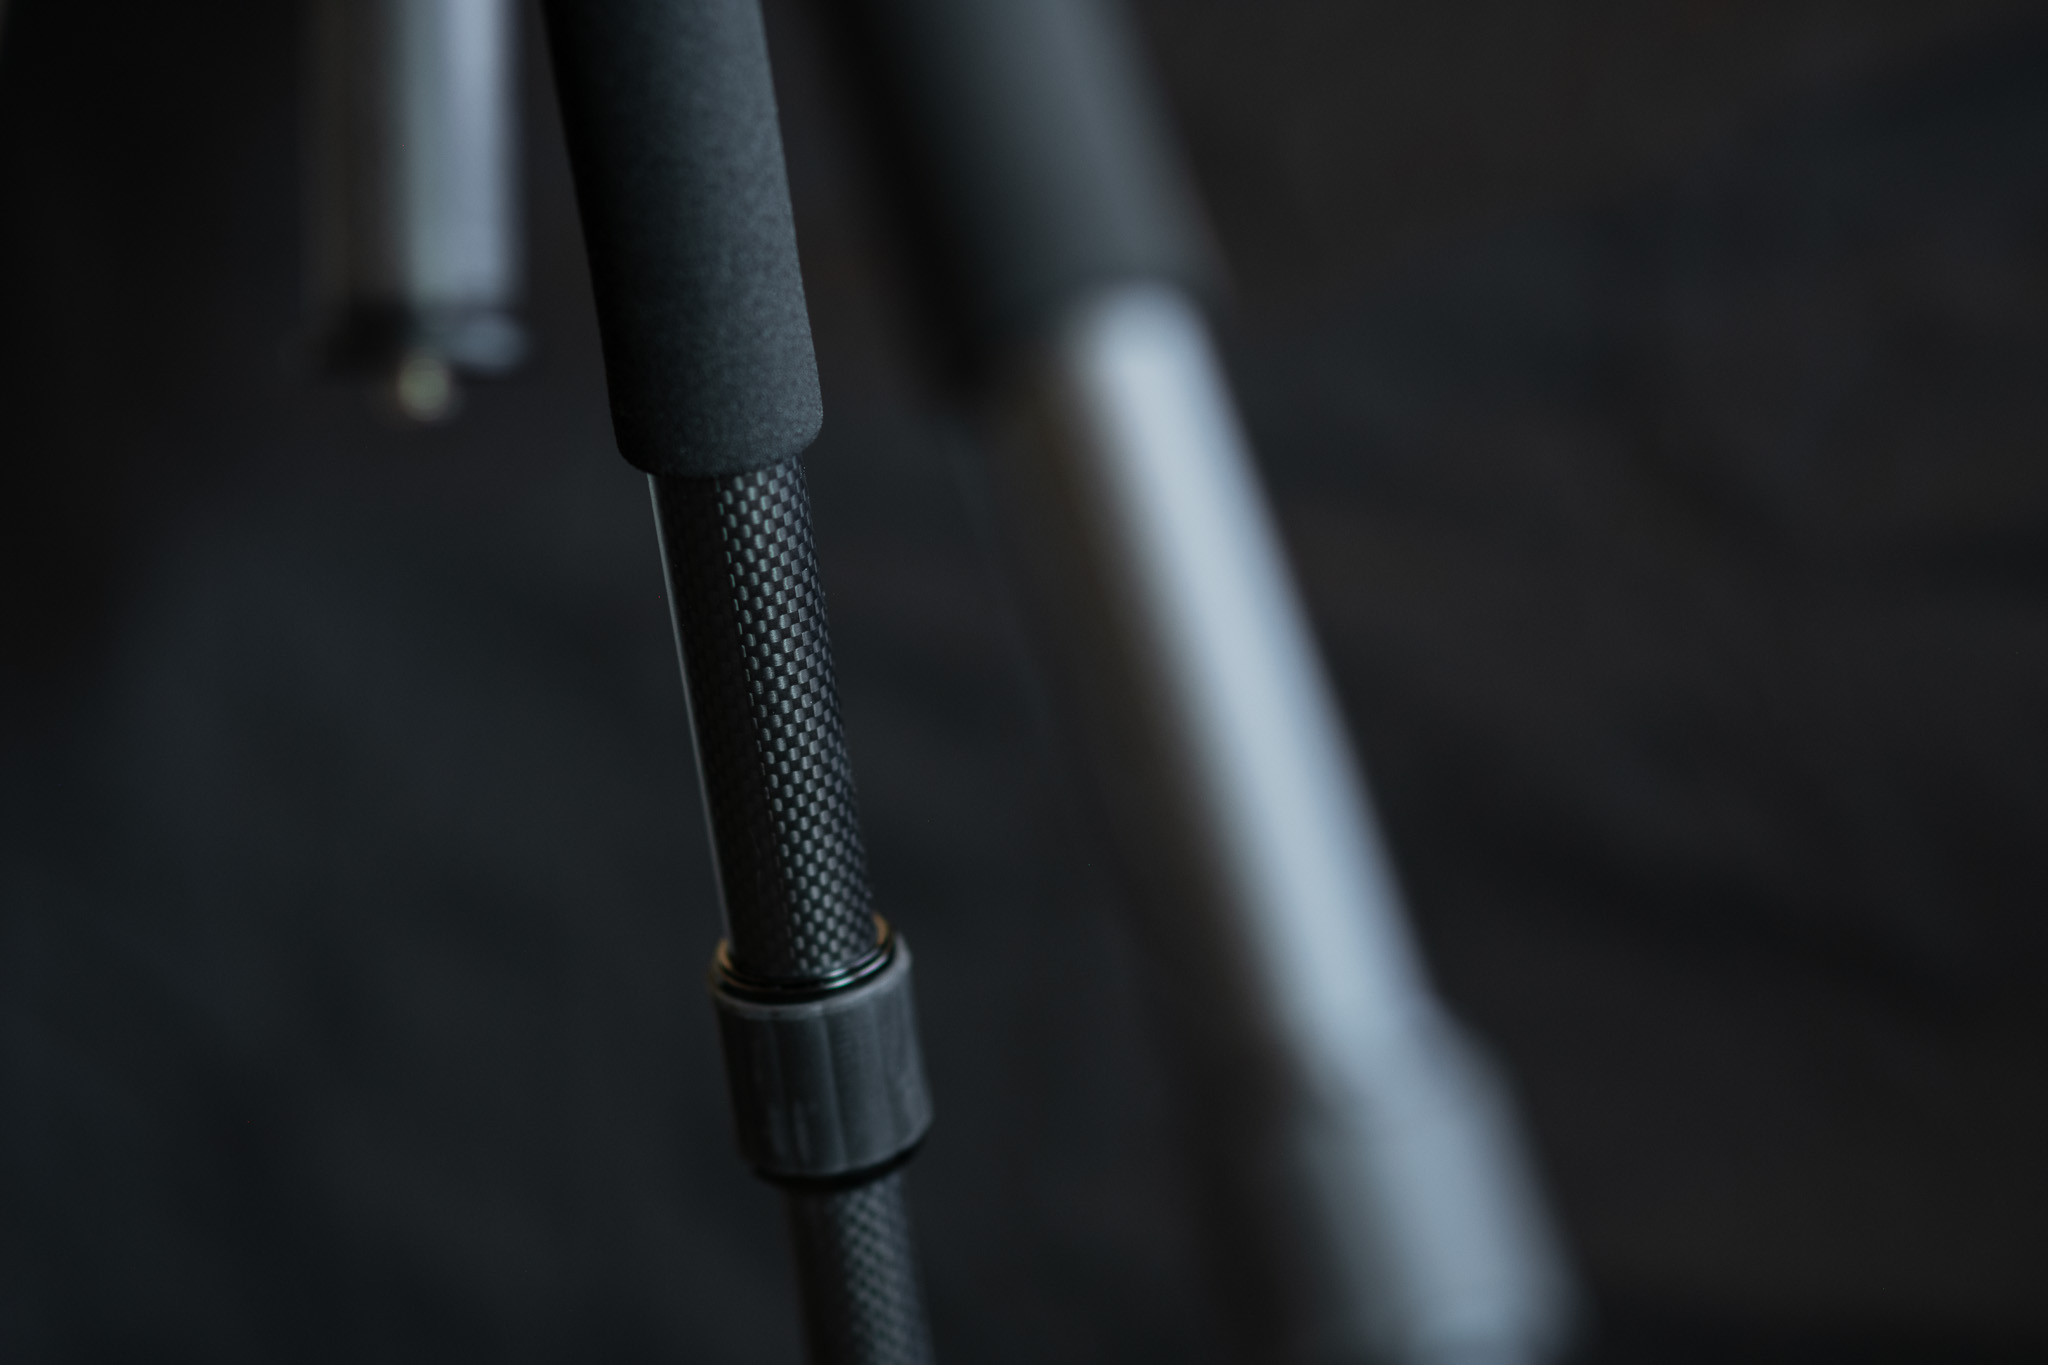
The construction on the tripod is great. Excellent fit and finish on all the parts. Leg position locks are springy and strong, snapping nicely into place. The twist leg locks are super smooth and fast and up to this point, reliable. It’s hard to compare the build compared to my Gitzo, since they’re in drastically different weight classes, I’d say the Feisol is as good, if not better, than the Gitzo. After having it for two years, it still performs like new.
Pros:
Light. Insanely light.
Compact. Will easily fit inside a carry-on and inside most backpacks as well.
Stable. Some of the thickest leg diameters in its class. Paired with the carbon fiber, it’s as sturdy as 1kg could be.
Cons:
Short. There’s no way around it. It’s a short tripod. At just over 3ft without the center column and just about 4,5ft fully extended, don’t count on this being an eye level tripod.
A little pricey. At $375, it’s not a budget tripod that’s for sure. But for a true carbon fiber tripod, it’s not too outrageous, and you certainly get what you pay for in the overall quality, fit, and finish of the product.
Overall, I think the Feisol CT-3332 is a fantastic travel tripod as long as you understand its purpose and limitation. It’s short and lightweight. I wouldn’t recommend it as a primary tripod, due to its height limitations, but as a supplement to a taller, more robust tripod, I think it’s a fantastic partner.
If you found this review helpful
…and informative and would like to purchase a Feisol CT-3332, you can pick up the items mentioned in this review over at Amazon.
It’d be super helpful if you purchased them (or anything else for that matter) through these affiliate links!
If you have any thoughts, questions, or comments, I’d love to hear them! Leave them in the comments box below.
Other gear mentioned or used:
Additional Sample Images taken on the Feisol CT-3332 + Sunwayfoto XB-28


How to replace the RAM in a 2018 Mac Mini
A guide to replace the, kinda-sorta user-replaceable, memory modules in a 2018 Mac Mini

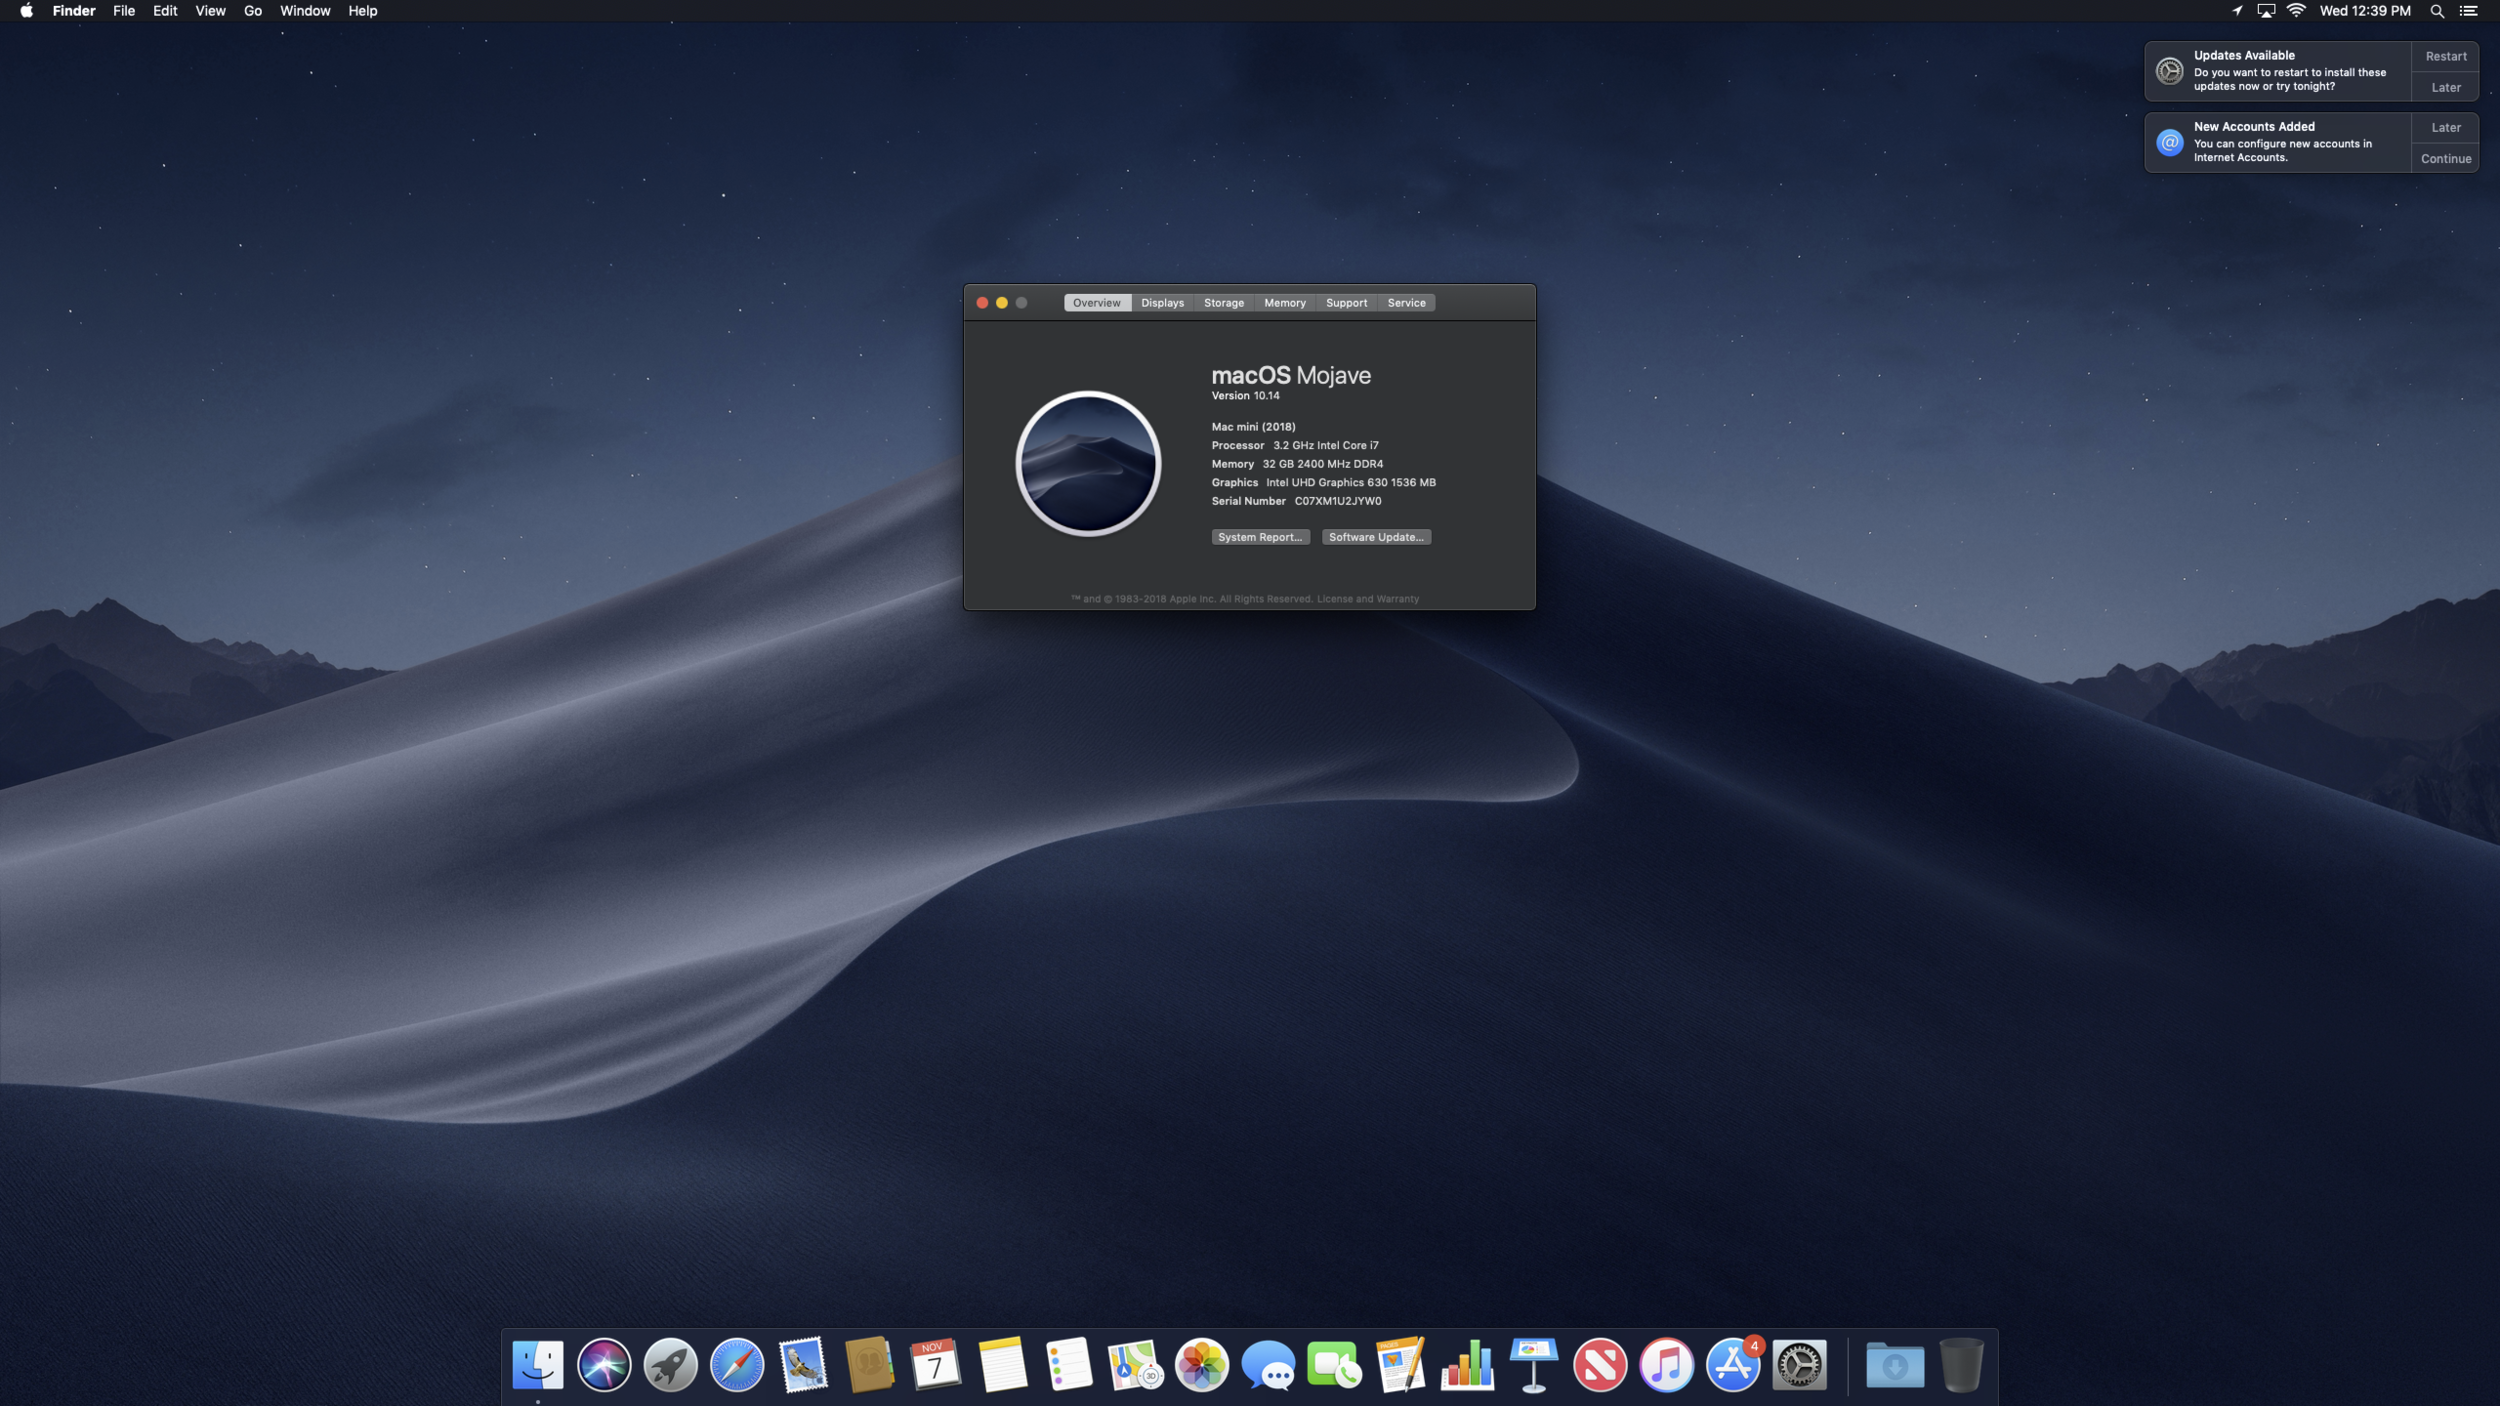
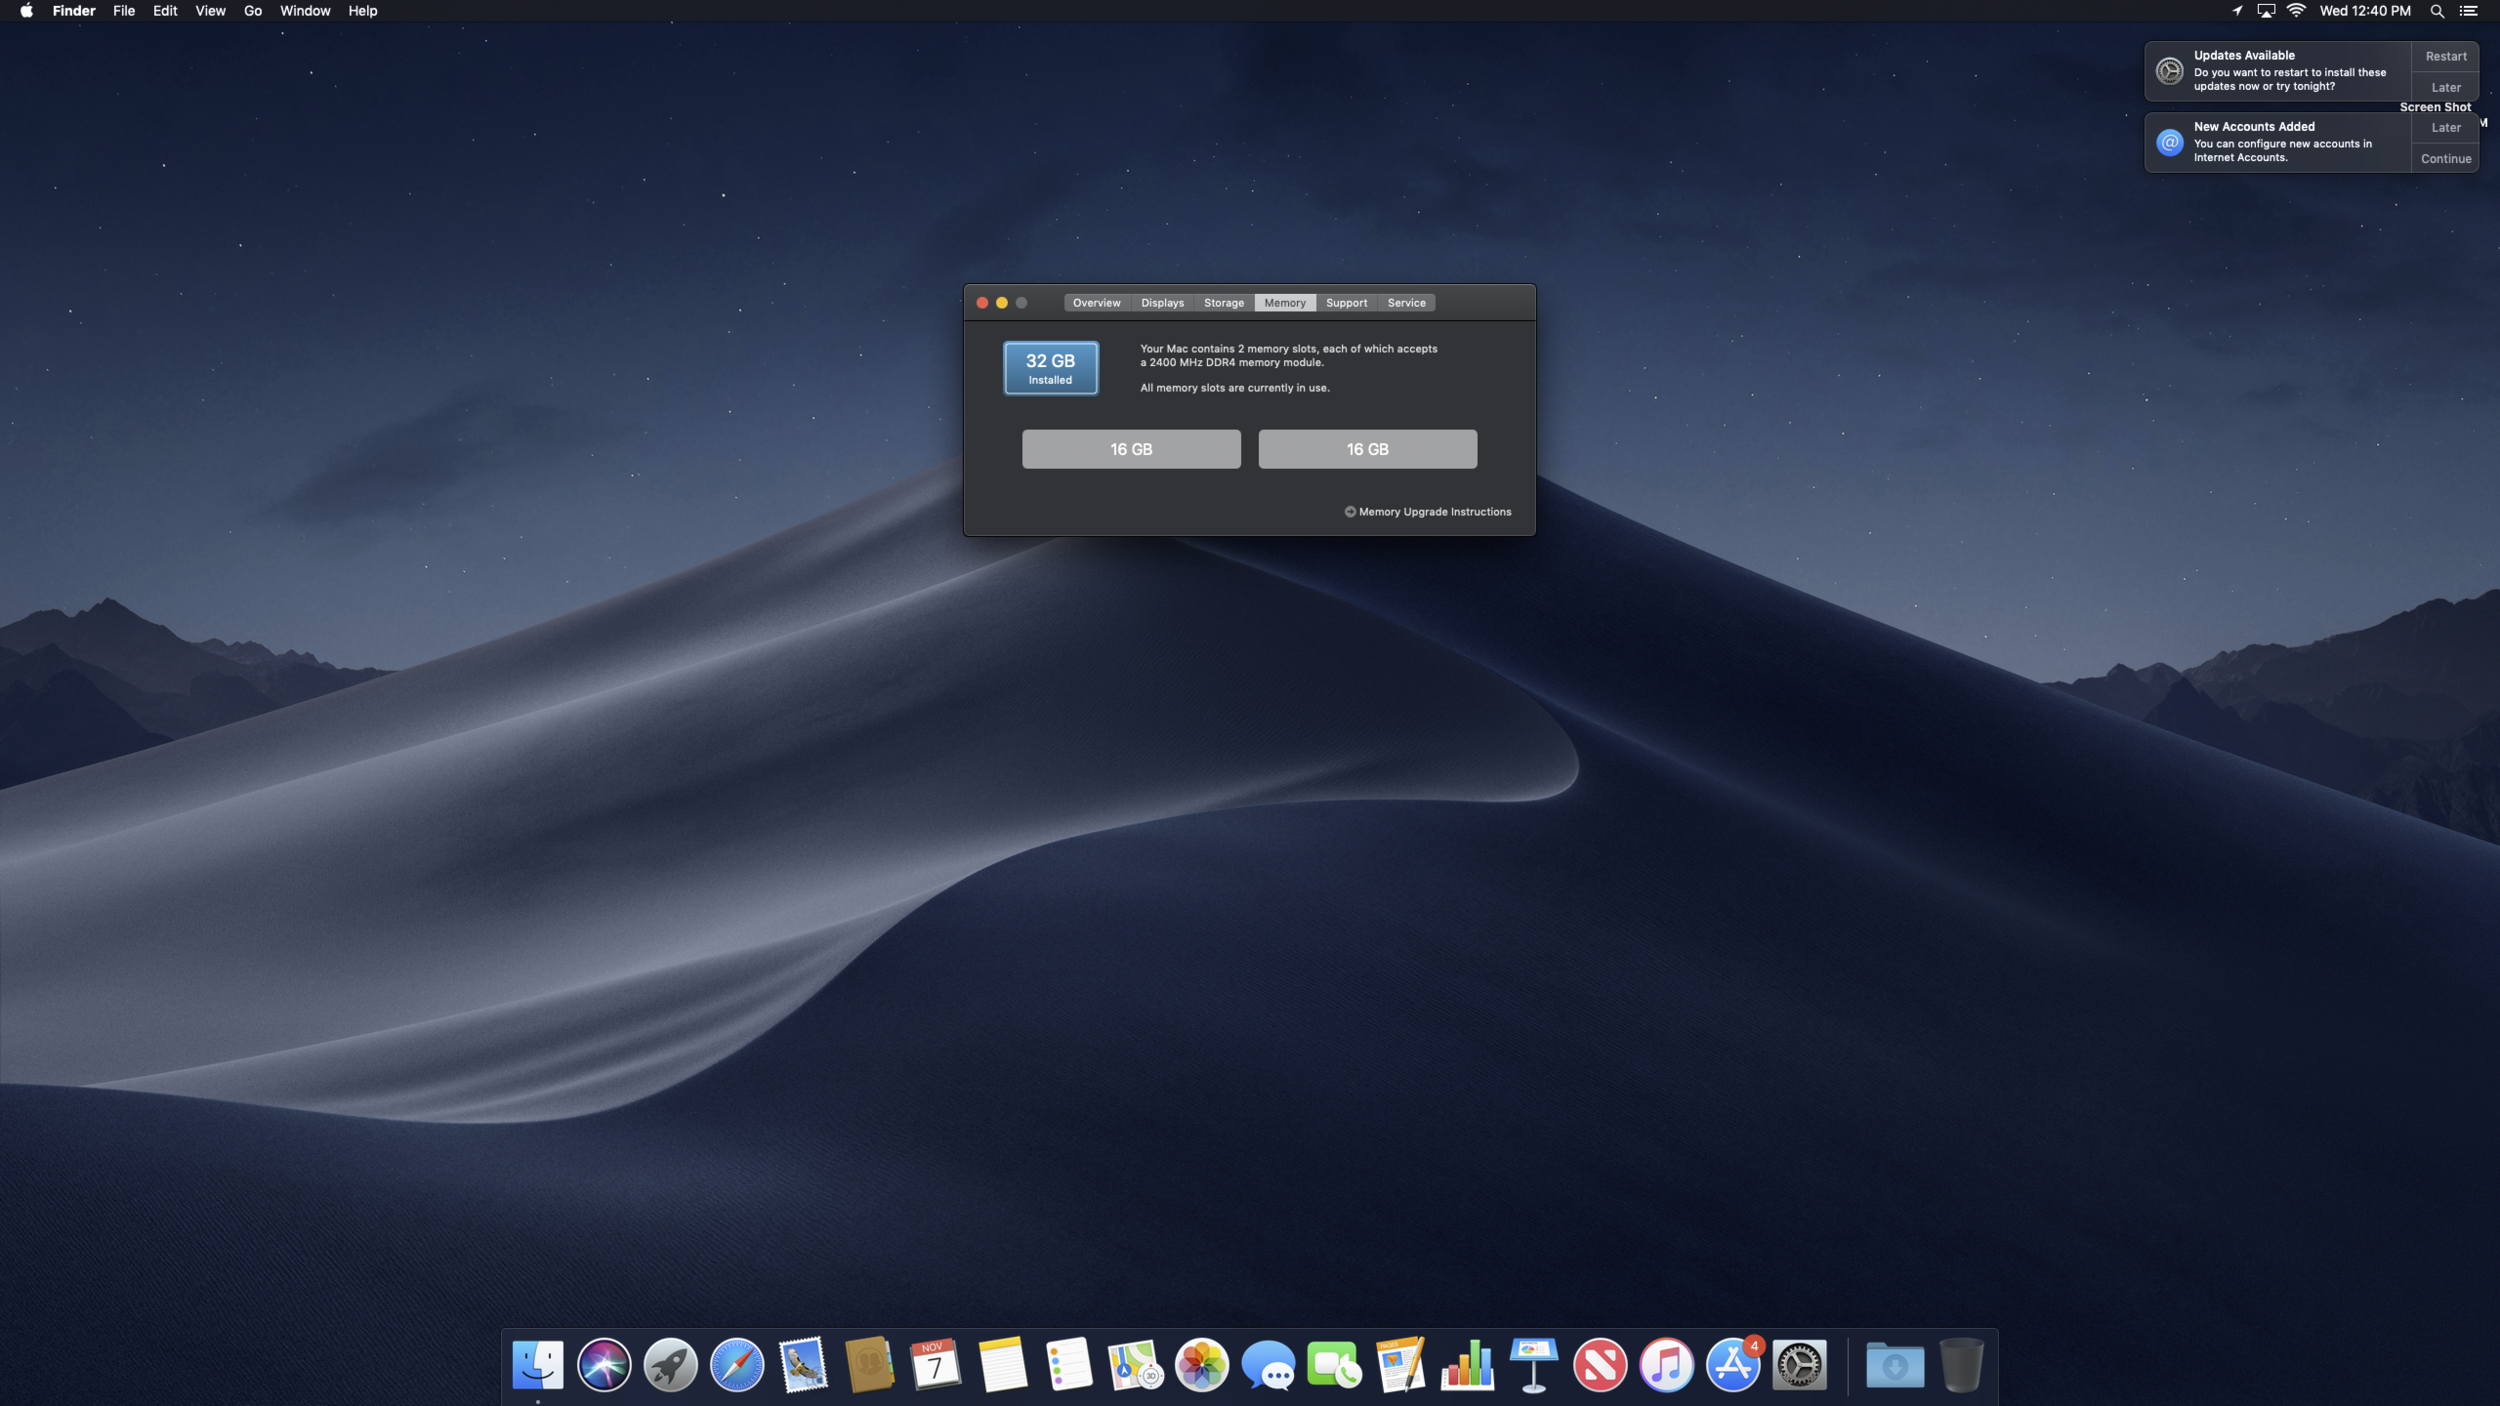
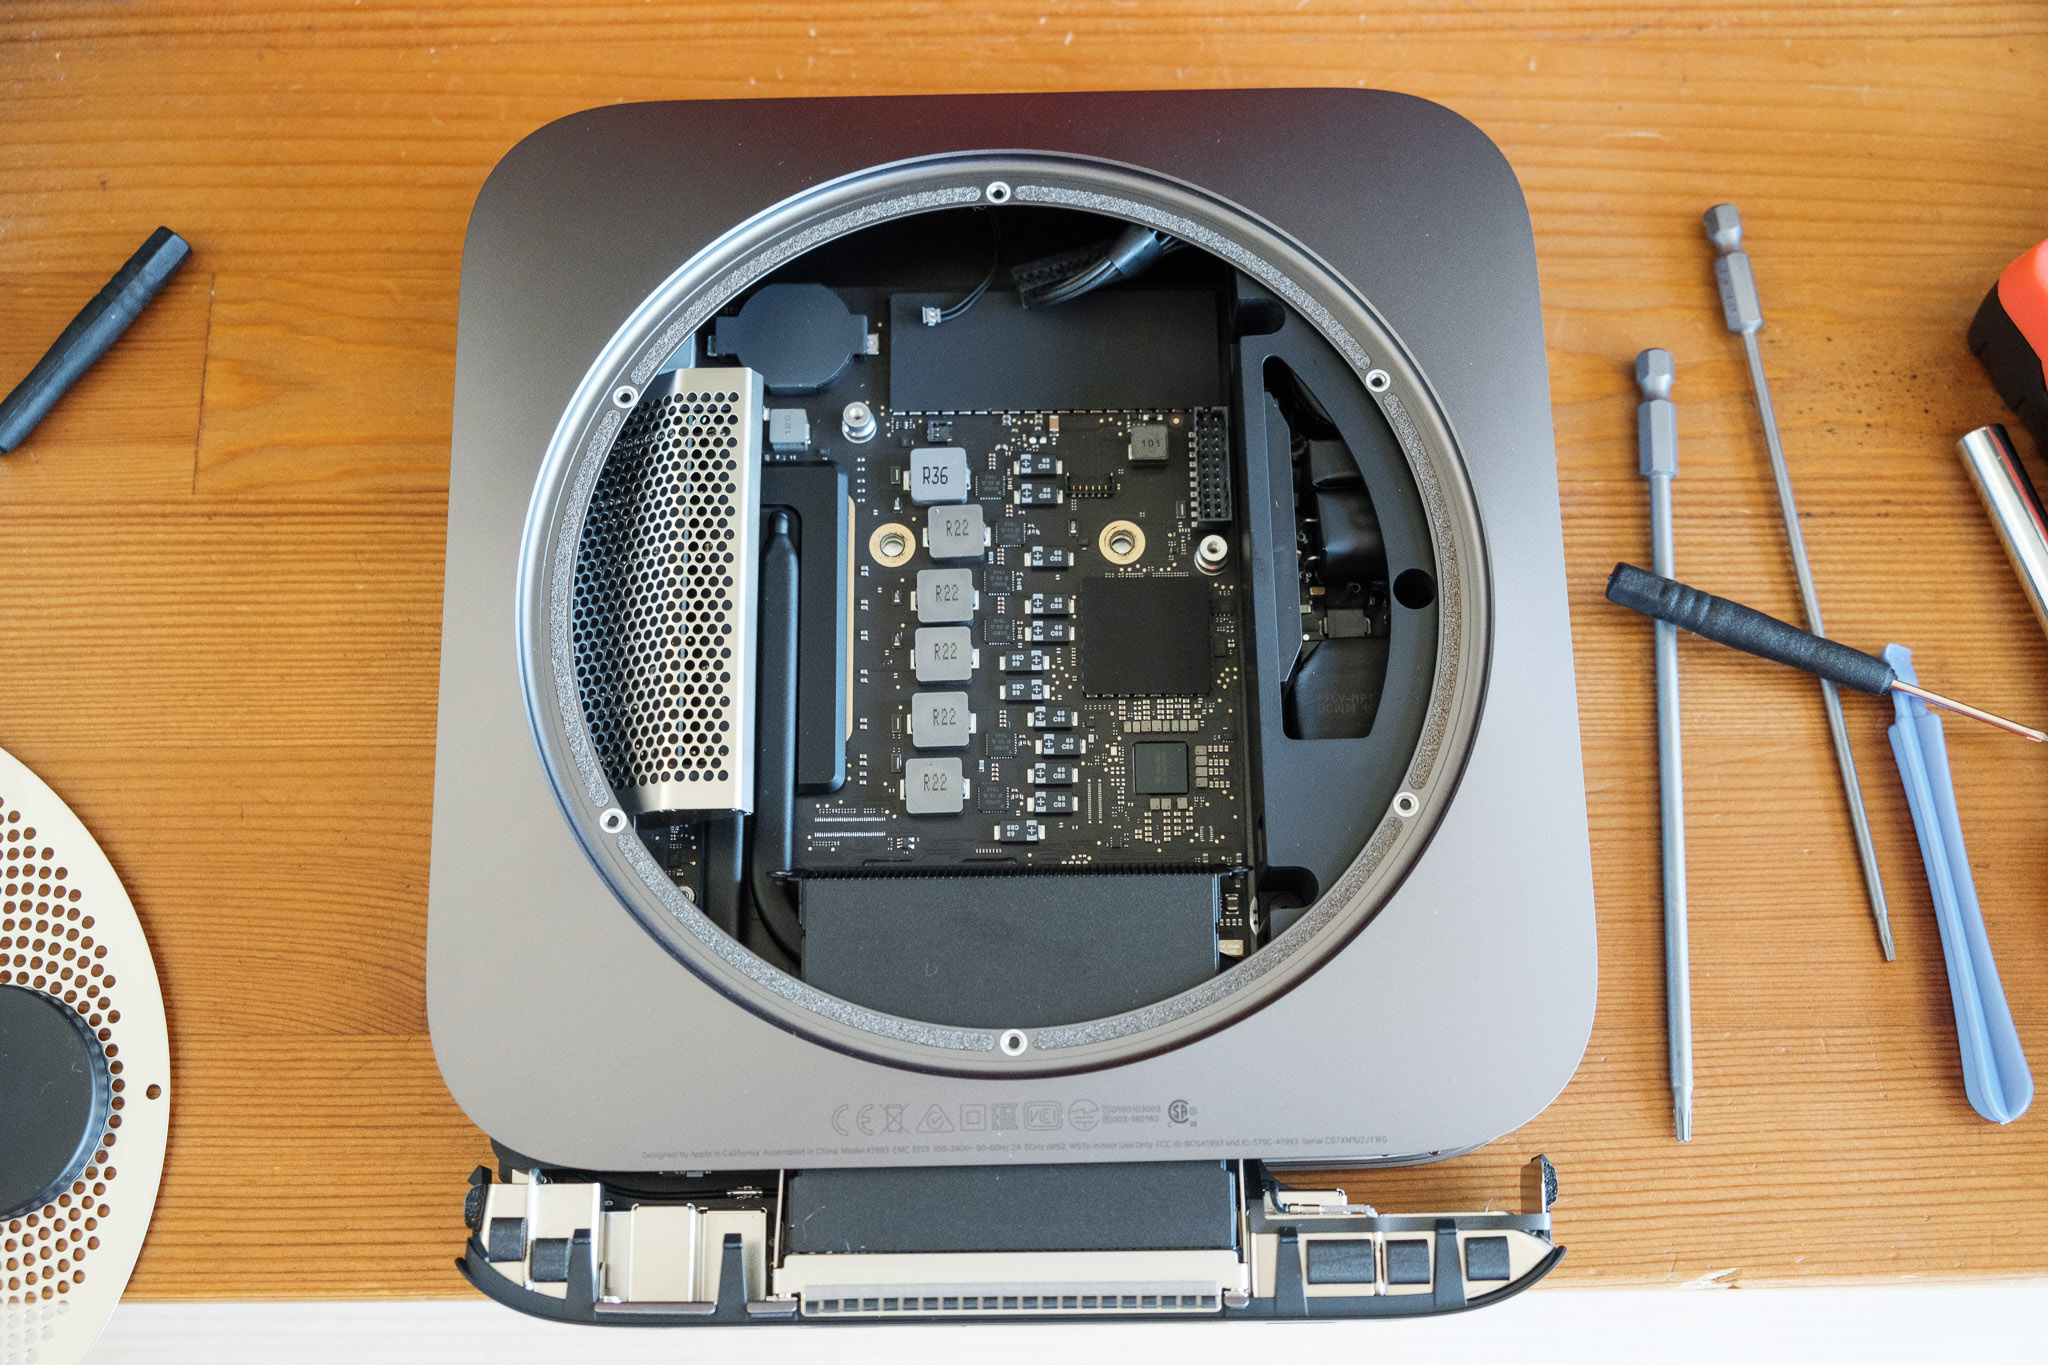
A brand new 2018 Mac Mini. Breaking into it and doing some upgrades before even powering it on.
After many years of waiting, a refresh of the Mac Mini has finally arrived, and unlike the extremely underwhelming 2014 refresh, Apple has graced us with a 6-core i7-8700 and user-replaceable SO-DIMM memory… sort of.
Per Apple’s support document detailing how to install/replace memory in a Mac Mini, they advise that only an Apple Store or Authorized Apple Service Provider can install/replace the RAM modules in a 2018 Mac Mini. With that said, is it possible to do it yourself? Sure is.
Disclaimer: At the time of writing, I cannot say whether or not doing this will void any warranty. Because of that, I advise you to proceed with caution should you decide to go forward with replacing your RAM modules.
Alright, let’s get to it.
What You Need

A 2018 Mac Mini
Replacement Memory Sticks
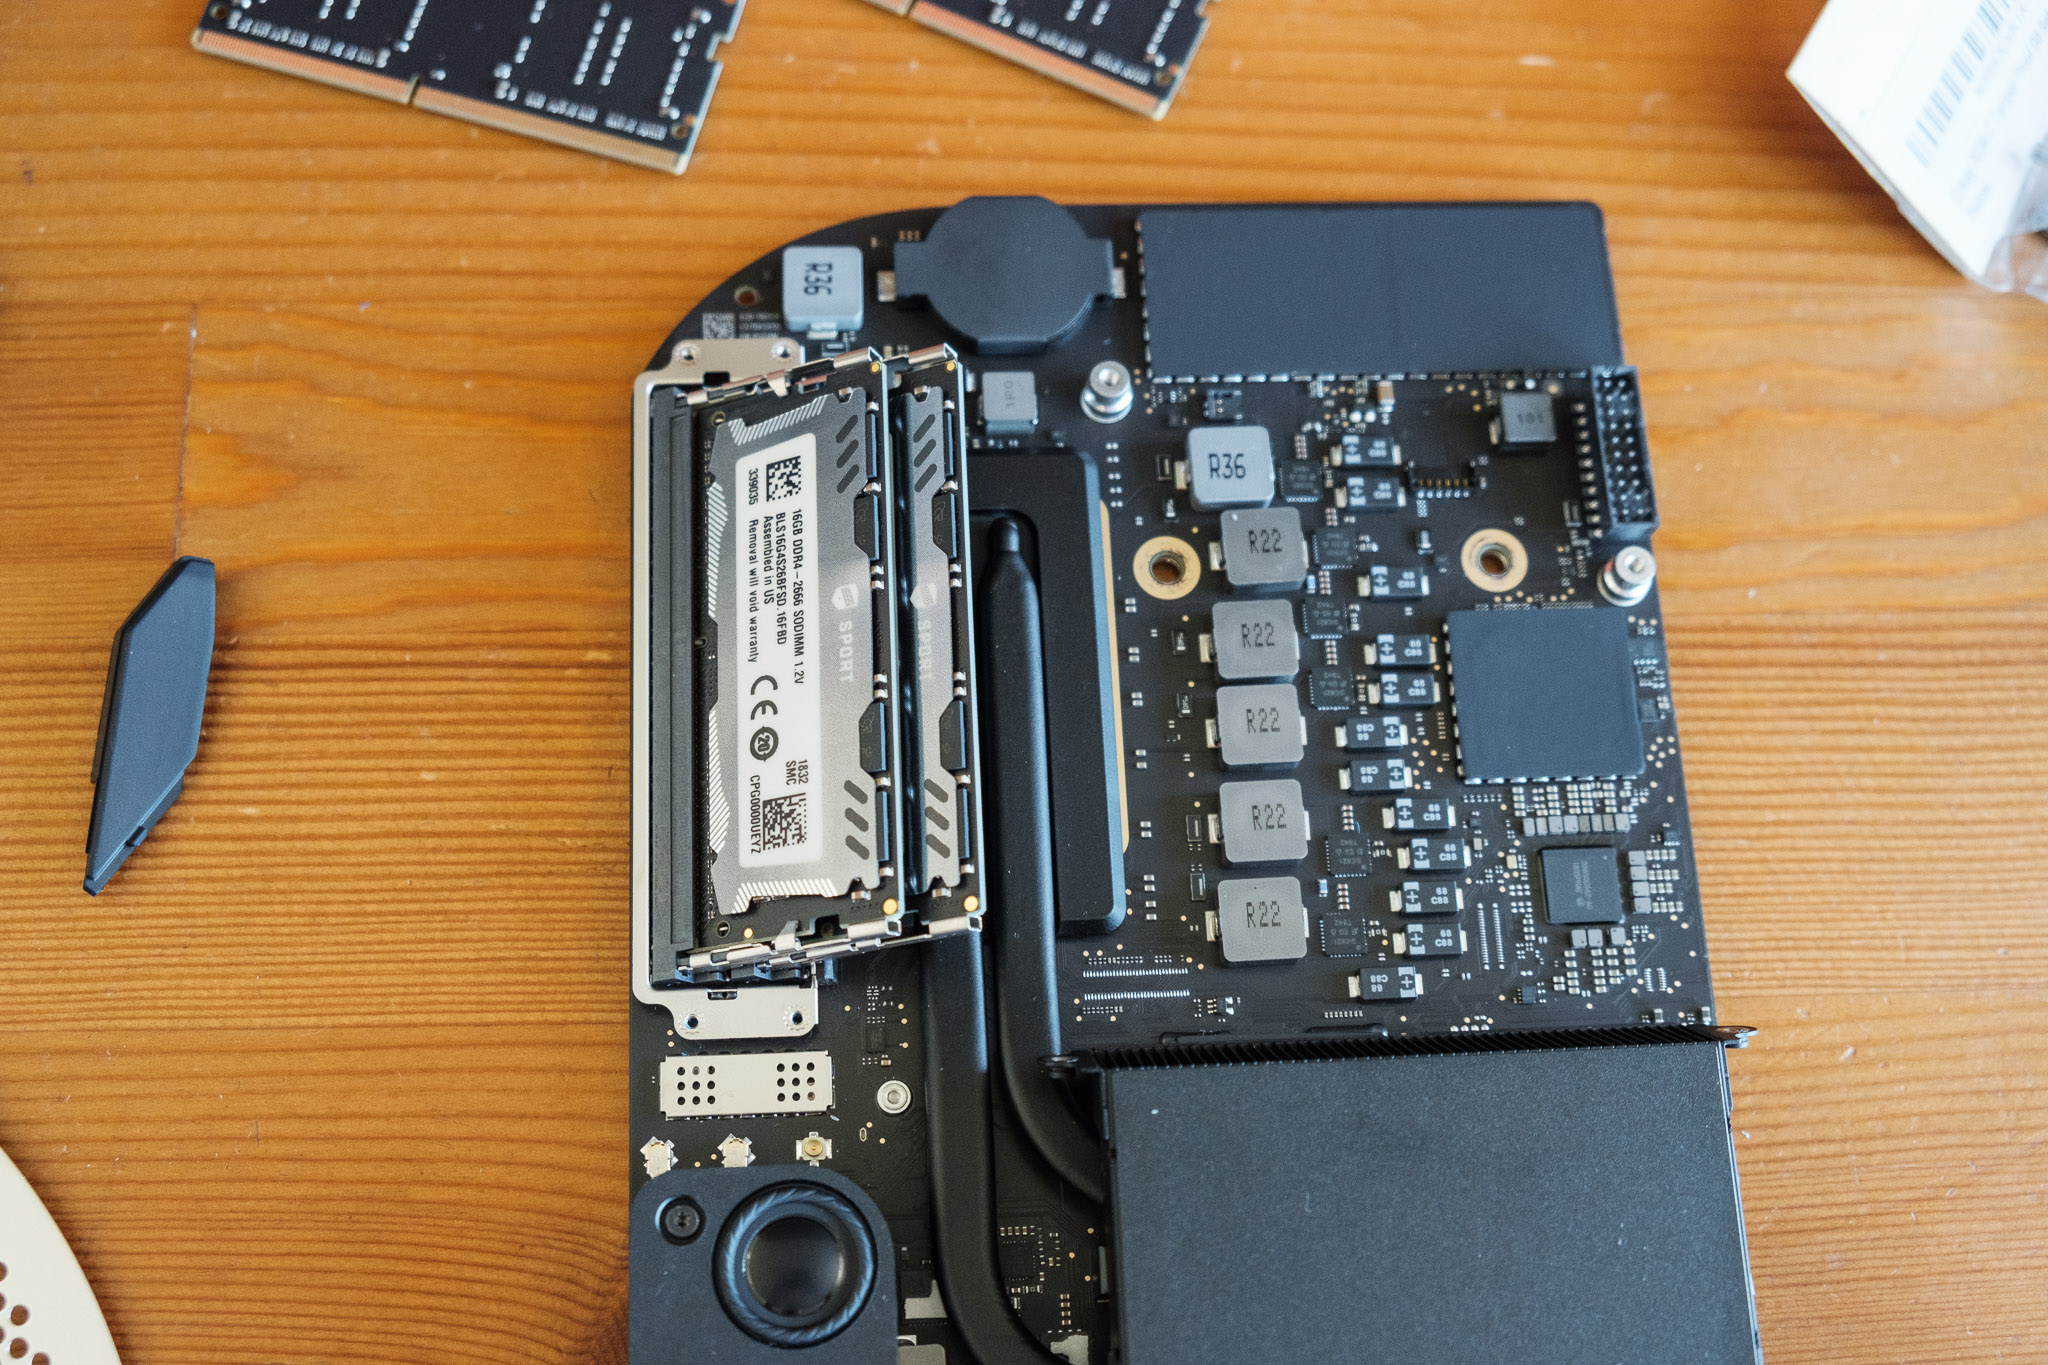
Memory I used: Crucial/Micron Ballistix Sport LT DDR4 2666 2x16gb
UPDATE: So it turns out the Memory pictured and linked above is underclocked to 2400 and boosted to 2666 via Intel XMP. I guess the mini doesn’t support that, so I will be/have replaced it with this memory Crucial 32GB Kit (16GBx2) DDR4 2666 MT/s (PC4-21300)
Torx Security T6 (also known as TR6, Tamperproof Torx T6, among other names)
The difference is tamperproof/security torx screws have a metal pin in the middle, therefore the screwdriver requires a hole in the center in order to get into the threads
Torx T10 driver (T9 could also work)
Some kind of plastic prying item, ideally a spudger (or a guitar pick)
Optional: Regular Torx T6
Optional: Mac Mini Logic Board Removal tool
Pick up a set with a TR6, TR9, Spudger, and Mac Mini Logic Board removal tool on Amazon
Procedure
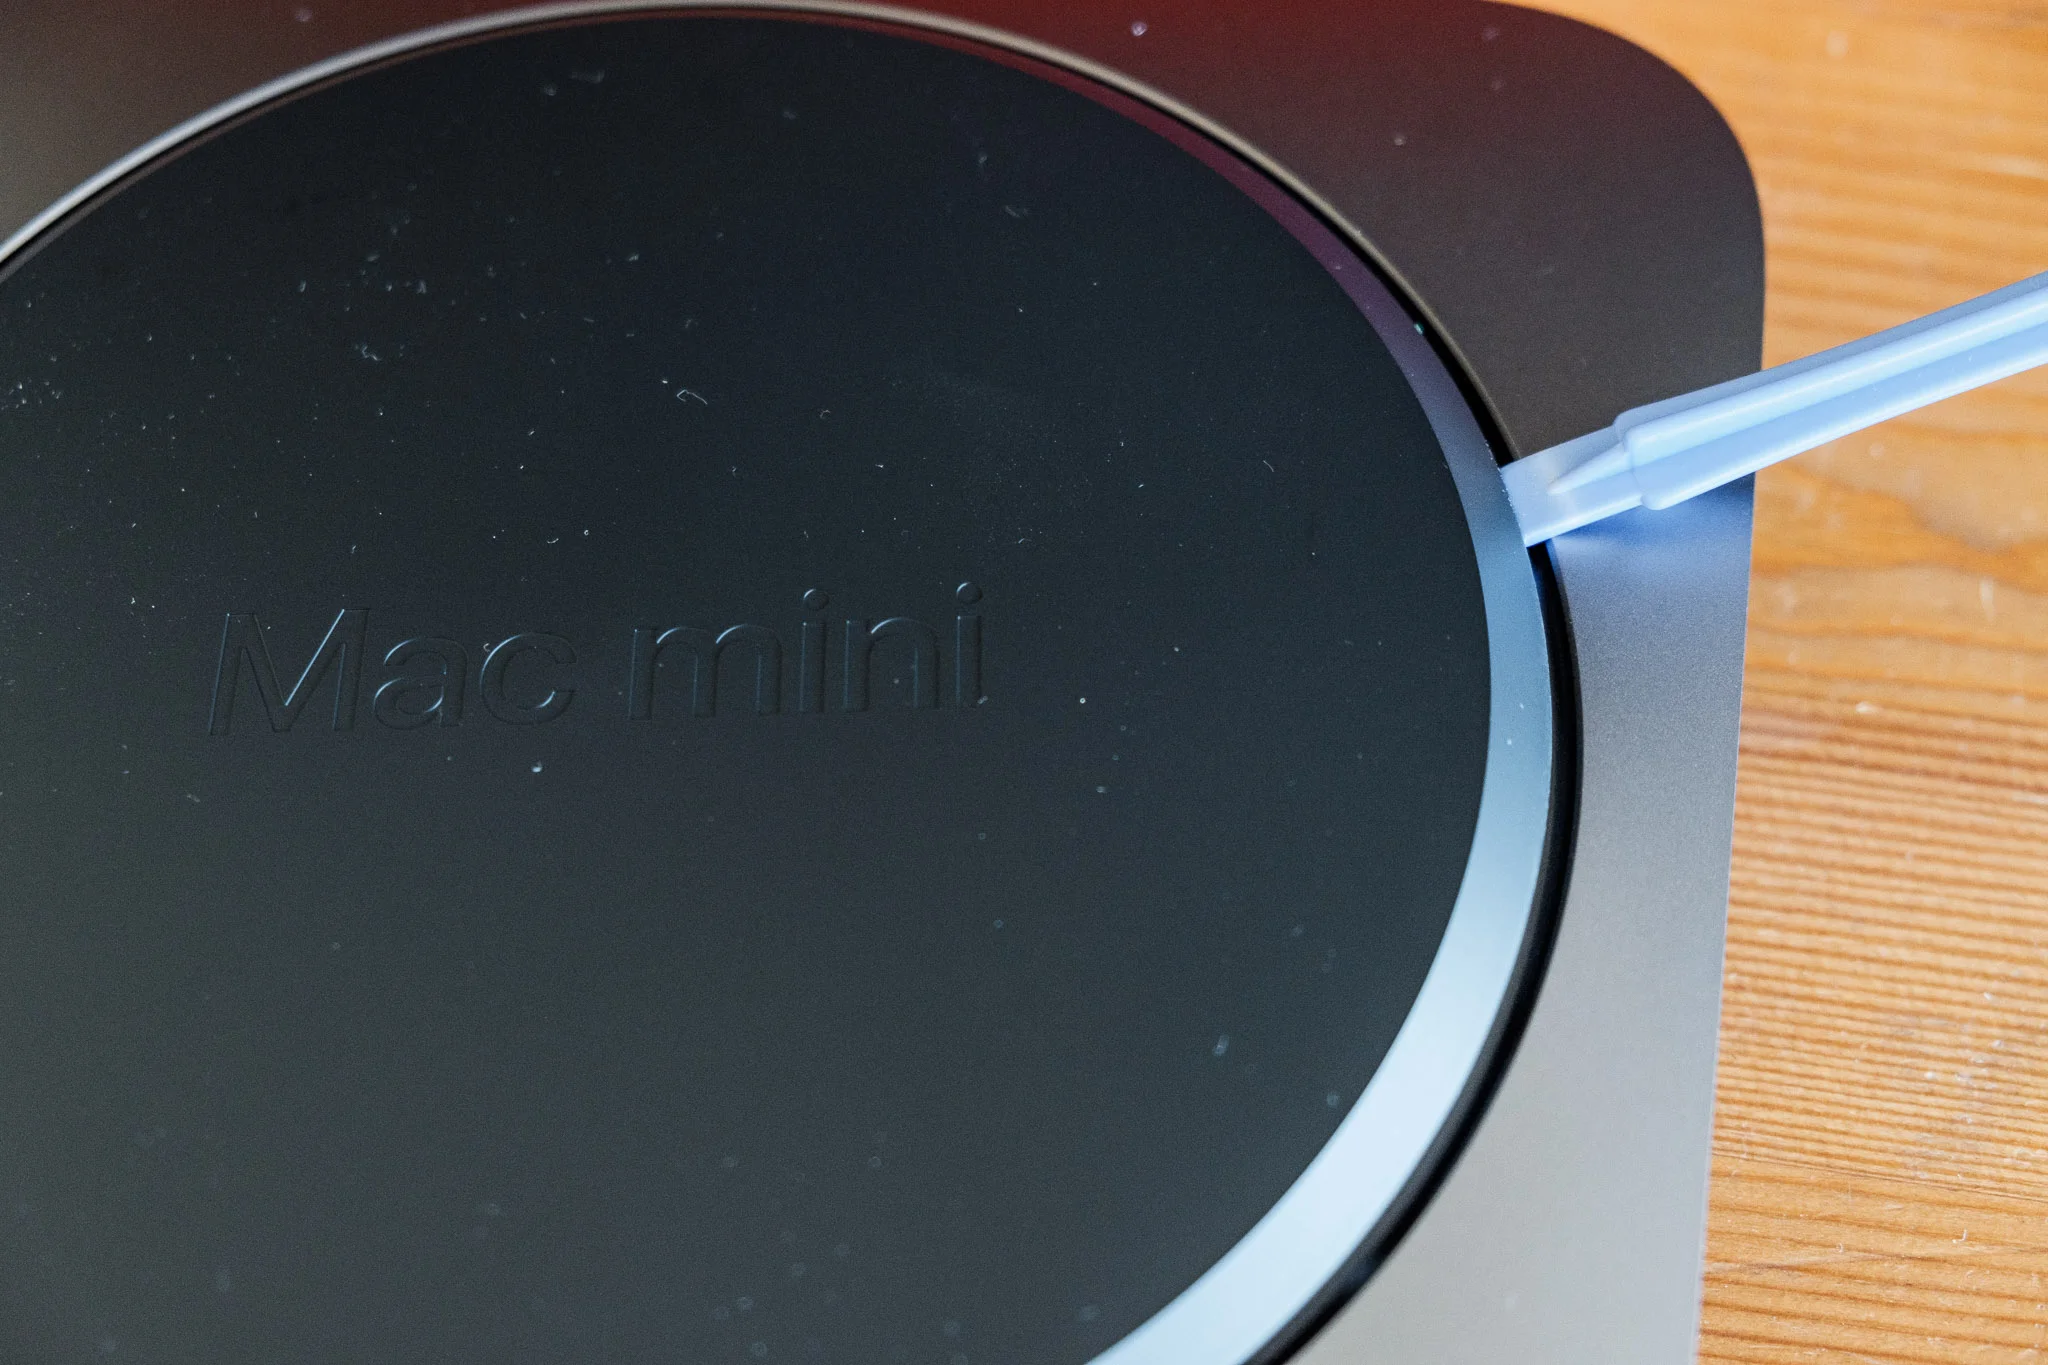
Step 1: Remove bottom plastic plate
Pop open the bottom using a spudger, credit card, guitar pick, what have you. The bottom is clipped (with the ports facing you) at the top-middle and bottom left and right (imagine three corners of a triangle)
Step 2: Remove metal plate
Using a TR6 screwdriver, remove the six (6) screws holding the bottom metal plate. GENTLY lift the plate to reveal the wire connecting the antenna. Slide the plate off to the side to reveal a screw holding the antenna cable in place. Use a T6 (or your TR6) to remove the screw from the bracket then pop off the cable from the logic board.


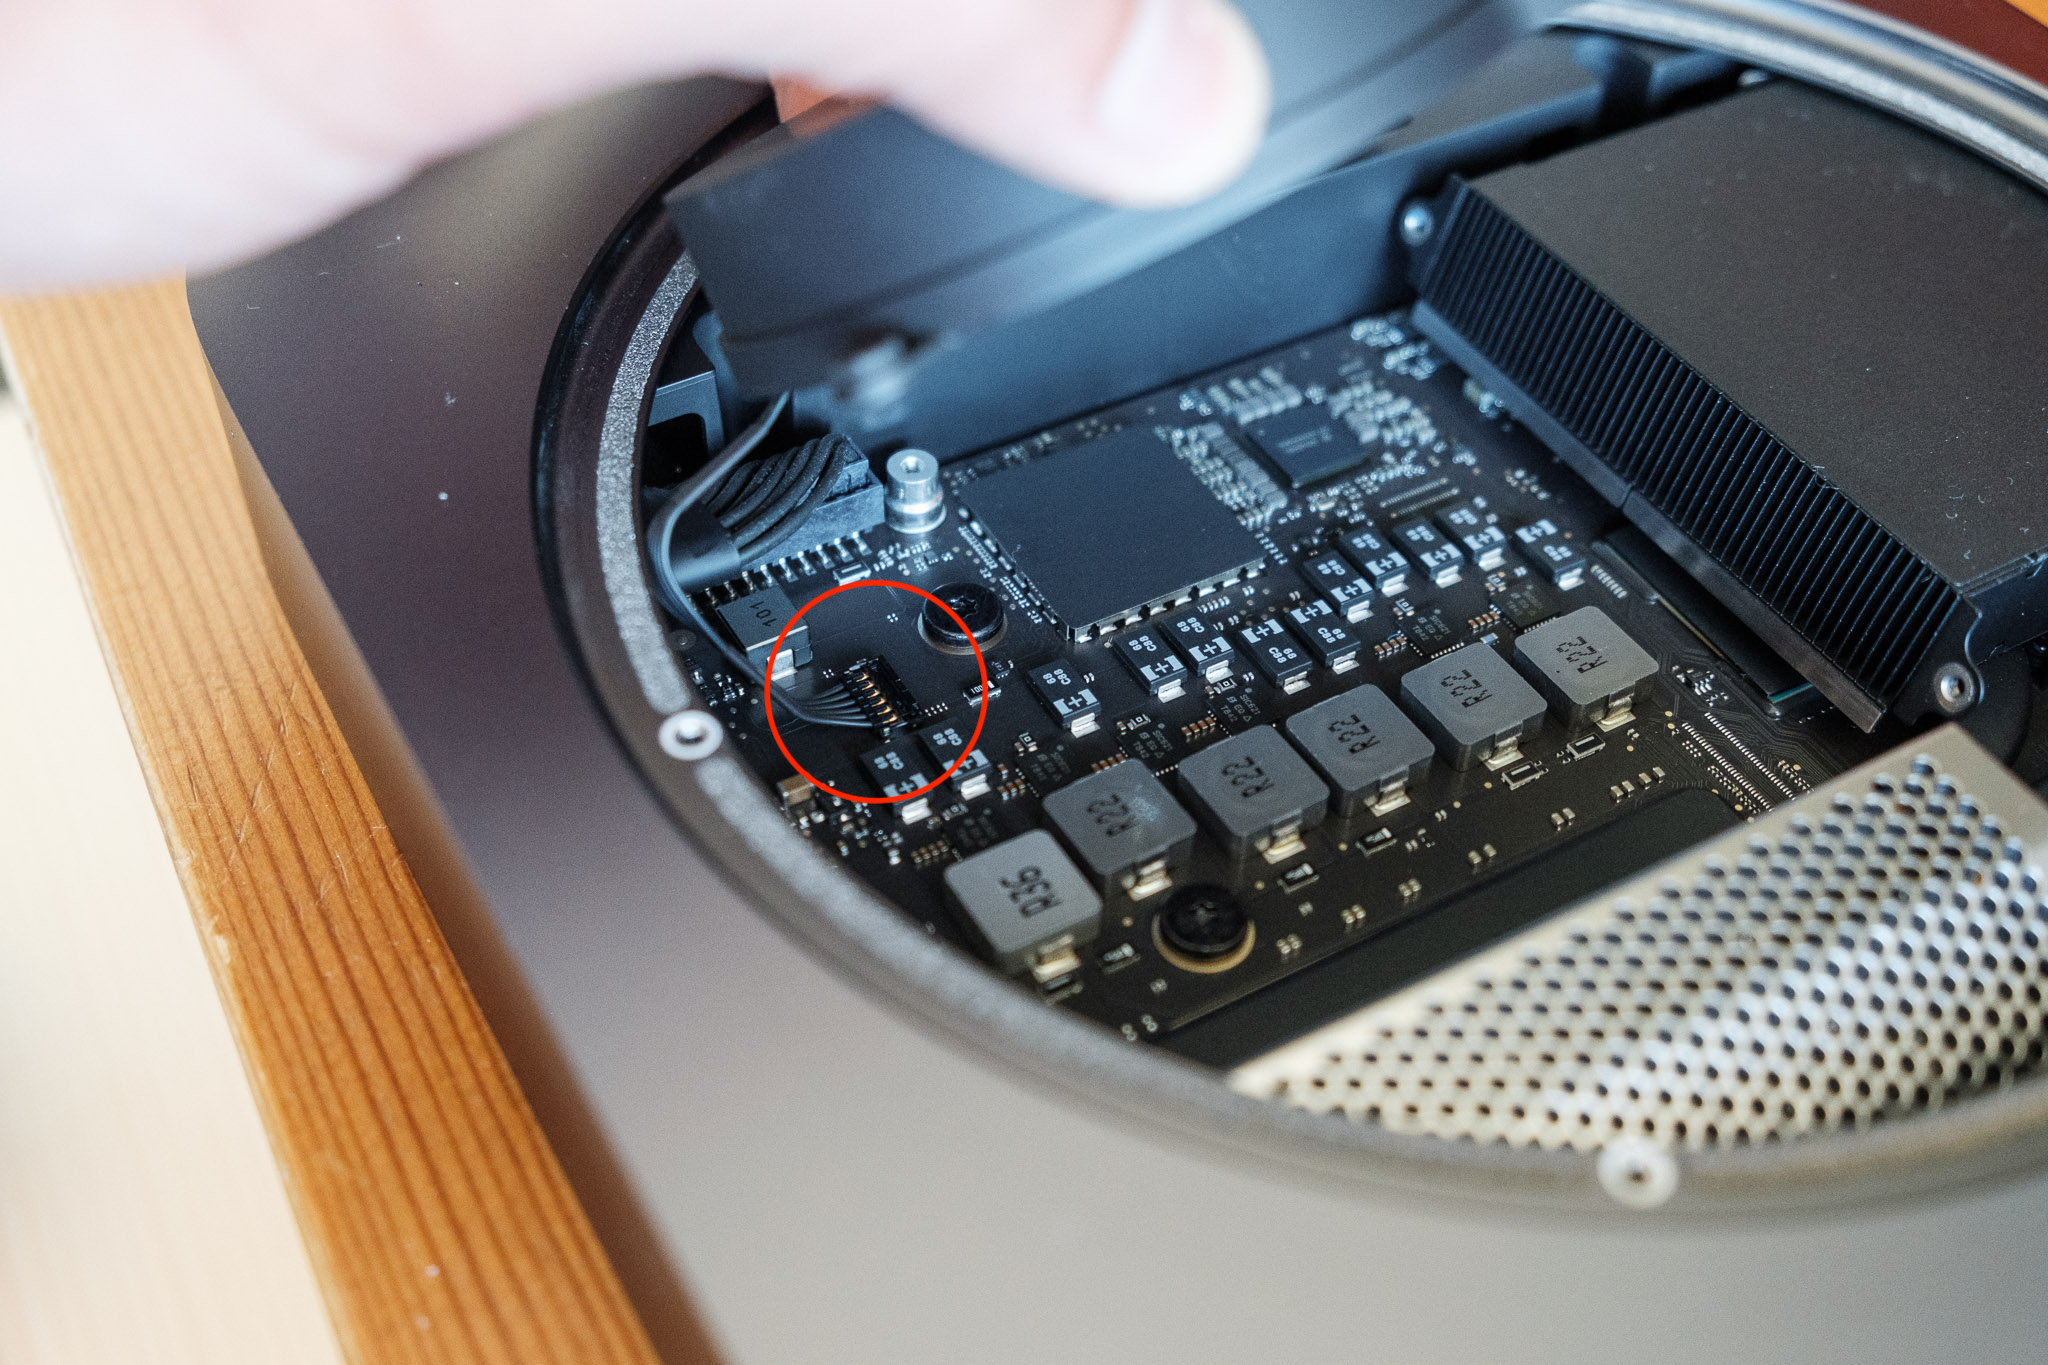
Step 3: Remove the fan
The fan is held on by four (4) T6 screws. With the unit turned so the ports are facing away from you, the screws are along the two sides at an angle, on the bottom left, and bottom right. Remove those four screws and lift the fan up. Disconnect the cable from the logic board (the connector goes straight up).


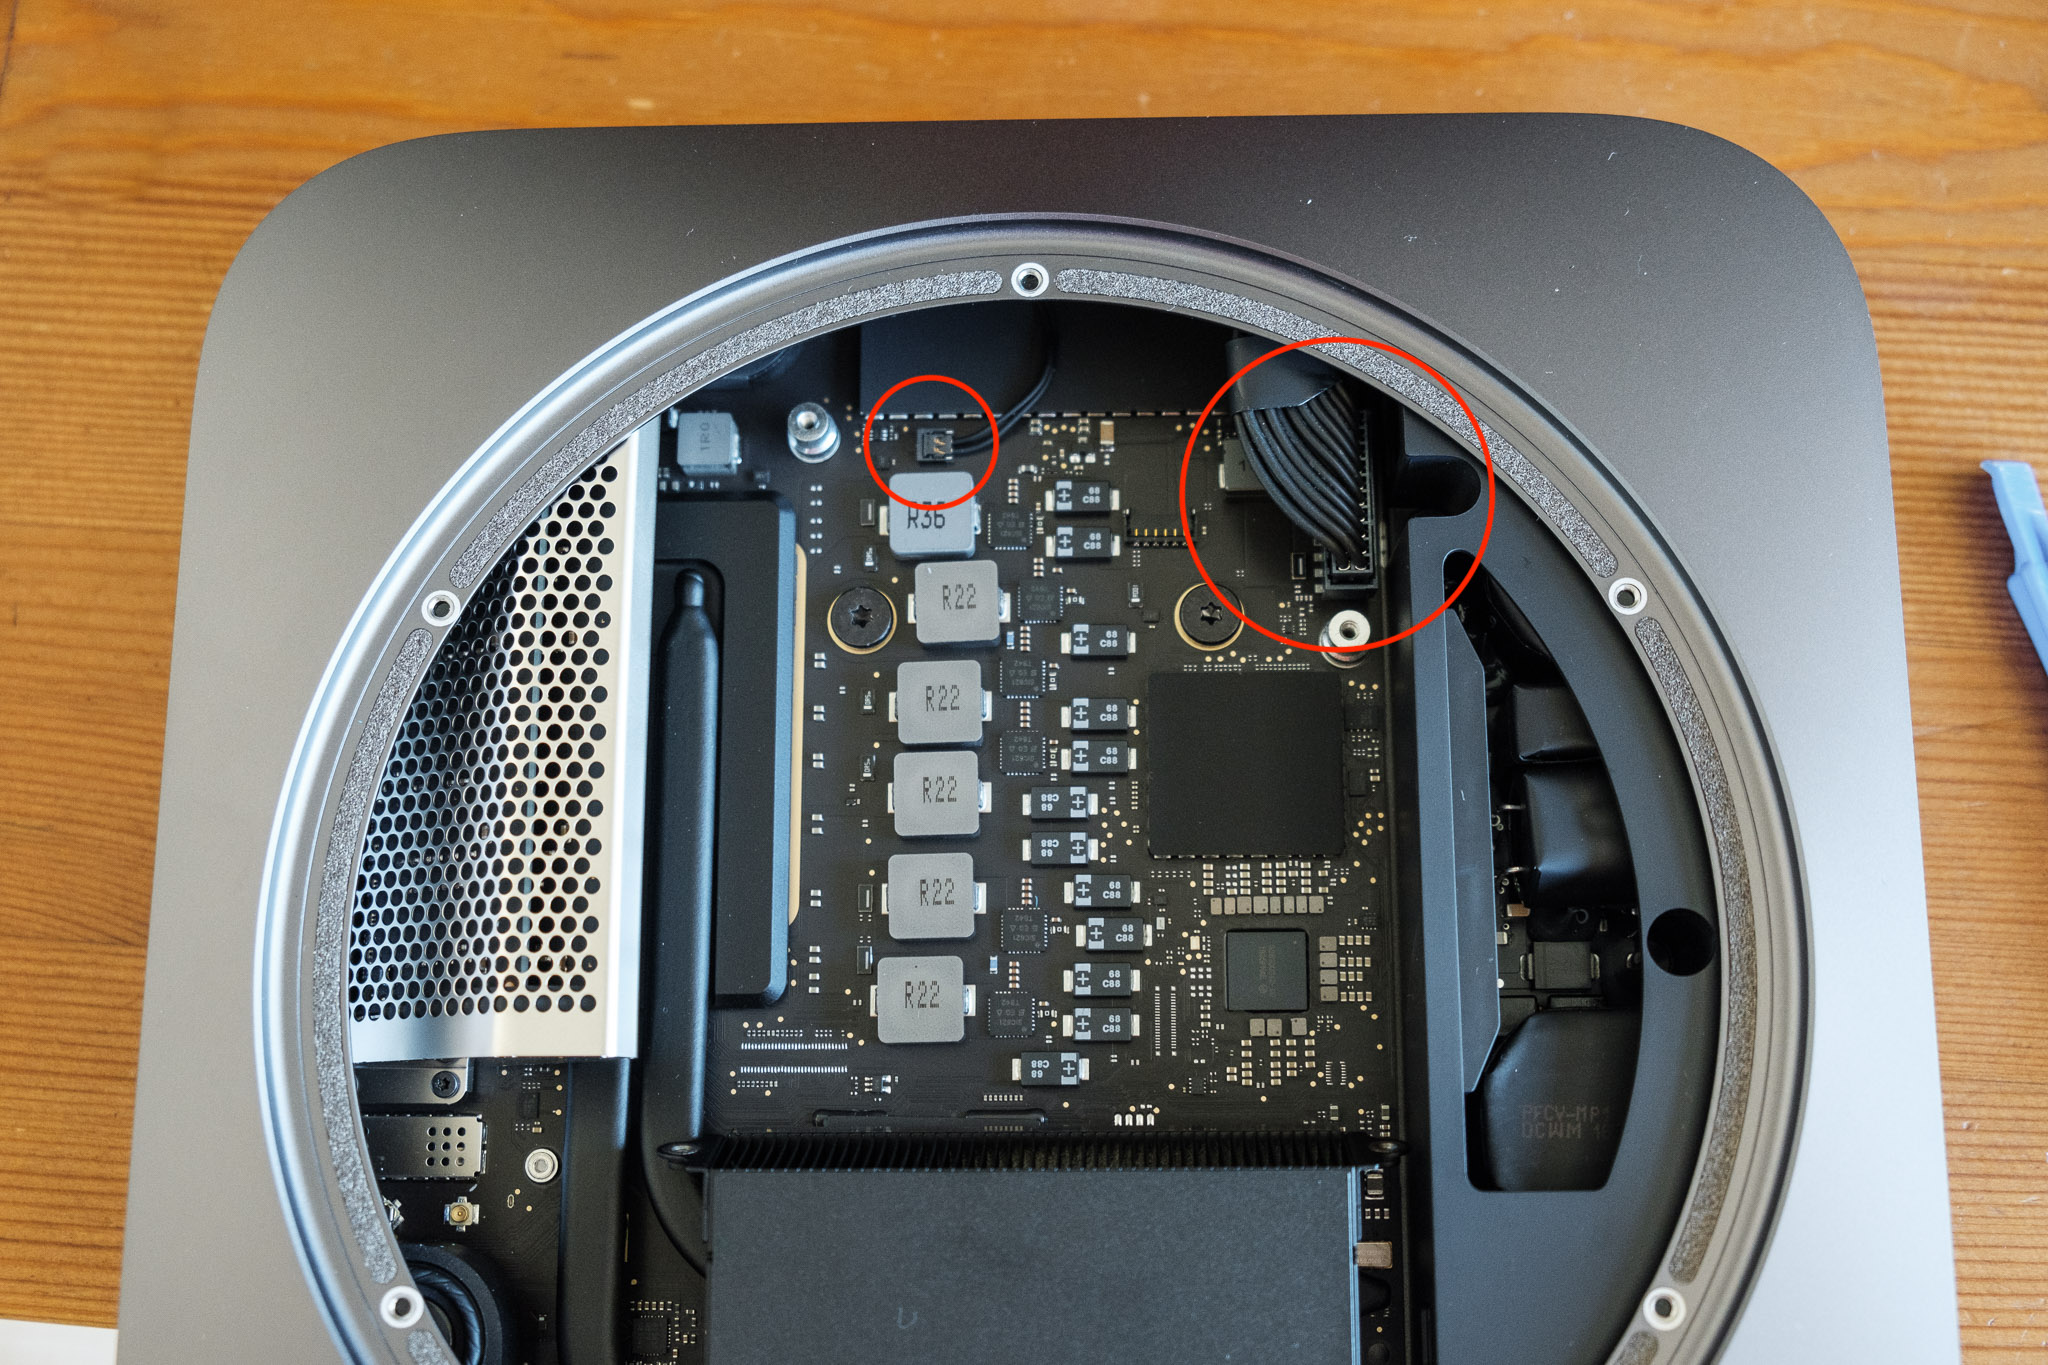
Step 4: Remove the logic board from the aluminum body
With the unit oriented with the ports facing you, disconnect the small cable in the far back (indicator light I believe?). This connector goes straight up. Next, unplug the big power connector on the right hand side. If there is not enough room to disconnect it fully at this moment, do not worry as you will be able to do so once you begin sliding out the logic board.
To remove the logic board, unscrew the two (2) T10 (or T9) screws in the upper middle of the logic board. With those removed, you can use a Mac Mini Logic Board removal tool or be ghetto like me and use two small screwdrivers to lever the logic board out of the casing. Once you get it moving a bit, you can also gently push the heatsink to push out the logic board.
If you didn’t fully unplug the power cable, do so now.
Pull the logic board out of the case and place the case aside.


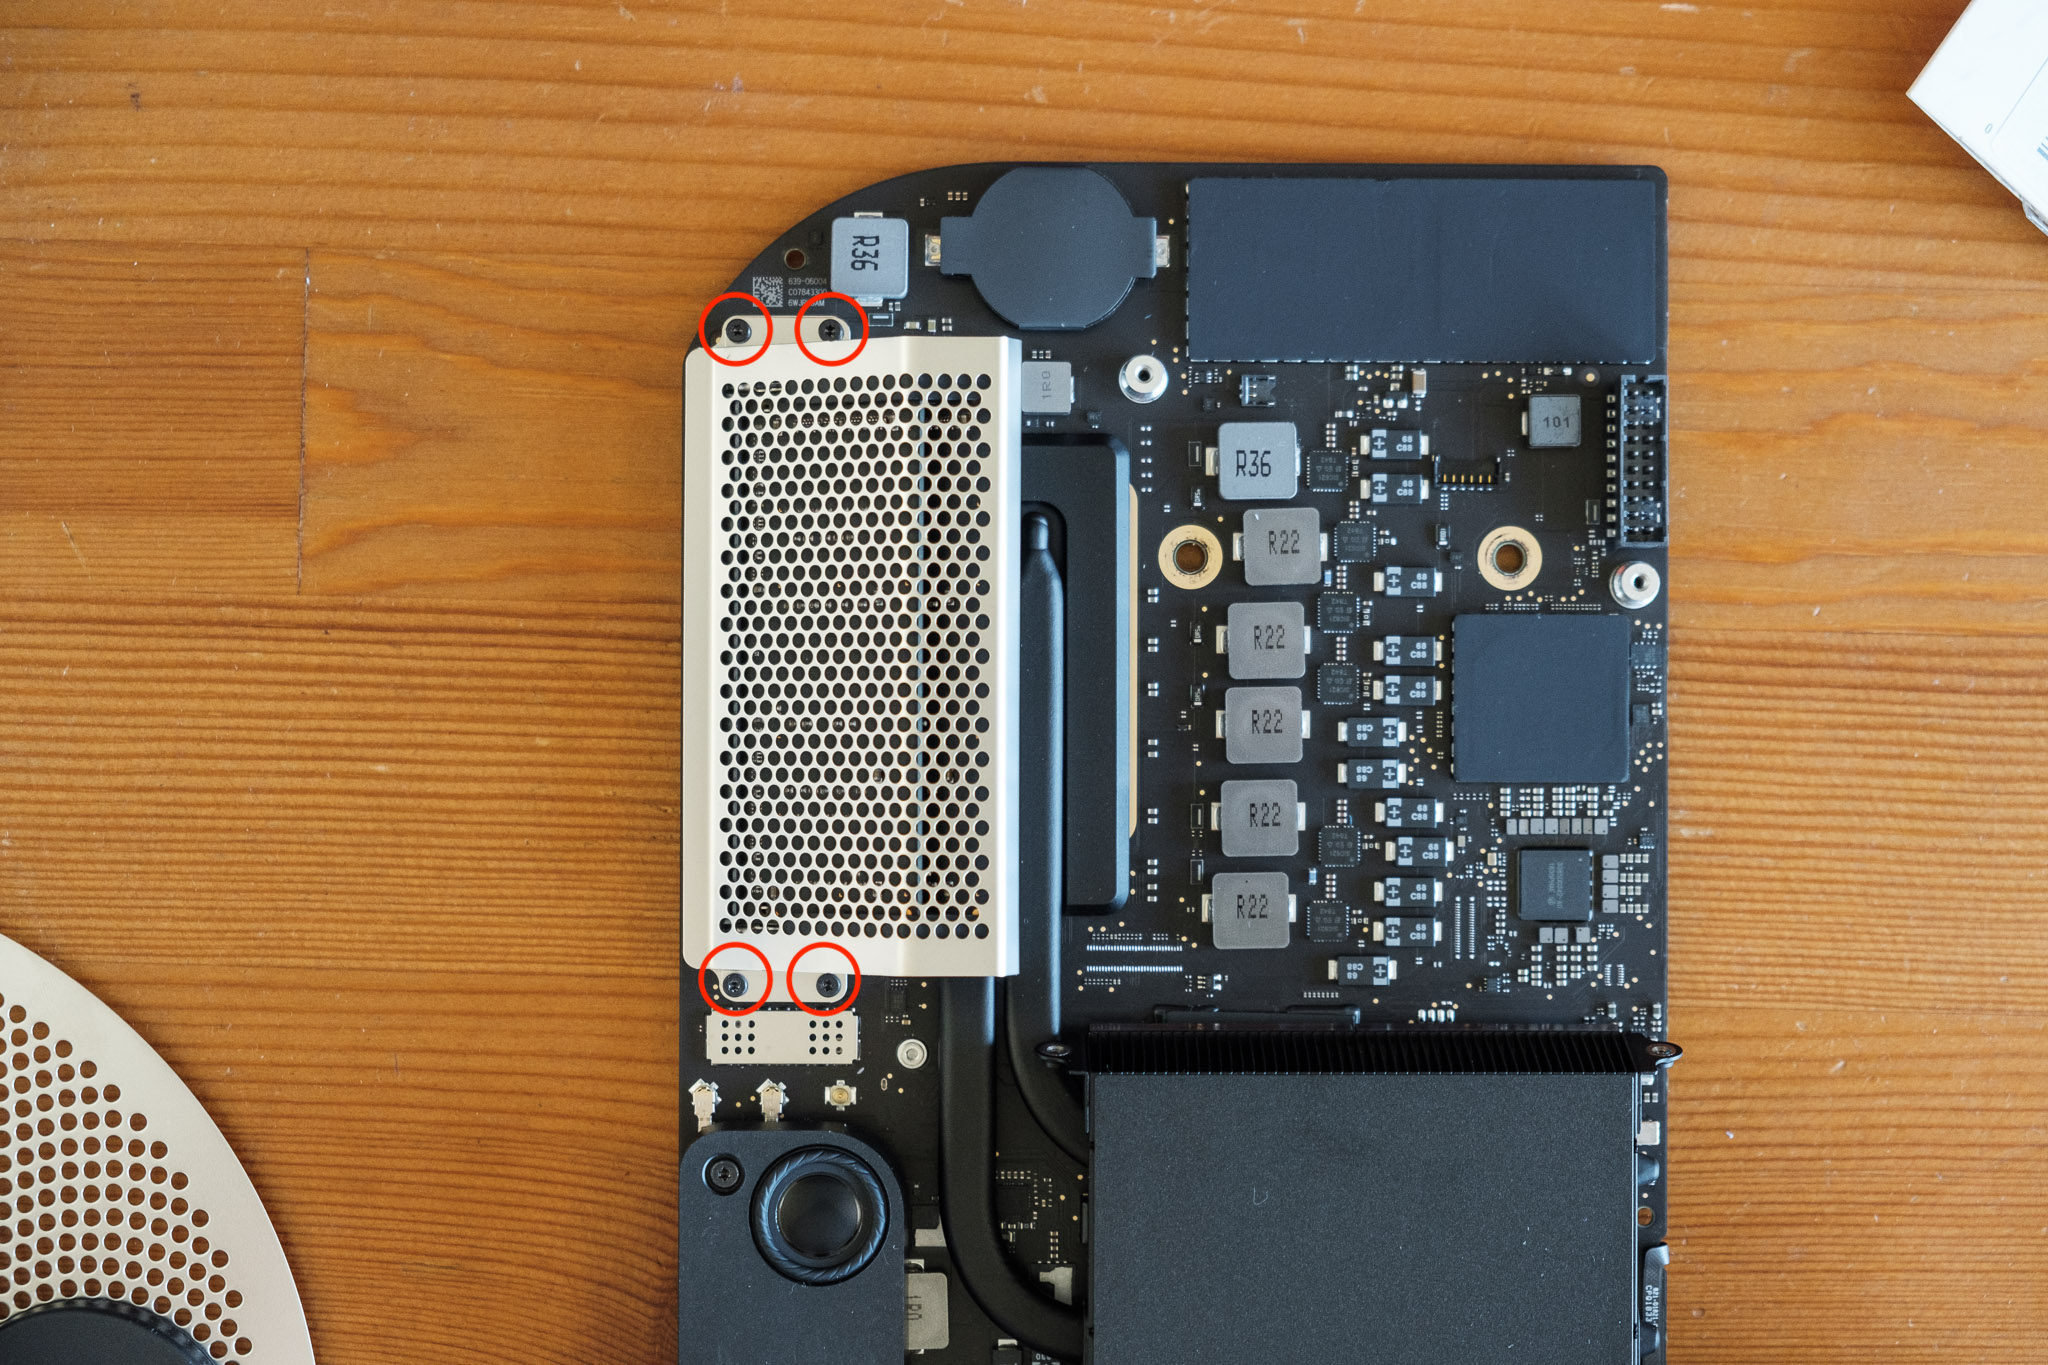
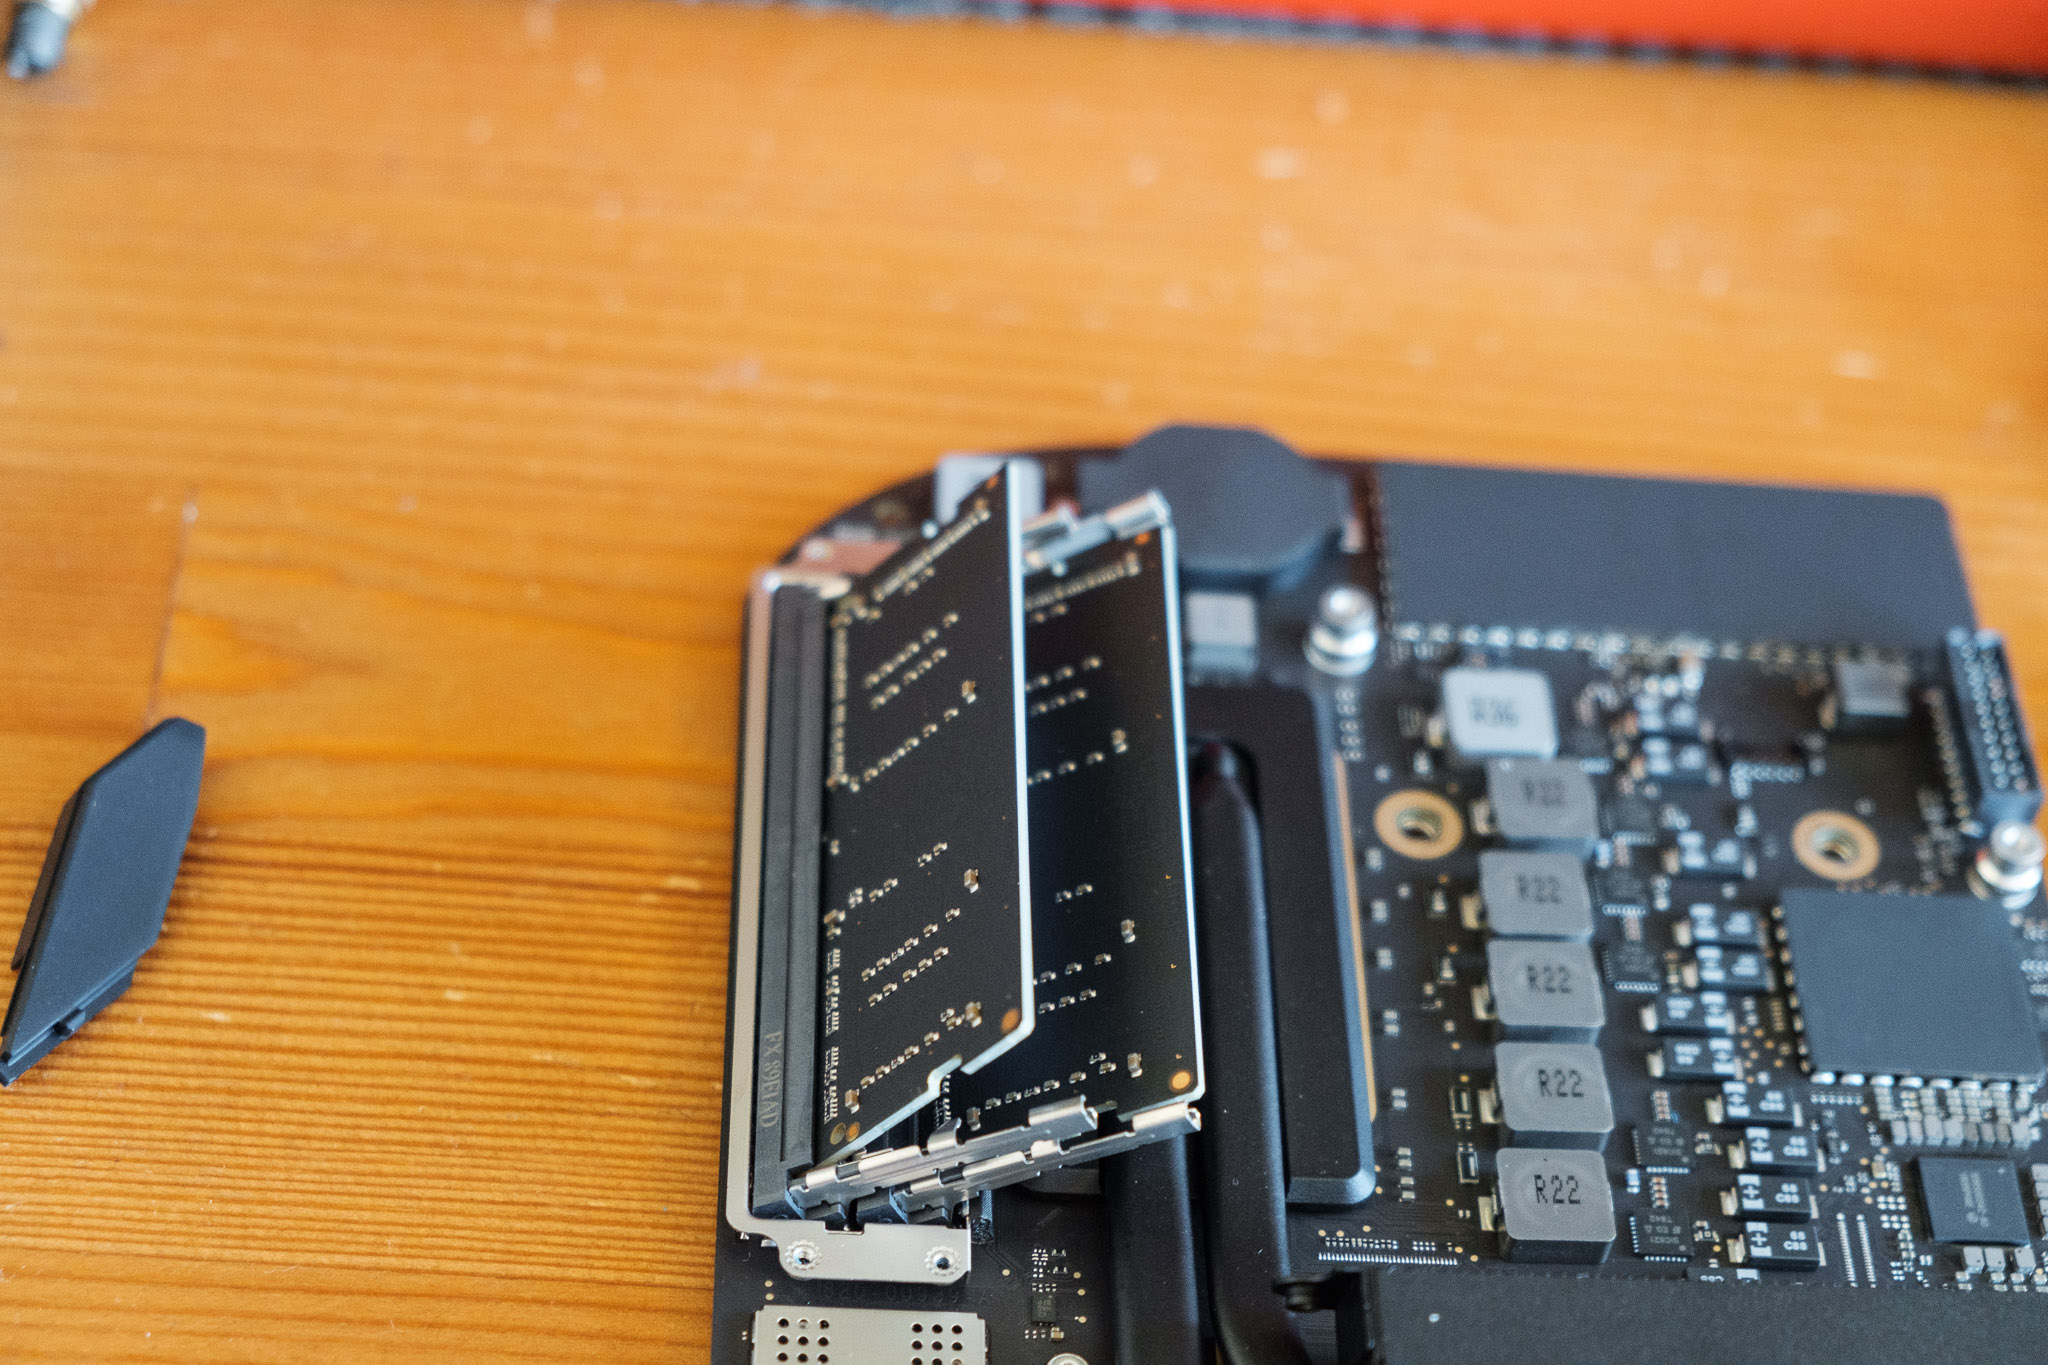
Step 5: Accessing and swapping out the RAM modules
With the logic board unearthed, only a metal cage and some rubber guards keep you from the memory modules.
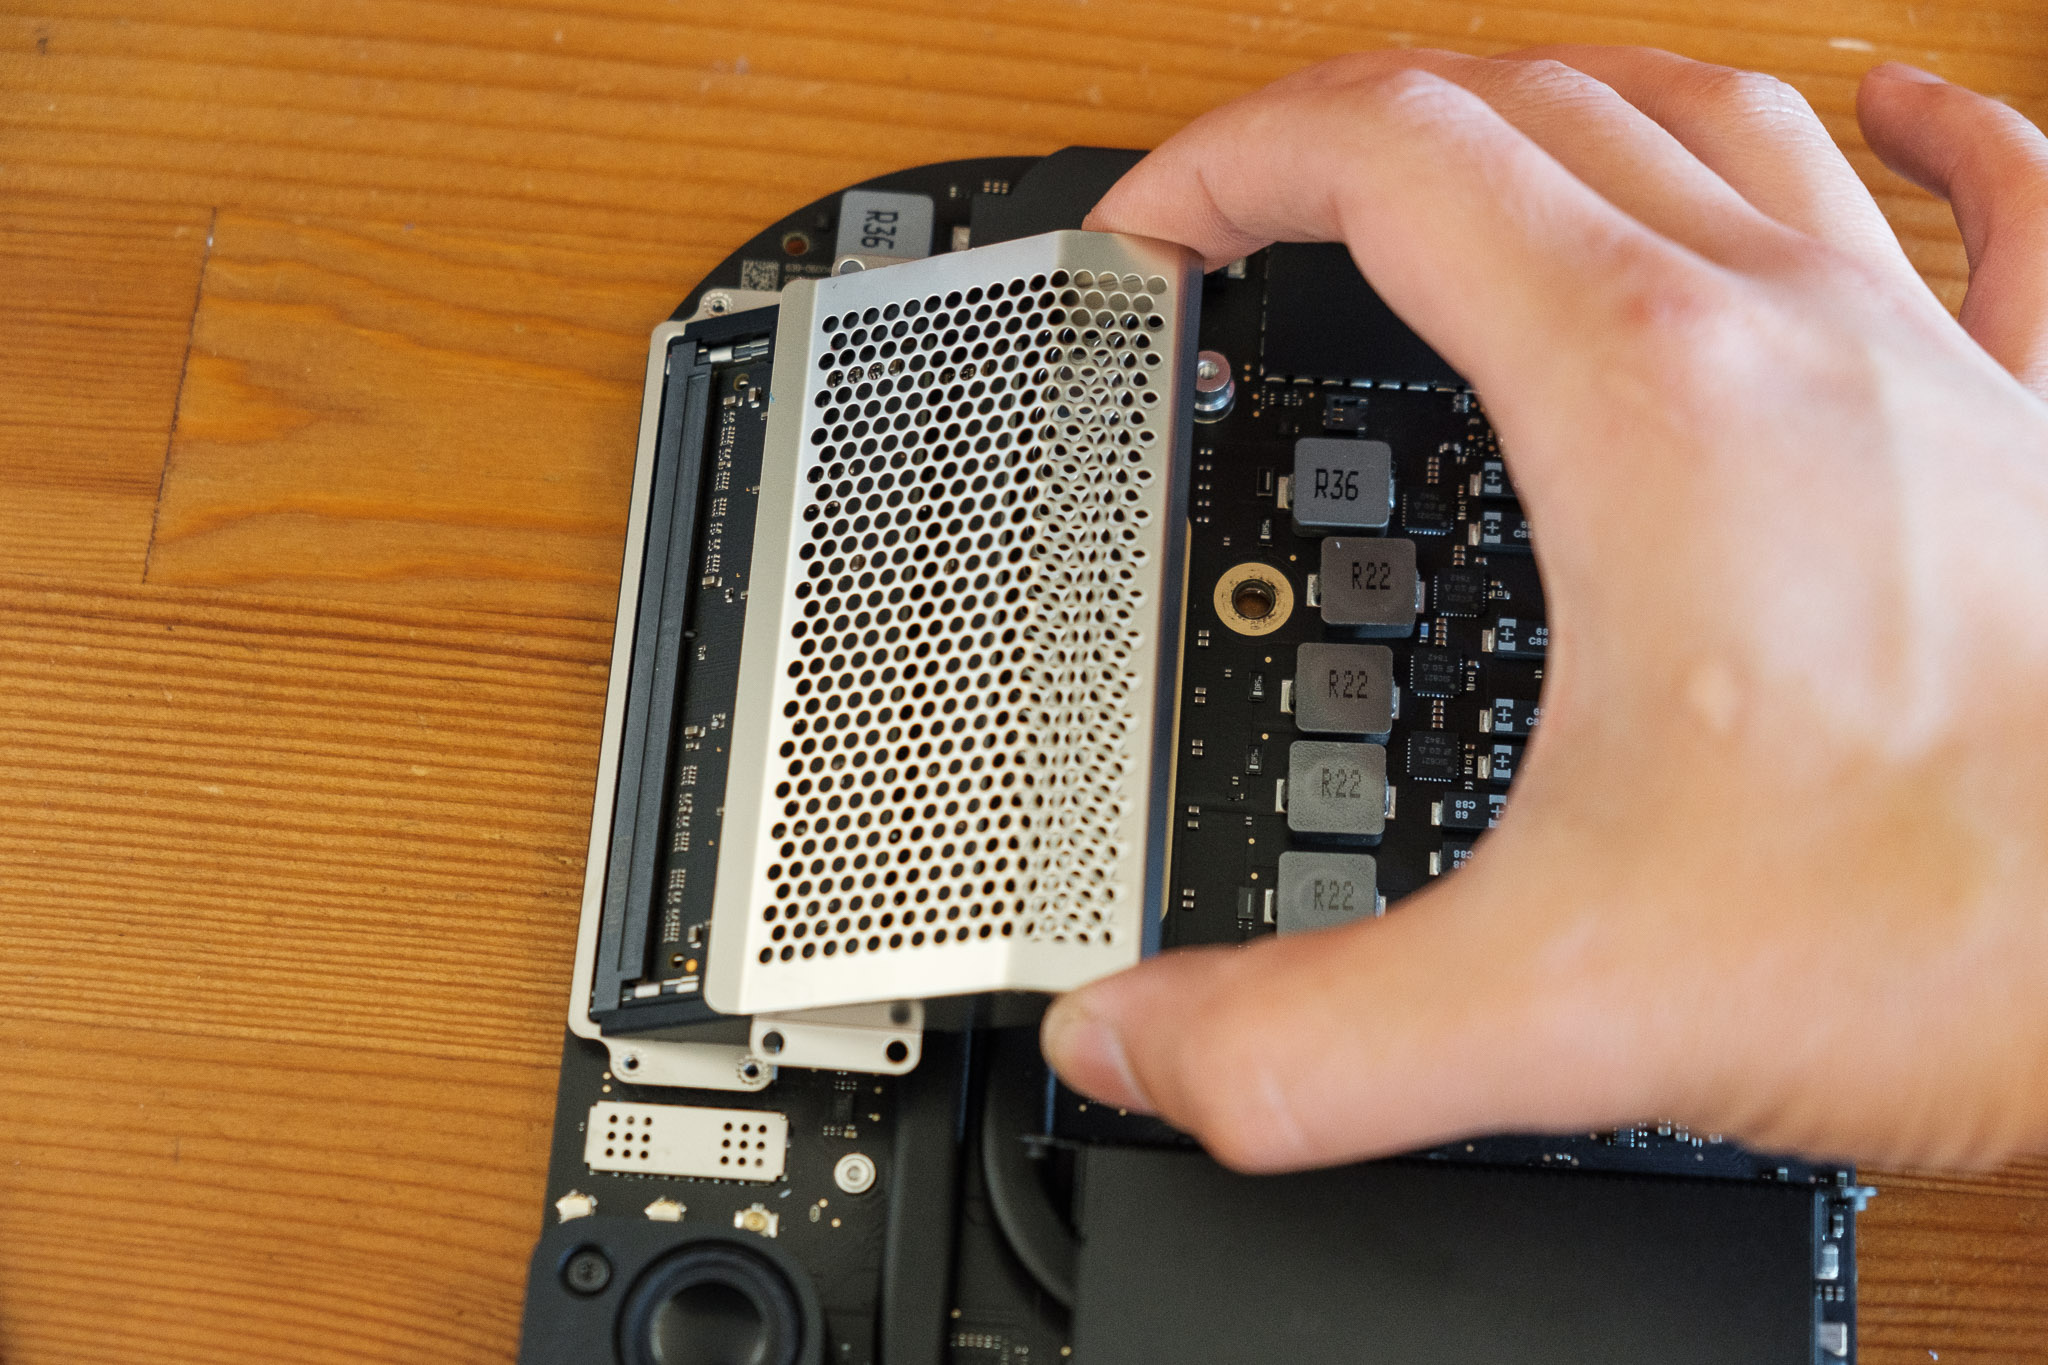
Remove the four (4) T6 screws from the outside of the cage. With the screws removed, slide the memory cage diagonally, at the same angle which the RAM modules are fitted. With the cage removed, pull the rubber stoppers off at the same angle (you may need to wiggle them free a bit).
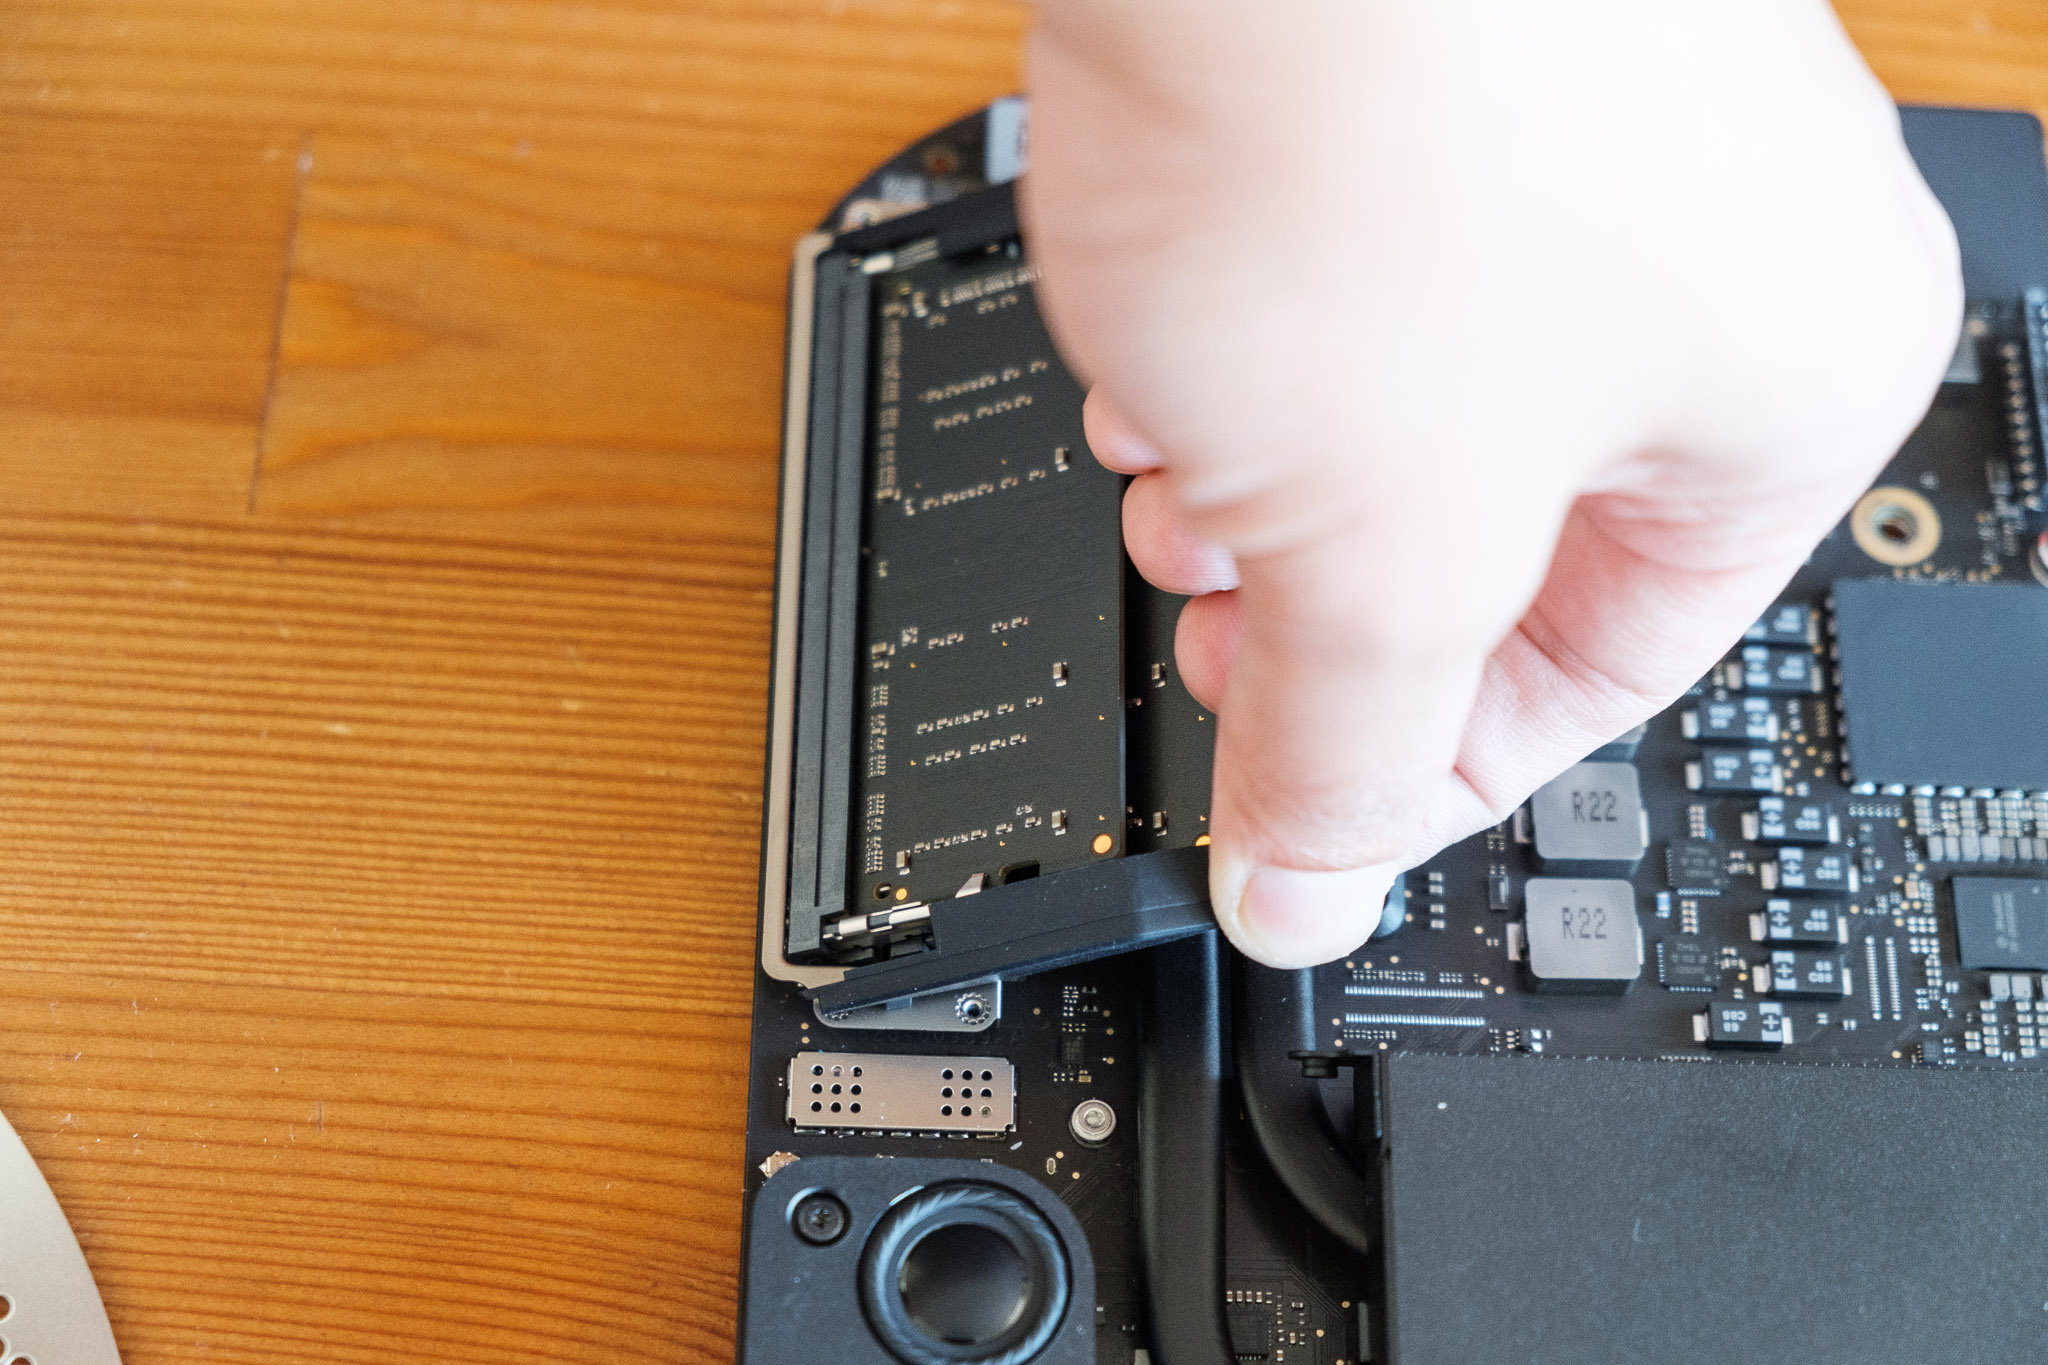
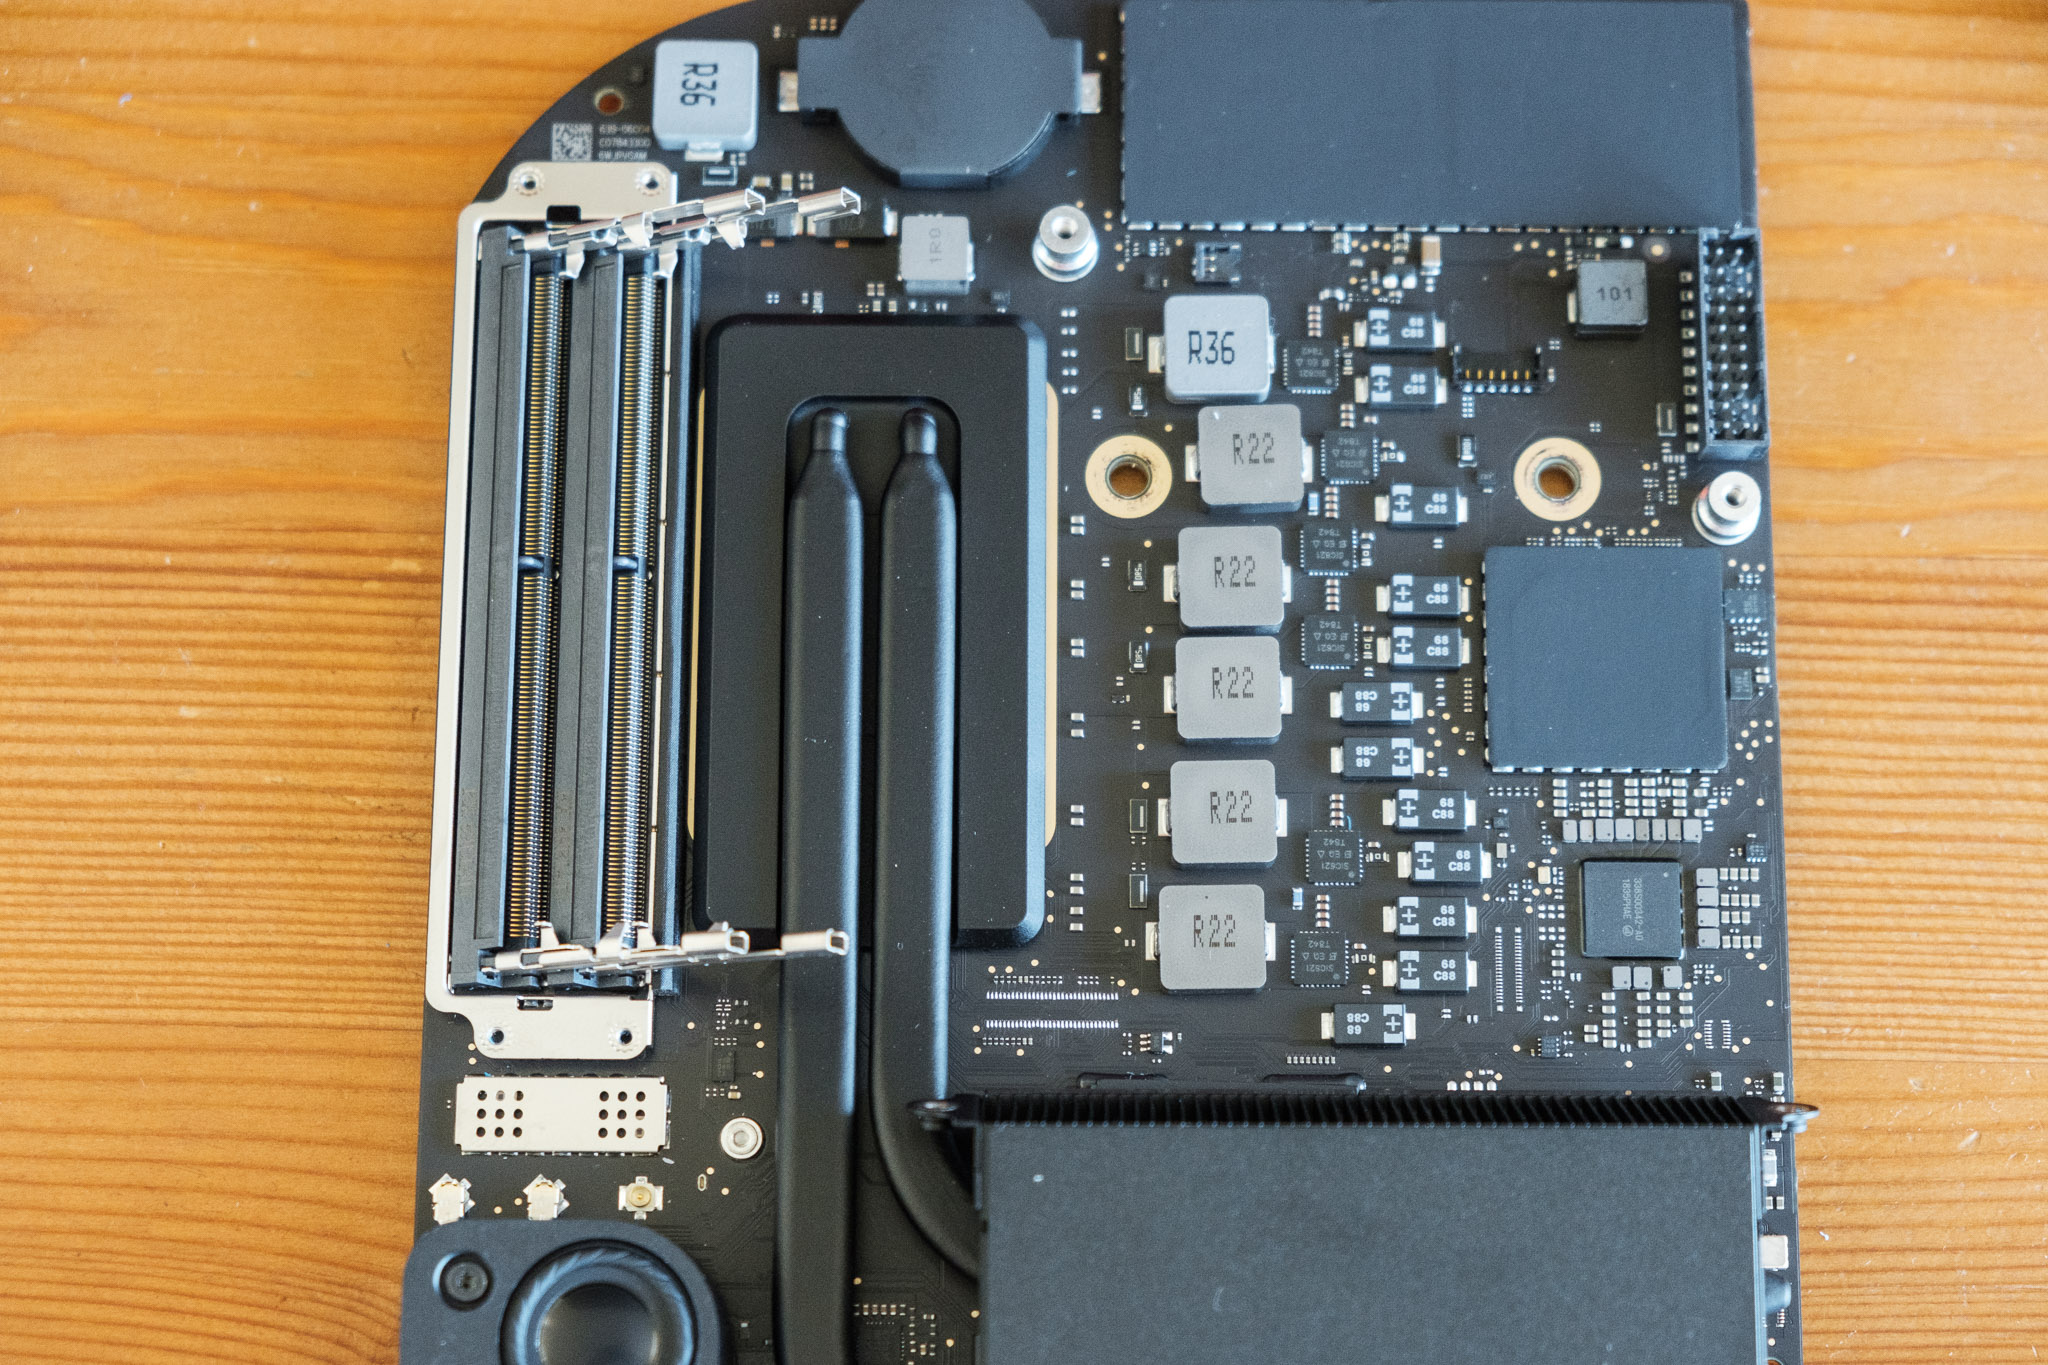
To release the memory, gently spread the thin metal clips holding the modules. The memory will spring upwards when free. Pull out the module. Do that for both modules.
To re-seat the new modules, place them into the slots, ensuring you have the correct orientation for the pins, and press them firmly down in the same angle which they were when popped free of the metal clips. Once in firmly, gently press down on the memory module to fasten it into the two metal clips. It may feel firm, but they’ll click into place. Do this with both modules.


Once you’ve seated both modules, you’re done! Just reverse disassembly and you’ll be good to go! Couple of things to take note of when re-assembling.
The rubber RAM guards slide in through the memory clips. The guards have little tongues that slide through a slot on the clips.
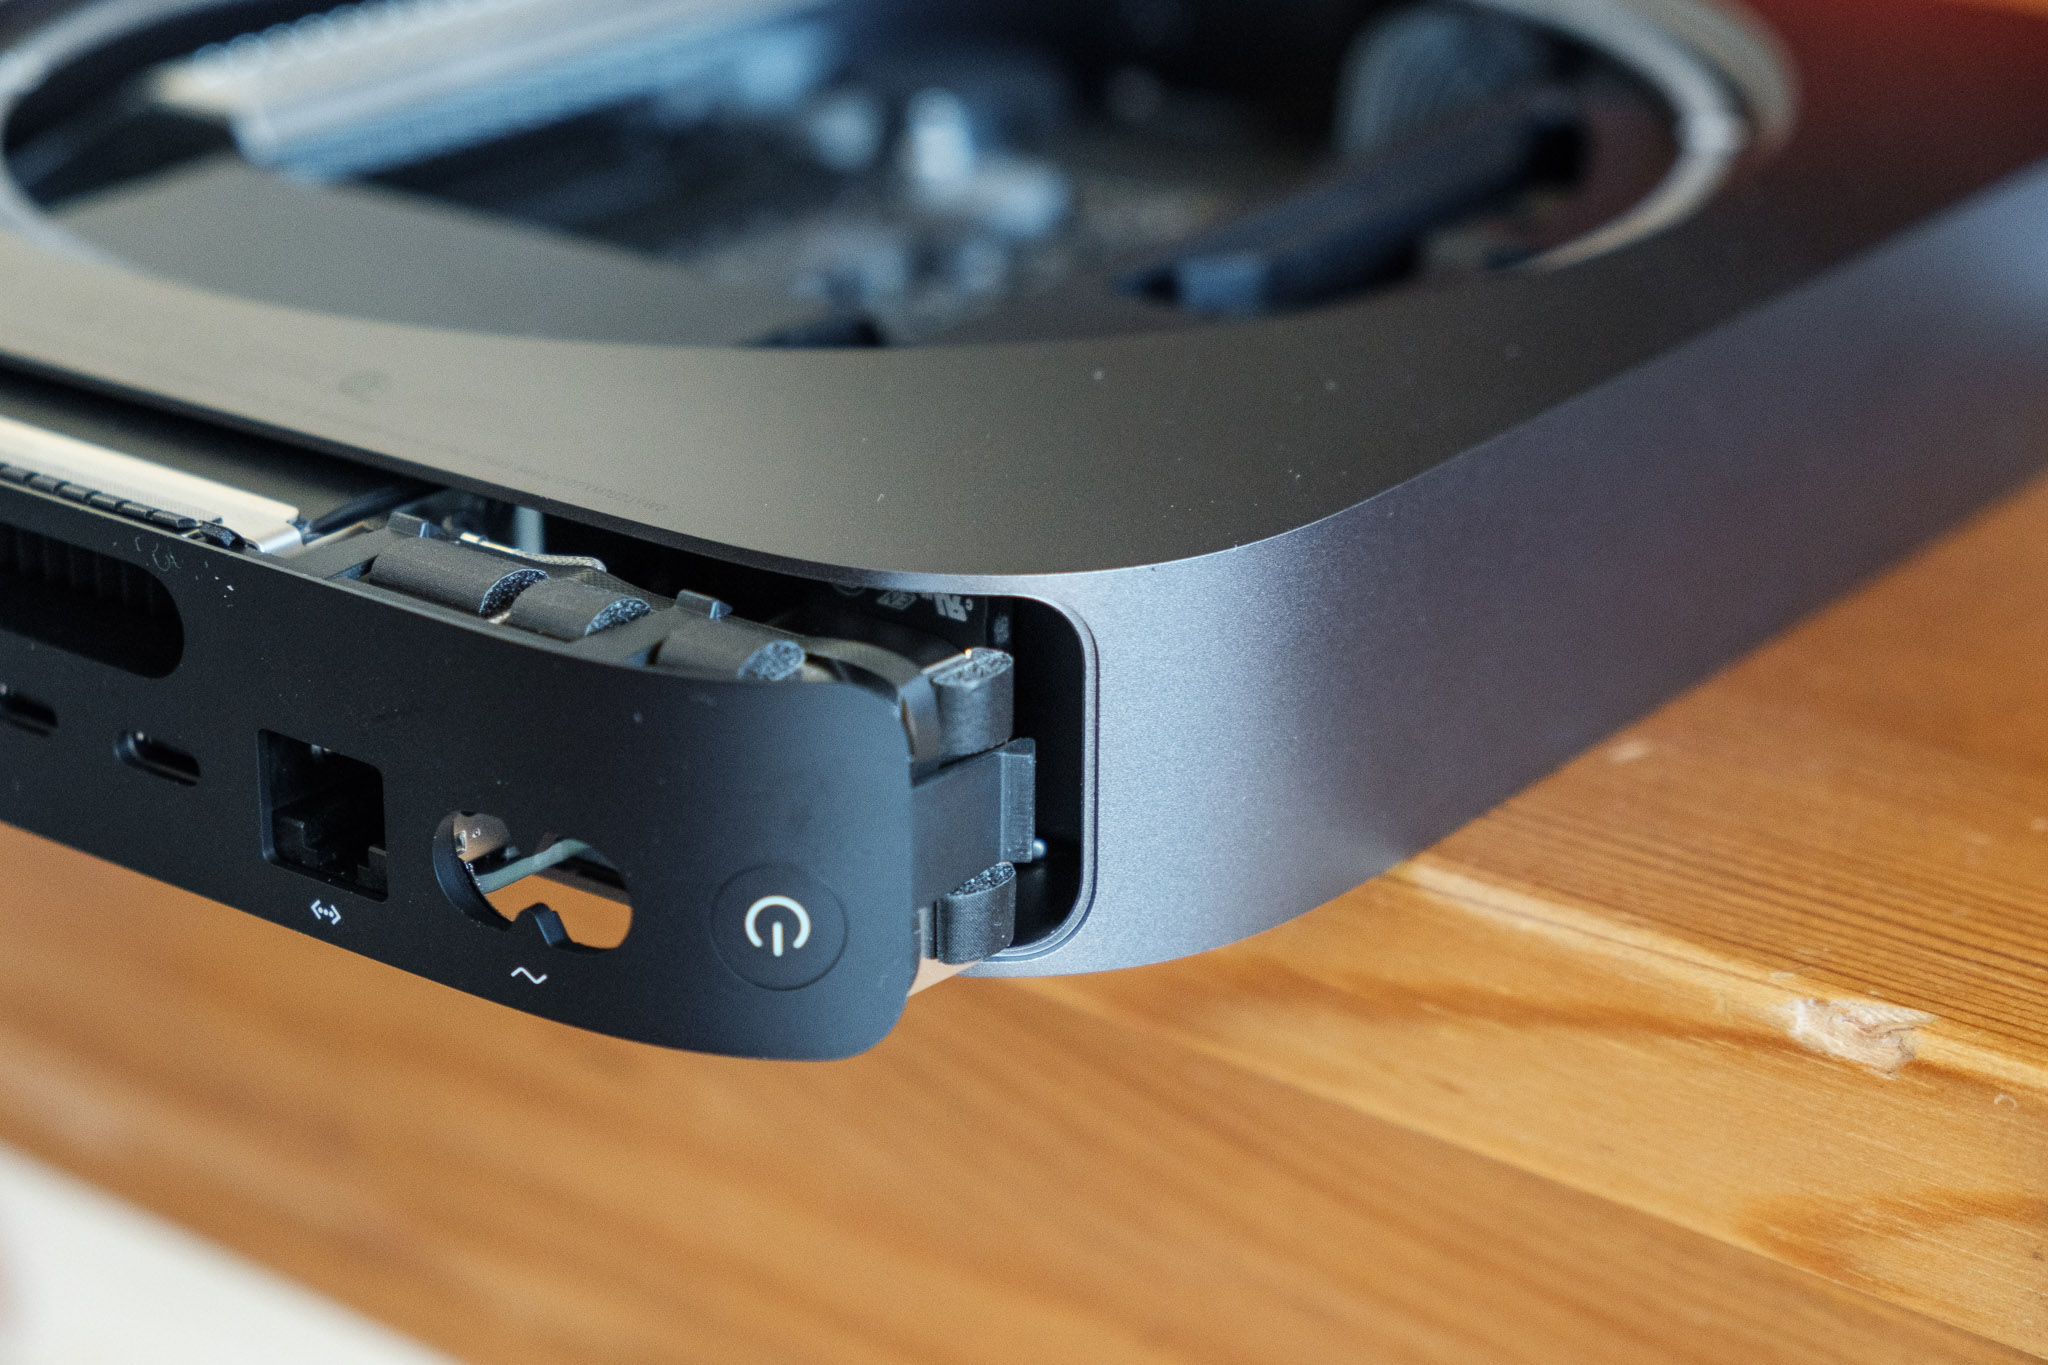
There’s two clips on the side of the ports when you slide back in the logic board. Depressing those a touch when re-inserting ensures you don’t accidentally snap one off if you go in at a slight angle
Don’t forget to reconnect the various cables, especially the fan and antenna cables.

Hope that was helpful. If you have any questions or need clarification, leave a comment and I’d be happy to help!

Gear Review: Ricoh GR: A 2018 Review. Is it still relevant?
A fairly old, $600, point and shoot camera that shoots junk video in 2018 over a phone with multiple lenses and touch screen. Why? Because it’s just more fun that way.
Quick July 2019 update: It’s one year later and the Ricoh GR III is now available. I haven’t had a chance to get my hands on one but I’m considering it. That being said, my GR II is starting to show its age with it’s intermittent start-up issues after a prolong period of inactivity. I still stand by it’s image quality, despite its age, and I can’t say for certain that the GR III is worth the $400 premium (more if you can find the GR II used)
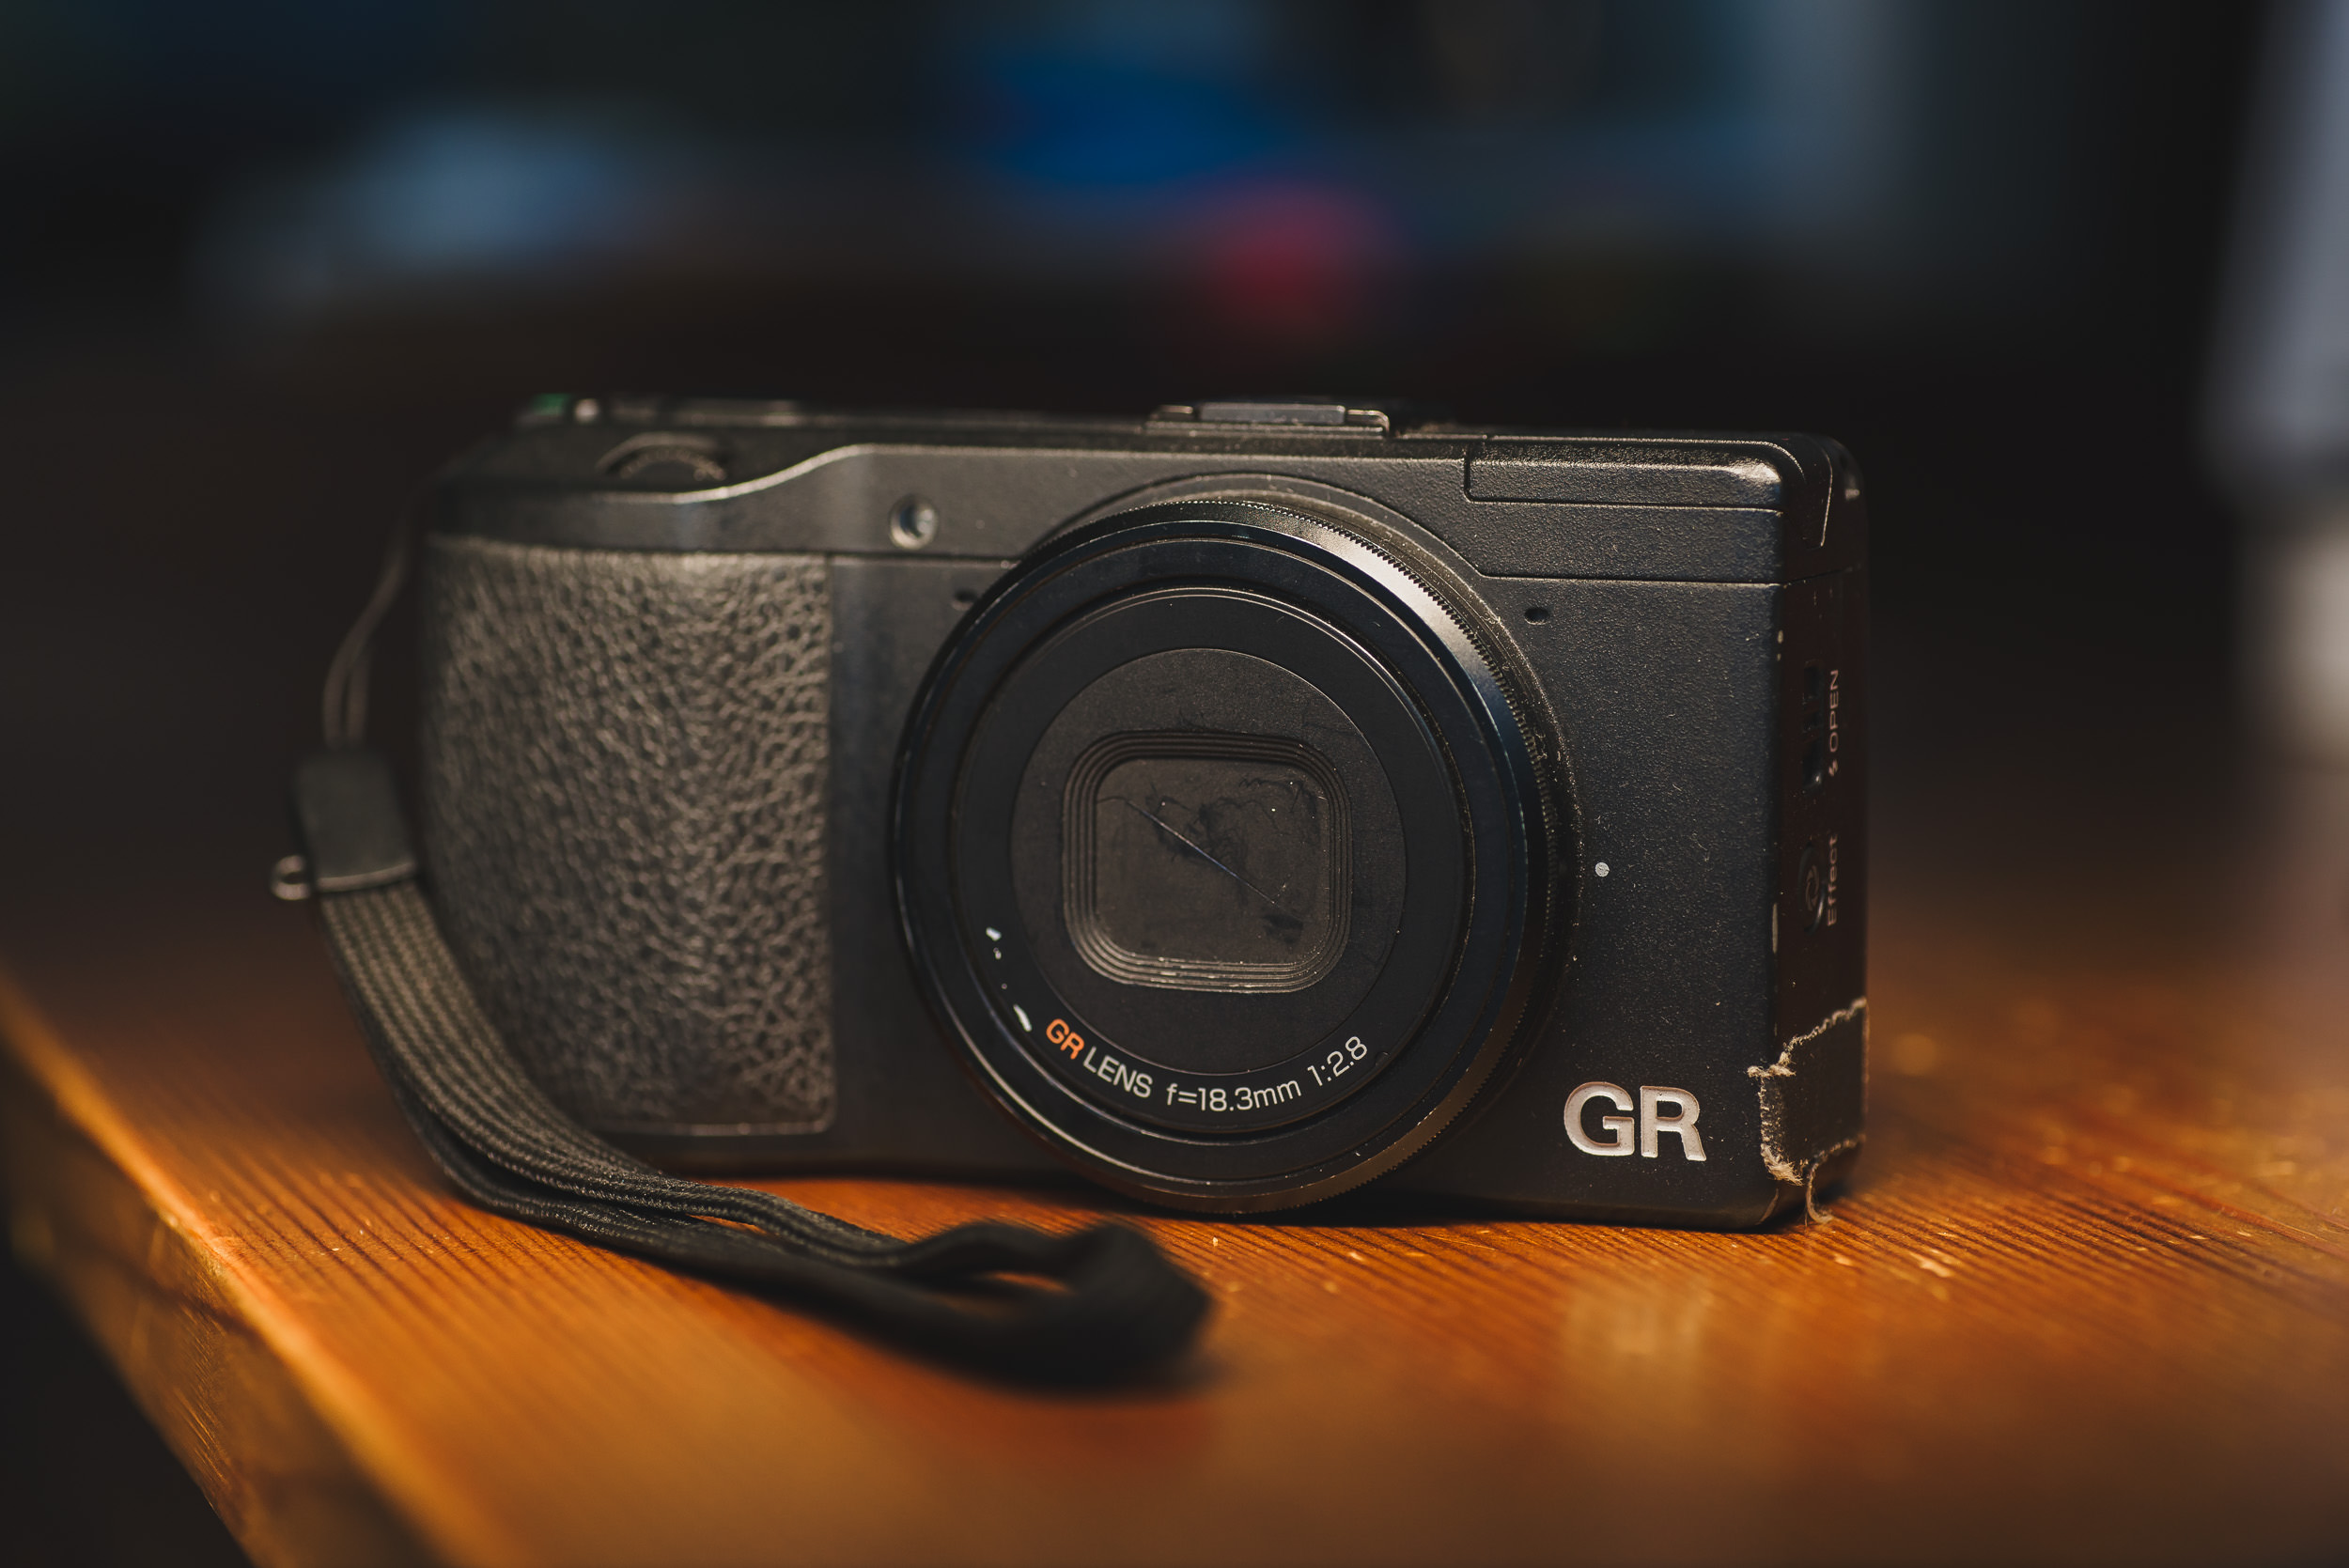
It’s 2018. We have cell phone cameras with 20+ megapixel, multiple fast aperture lenses, and simulated shallow depth of field. DSLRs and mirrorless options with large crop (APS-C) and full-frame (35mm) sensors are affordable and abundant. So why would I want a nearly five-years-old, $500+, crop sensor camera with a fixed f/2.8 lens?
In short: because it’s small, light, discreet, fast, and specialized; producing detailed, flexible, and wonderful images.
(If you’re already sold, pick up the Ricoh GR II on Amazon)

So why did I add, and still use, the Ricoh GR?
Between my various DSLR bodies/lenses and my iPhone, there doesn’t seem like there’s a need for another camera, especially not a point and shoot with 2013 technology. The DSLRs provide me with the utmost image quality, speed, and ergonomics and iPhone is more than capable of capturing snapshots and you can even capture great images with a little know-how. But what about the times in between, when I want more than a snapshot without the tediousness of lugging around a DSLR and a bunch of lenses? Enter the Ricoh GR.

A quick spec run down on the Ricoh GR (and GR II)
+ 16.2mp APS-C sized sensor
+ 18.3mm f/2.8 lens(28mm full-frame equivalent field of view)
+ Smaller footprint than an iPhone 6/7/8/X
- It’s like a stack of three iPhone 5/SEs
+ Weighs 245g
- But only weighs as much as two iPhone 5s! (1.5 iPhone Xs for a more modern comparison)
- Doesn’t have a flippy/tilty/touch screen
- Nor does it have a viewfinder
- Shoots some of the worst video I’ve ever seen
- The original GR doesn’t have wifi (though the GR II* does)
*The GR II is 99% identical to the GR. The GR II features a few feature upgrades such as AF during video recording, a few effect modes, a subtle bump to the max shutter speed at f/2.8 (1/2500 from 1/2000), and the aforementioned wifi.
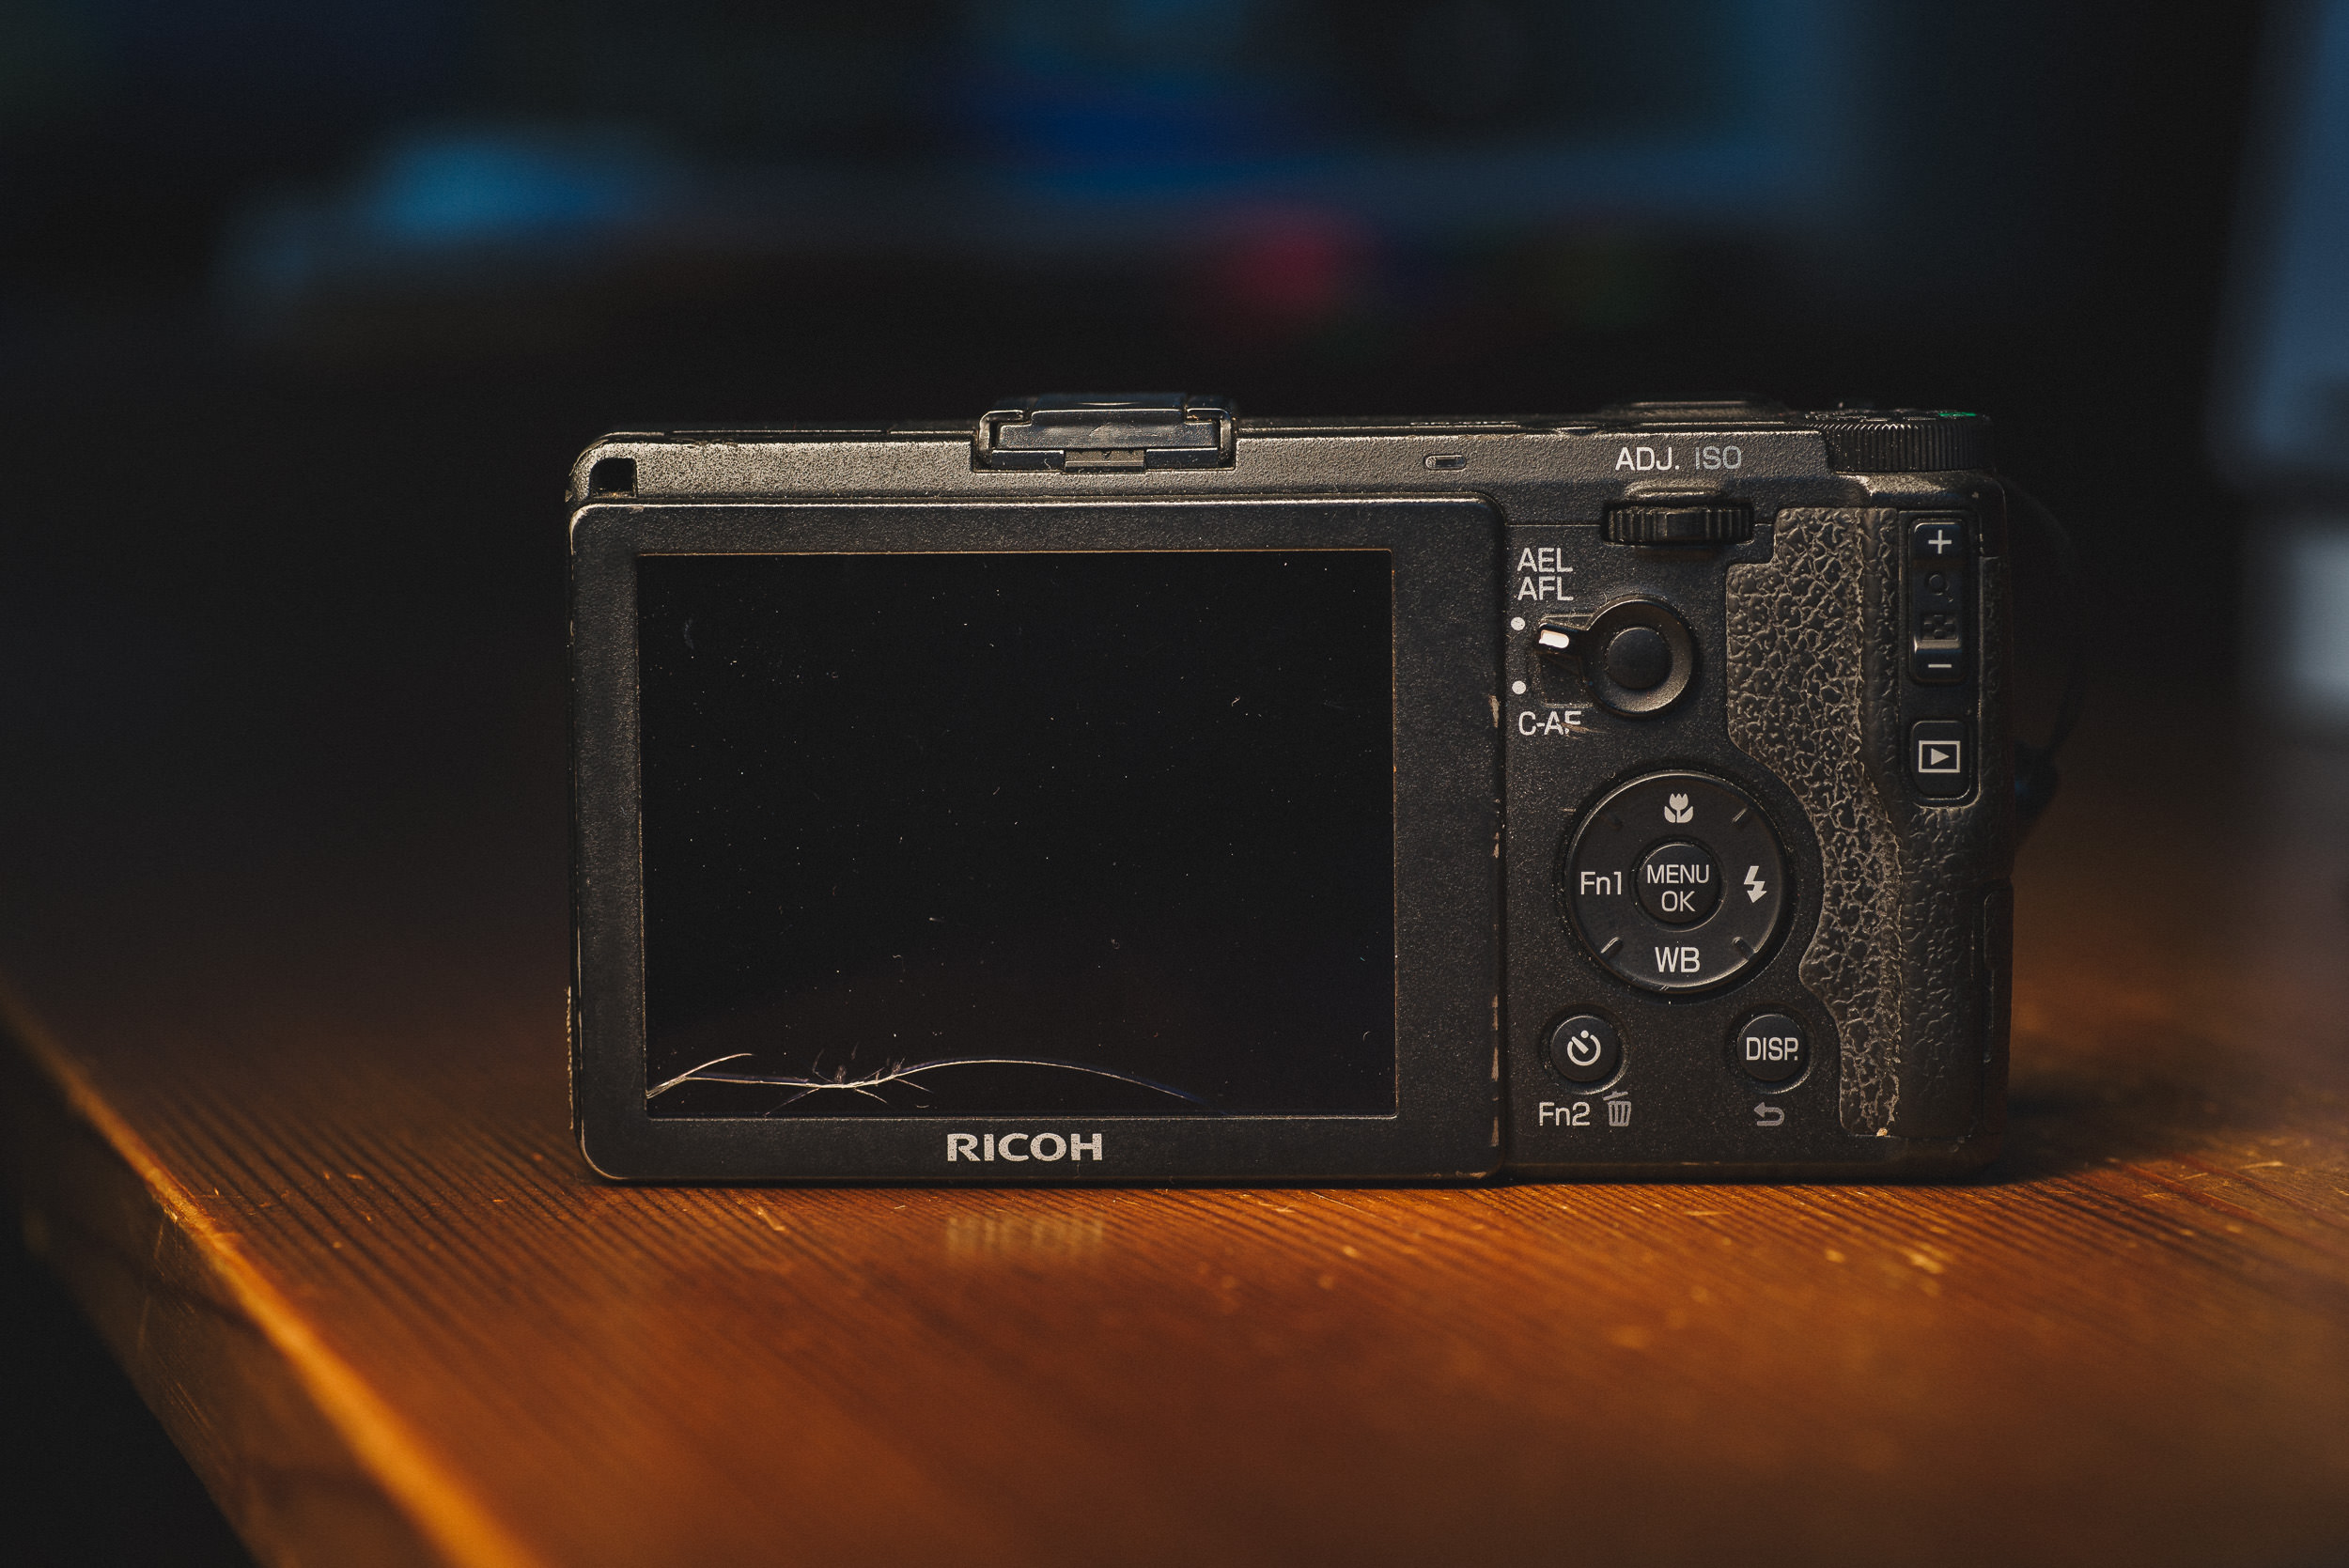
Appearance, Size, Handling

Alright, I’ll admit it’s pretty ugly. While I’d love something with the retro stylings of Fuji’s X100/X70 series or just a clean straightforward design like the Sony RX100s, the less than appealing, slightly janky, appearance of this camera is actually something desirable. It’s incredibly unassuming and completely unintimidating which is invaluable when you want to discreetly photograph a scene or subject.

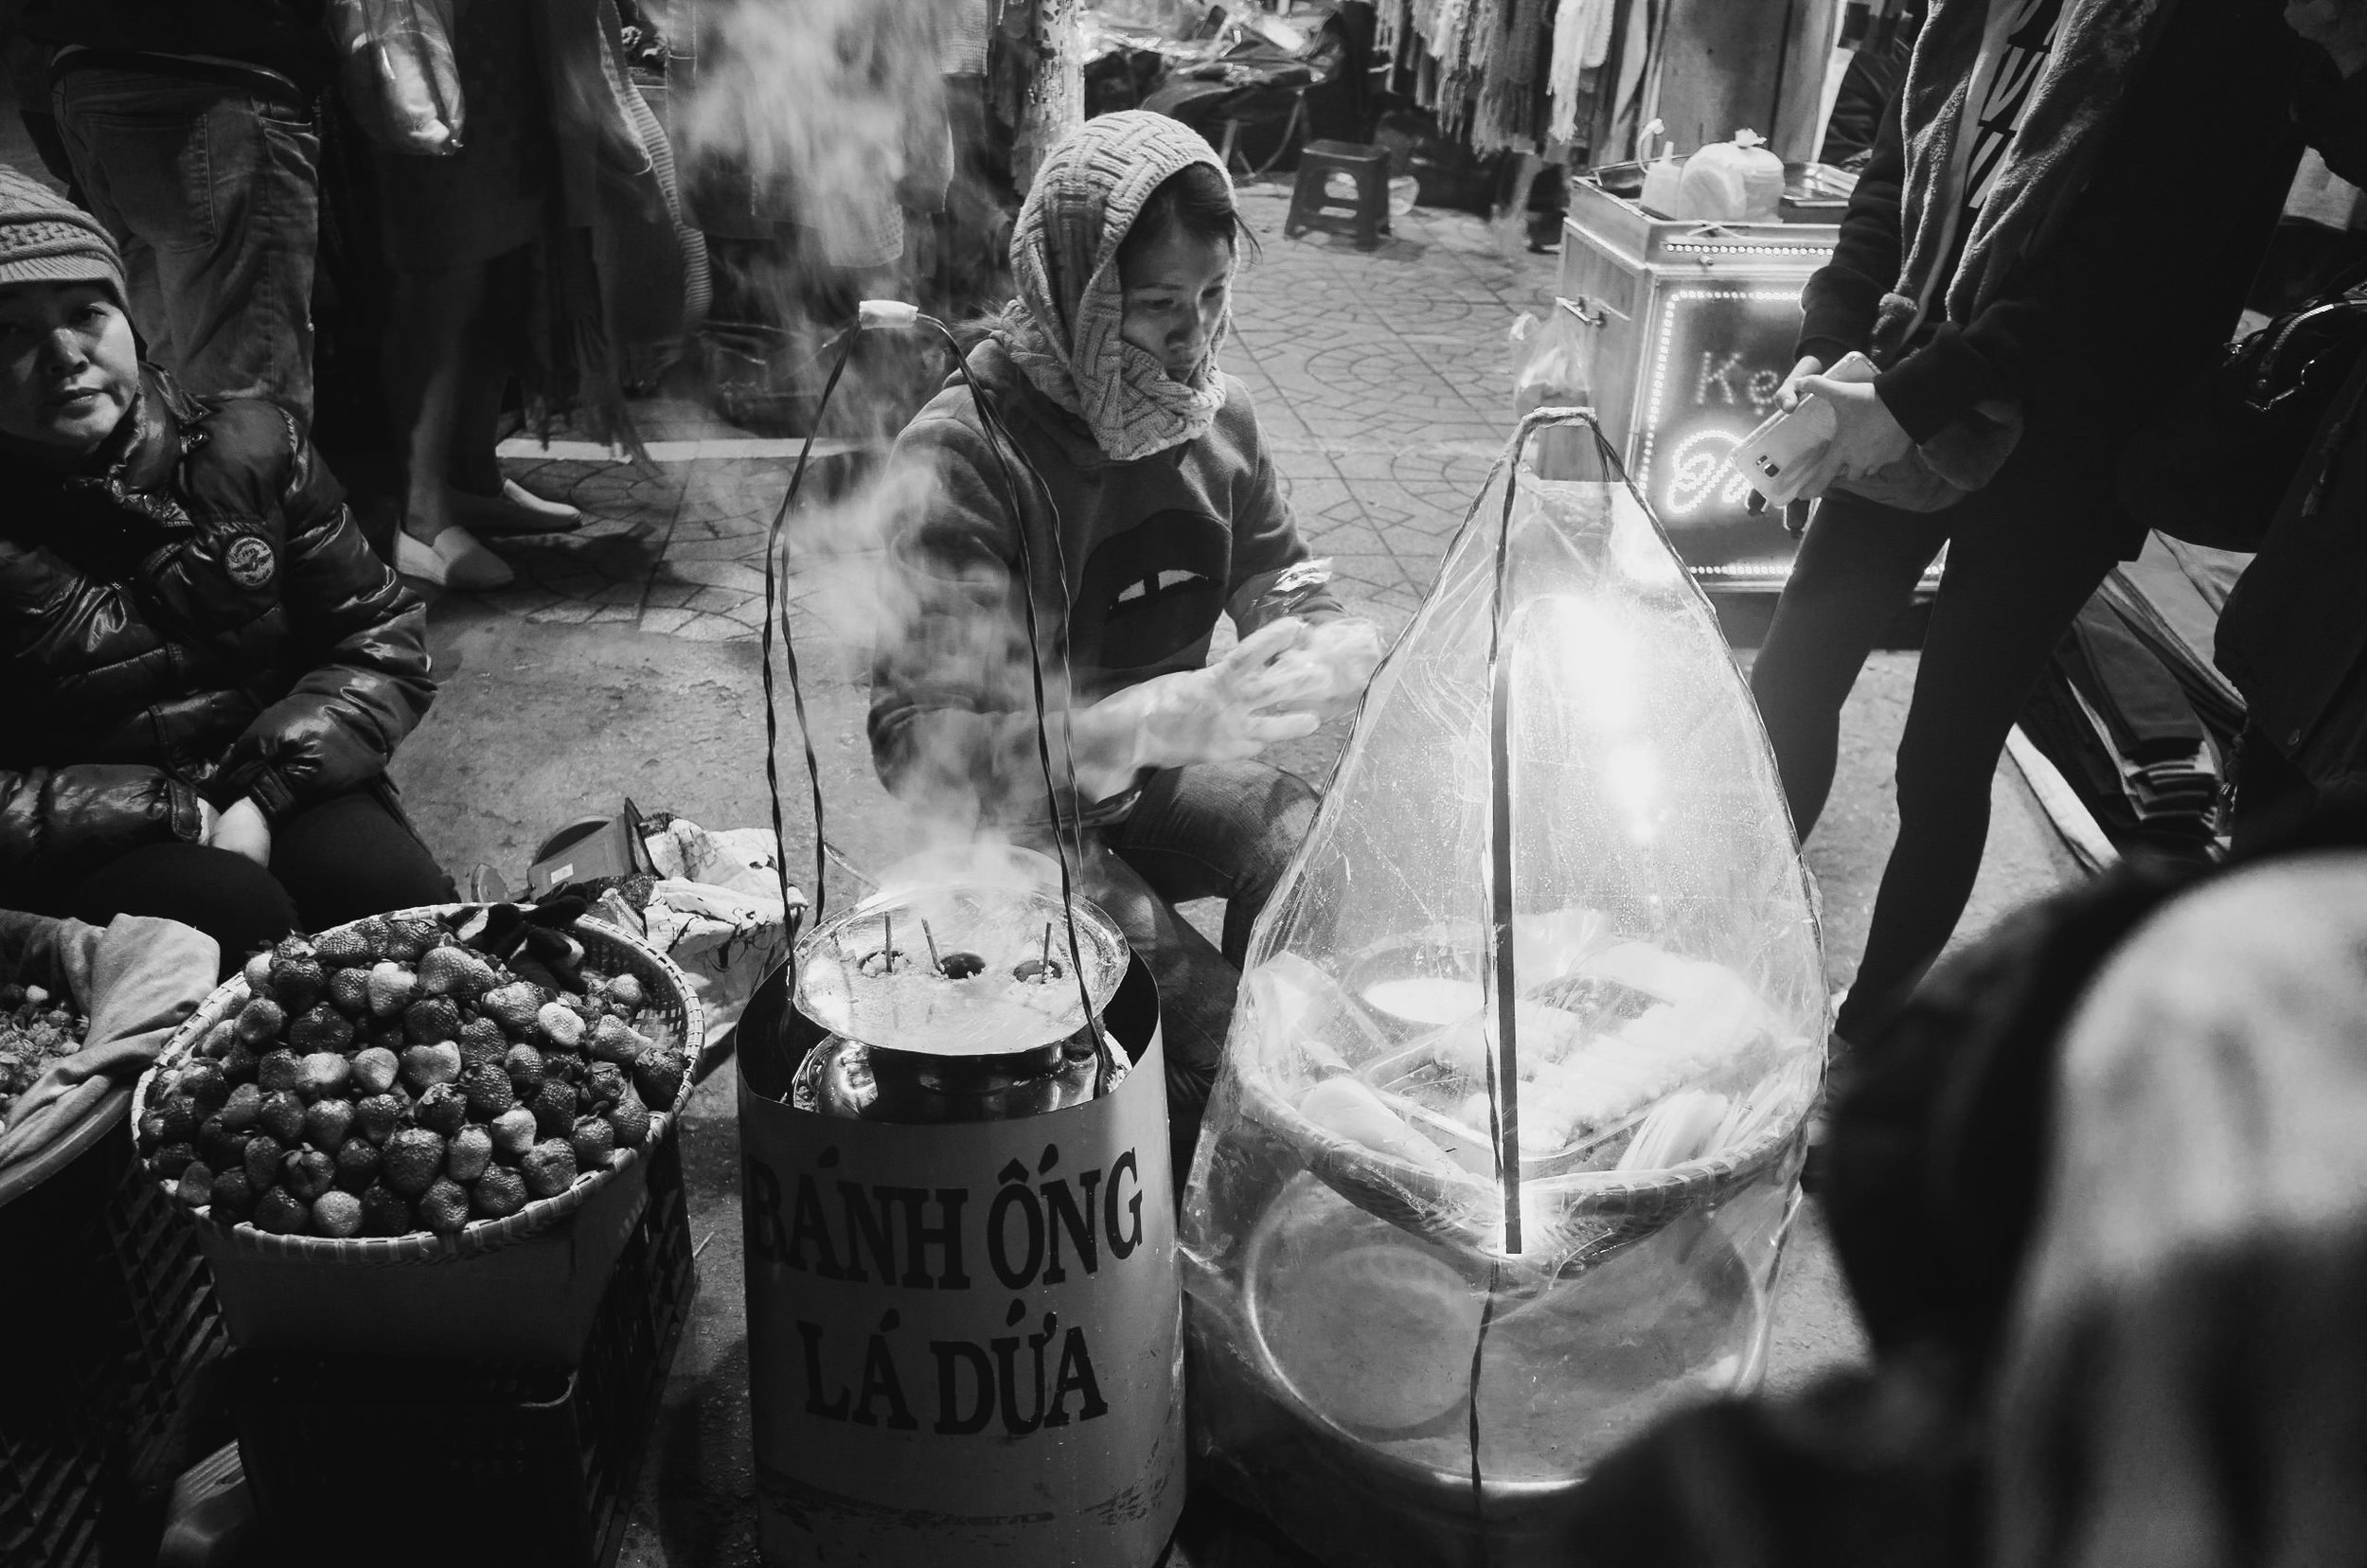

With these types of images, you need to be close. Standing from afar with a telephoto lens lacks that feeling and presence that shooting closer with a wider lens possesses. A DSLR will catch the eye of your subject or someone in your scene due to its size and “professional” appearance, thus disrupting the natural-ness of the photo. This makes it an ideal camera for stealthy and inconspicuous street photography.
The camera is small. Easily the smallest camera to feature an APS-C sensor and measures up well to it’s micro 4/3 and 1” sensor competitors. This is nearly the entire reason I added this camera to my collection.
Being able to fit a powerhouse of a camera into practically any pocket is nothing short of incredible. While there are stunning cameras that are pocketable in a large jacket pocket or small purse, this is little thing will fit in all but the snuggest of jean pockets (then again, a Motorola Razr can barely fit into those). Despite it’s fairly diminutive size, it has a fairly sturdy feeling build but doesn’t feel heavy.
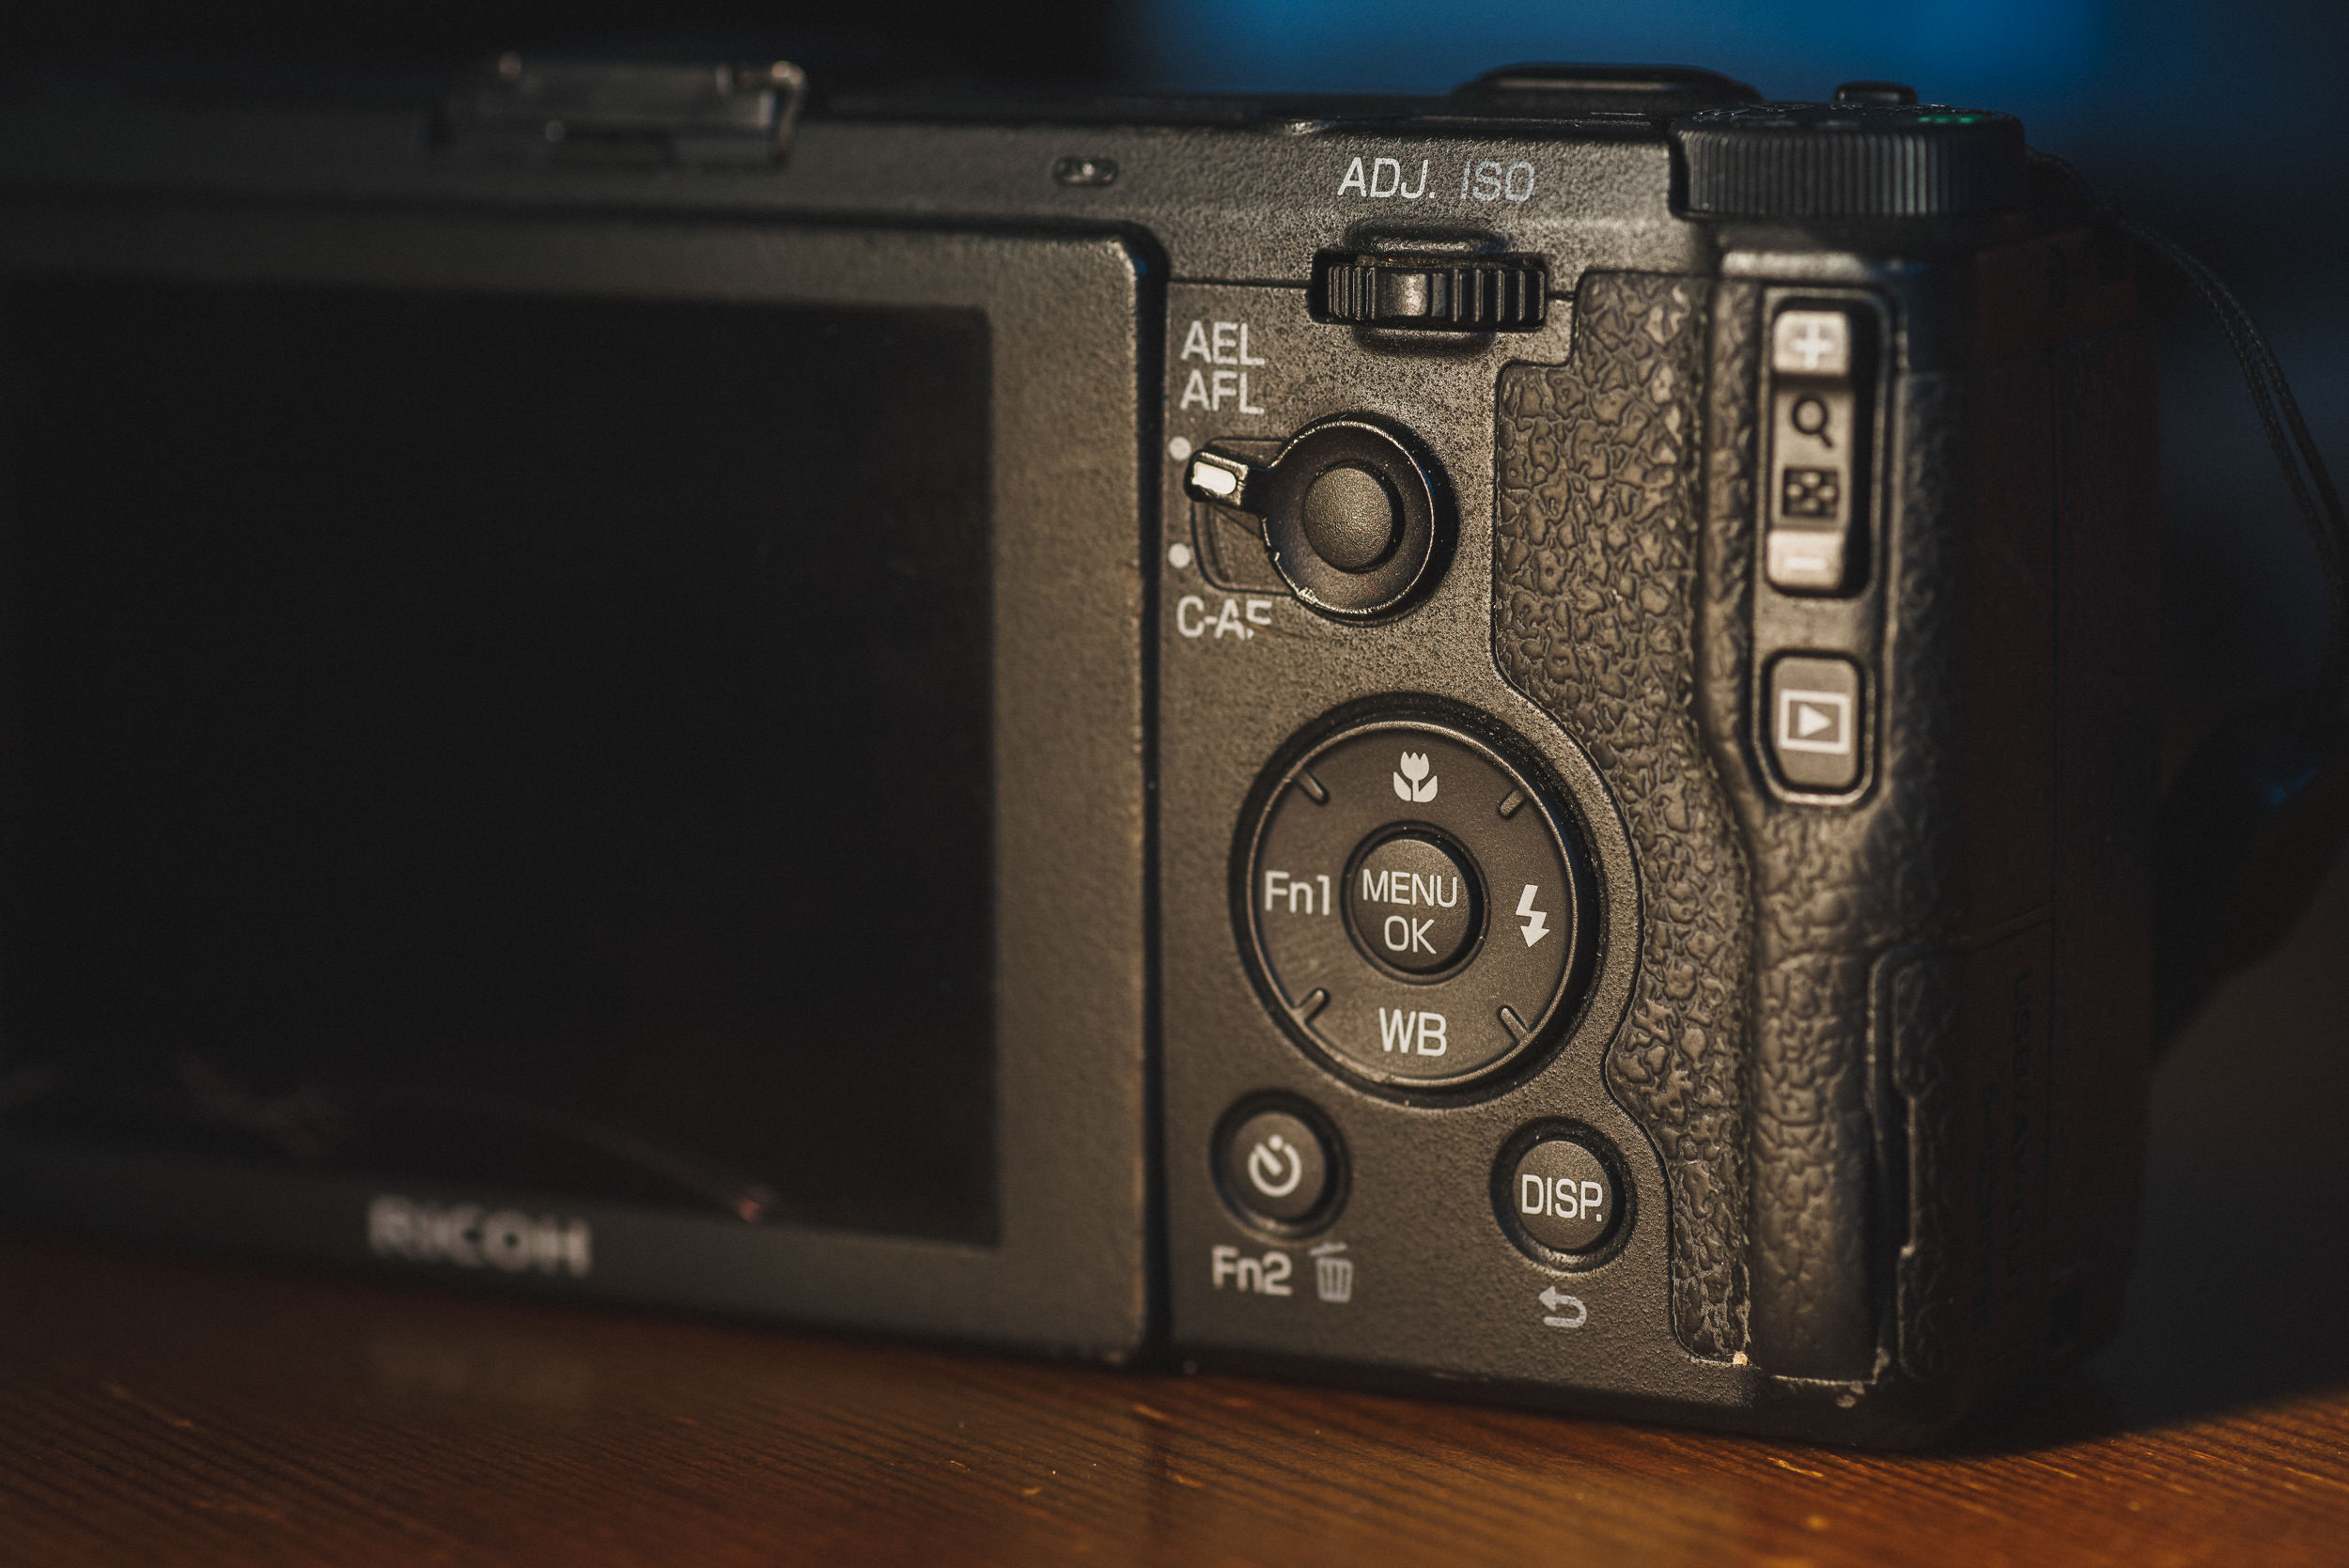
The shape of the grip is very well designed, fairly chunky and grippy, and is very comfortable to hold for long periods. The front control wheel and rear toggle/rocker/button, along with the couple of programmable function keys, allows for easy one-handed operation and control over most of the necessary settings.
Usage, Performance, & Image Quality
As mentioned above, the controls and customization are fantastic. With the front wheel, I can control my aperture (or shutter speed in Tv) and the rear rocker can be used to set my shutter speed or pressed to access a quick menu of options where I can set my ISO, change my metering mode, focus mode, enable continuous shooting, or enable a handful of bracketing options. One of my favorite features is the “One Press M Mode” feature (enabled in the menu). This feature can be set to Aperture priority, Shutter priority, or Program. I have mine set to aperture priority, which transforms the exposure compensation buttons to an “enable Aperture priority” button while shooting in M.
For example, I’m inside shooting at 1/60, f/2.8, ISO 100, I then step outside to broad daylight and my exposure is way off as I should be at 1/2000, f/2.8, ISO 100 for a proper exposure. Typically I’d click my shutter down to make up for those 5 stops (15 clicks at 1/3-stops) but with nifty feature, I just press + or – on the exposure compensation and it adjusts my shutter speed to the proper exposure as if it were in aperture priority. This makes changing between drastically different light levels a lot more manageable without the inconsistencies of using just aperture priority.

The Ricoh GR was designed with street shooters in mind, not just in its small form factor and basic appearance, but also through its rich feature set. Snap focus is a unique focusing mode that sets the lens to a pre-determined focus distance. This is perfect for street shooting since when paired with a narrower aperture like f/8, you can gauge the distance of your subjects and quickly take a photo when they fall into your focus range and not worry about hunting for focus. Predictability and reliability are things I really value for focus and snap focus definitely delivers there. You can also enable it to automatically use the pre-set snap focus when you press down your shutter all the way without focusing, so you always have snap focus at your disposal.
Not everything is perfect about the AF system, while it’s pretty accurate and offers a couple of different AF modes covering various sizes, it is almost useless when it comes to tracking a moving subject and it could perform a bit better at focusing in low light. Good AF technique helps, but focusing in dimly lit situations (~ISO1600, f/2.8, 1/60 sort of dim) can be slow and difficult.
The images it produces though are fantastic. The 18.3mm f/2.8 lens and sensor produce surgically sharp images. They might even be too sharp sometimes. Center sharpness is off the charts, while edge/corner sharpness is great at ~f/5.6.


The RAW files are flexible, although a little flat and it took a bit of work before I found an edit that worked well for me. The JPEGs it produces with the Positive Film effect (slightly tweaked to give it quite a bit more color) look great right out of the camera, so I’ve developed a Lightroom preset to match them (send me a message if you're interested in it). They’re not exactly the same, but I like it that way.
Dynamic range and ISO performance, arguably the two biggest differences between cell phones sensors and larger sensors. Dynamic range, for those who aren’t familiar, is the difference of light an image sensor can capture in a single frame. Our eyes are capable of looking through a window to a sunlit scene while still maintaining visual acuity to items indoors/in shadow, but cameras can struggle to capture such bright and dark details in a single frame. Being so accustom to the newer Nikon/Sony sensors, I frequently forget that not every RAW image has the amount of dynamic range that my D600/750/850 do, but I was pleasantly surprised with the GR’s dynamic range. I can comfortably push an exposure about 2, maybe 3 stops with minimal loss in detail. The highlights also retain well in the RAWs, even when they appear to be clipped.


Conclusion
Pros
Incredibly compact size
Affordable (especially if purchased used, where the GR II can be had for <$400)
Great image quality
Unique and useful controls
Cons
You can shoot better video with potato
The sensor, while capable, shows its age when you push the ISO
Autofocus system in low light and tracking high action is lacking
It's not winning any beauty contests
My front scroll wheel acts up sometimes, jumping from f/2.8 to f/13 then back to f/5.6.
The Ricoh GR has been a great little addition to my kit but better yet, it’s been an excellent addition to my pocket. At $550 (USD, as of July 2019) for a new Ricoh GR II, it’s a capable point and shoot and the power and size ratio can’t be beat.
If you liked this review, I'd appreciate it if you make your purchase(s) through the affiliate link below. Thanks!
More Sample Images


Workflow Tip // Cull Faster with Photo Mechanic: Photo Mechanic + Lightroom Workflow
Lightroom not fast enough for you? Have Photo Mechanic but don't find it quite as streamlined as you had hoped? Check out this guide on how I optimize Photo Mechanic for speed when culling through thousands of images and integrate it into my workflow with Lightroom.
For high volume photographers, culling photos can be one of the more time consuming tasks during the editing process. Lightroom, while it's an powerful RAW processor and library management program, its speed and efficiency leaves a bit to be desired.
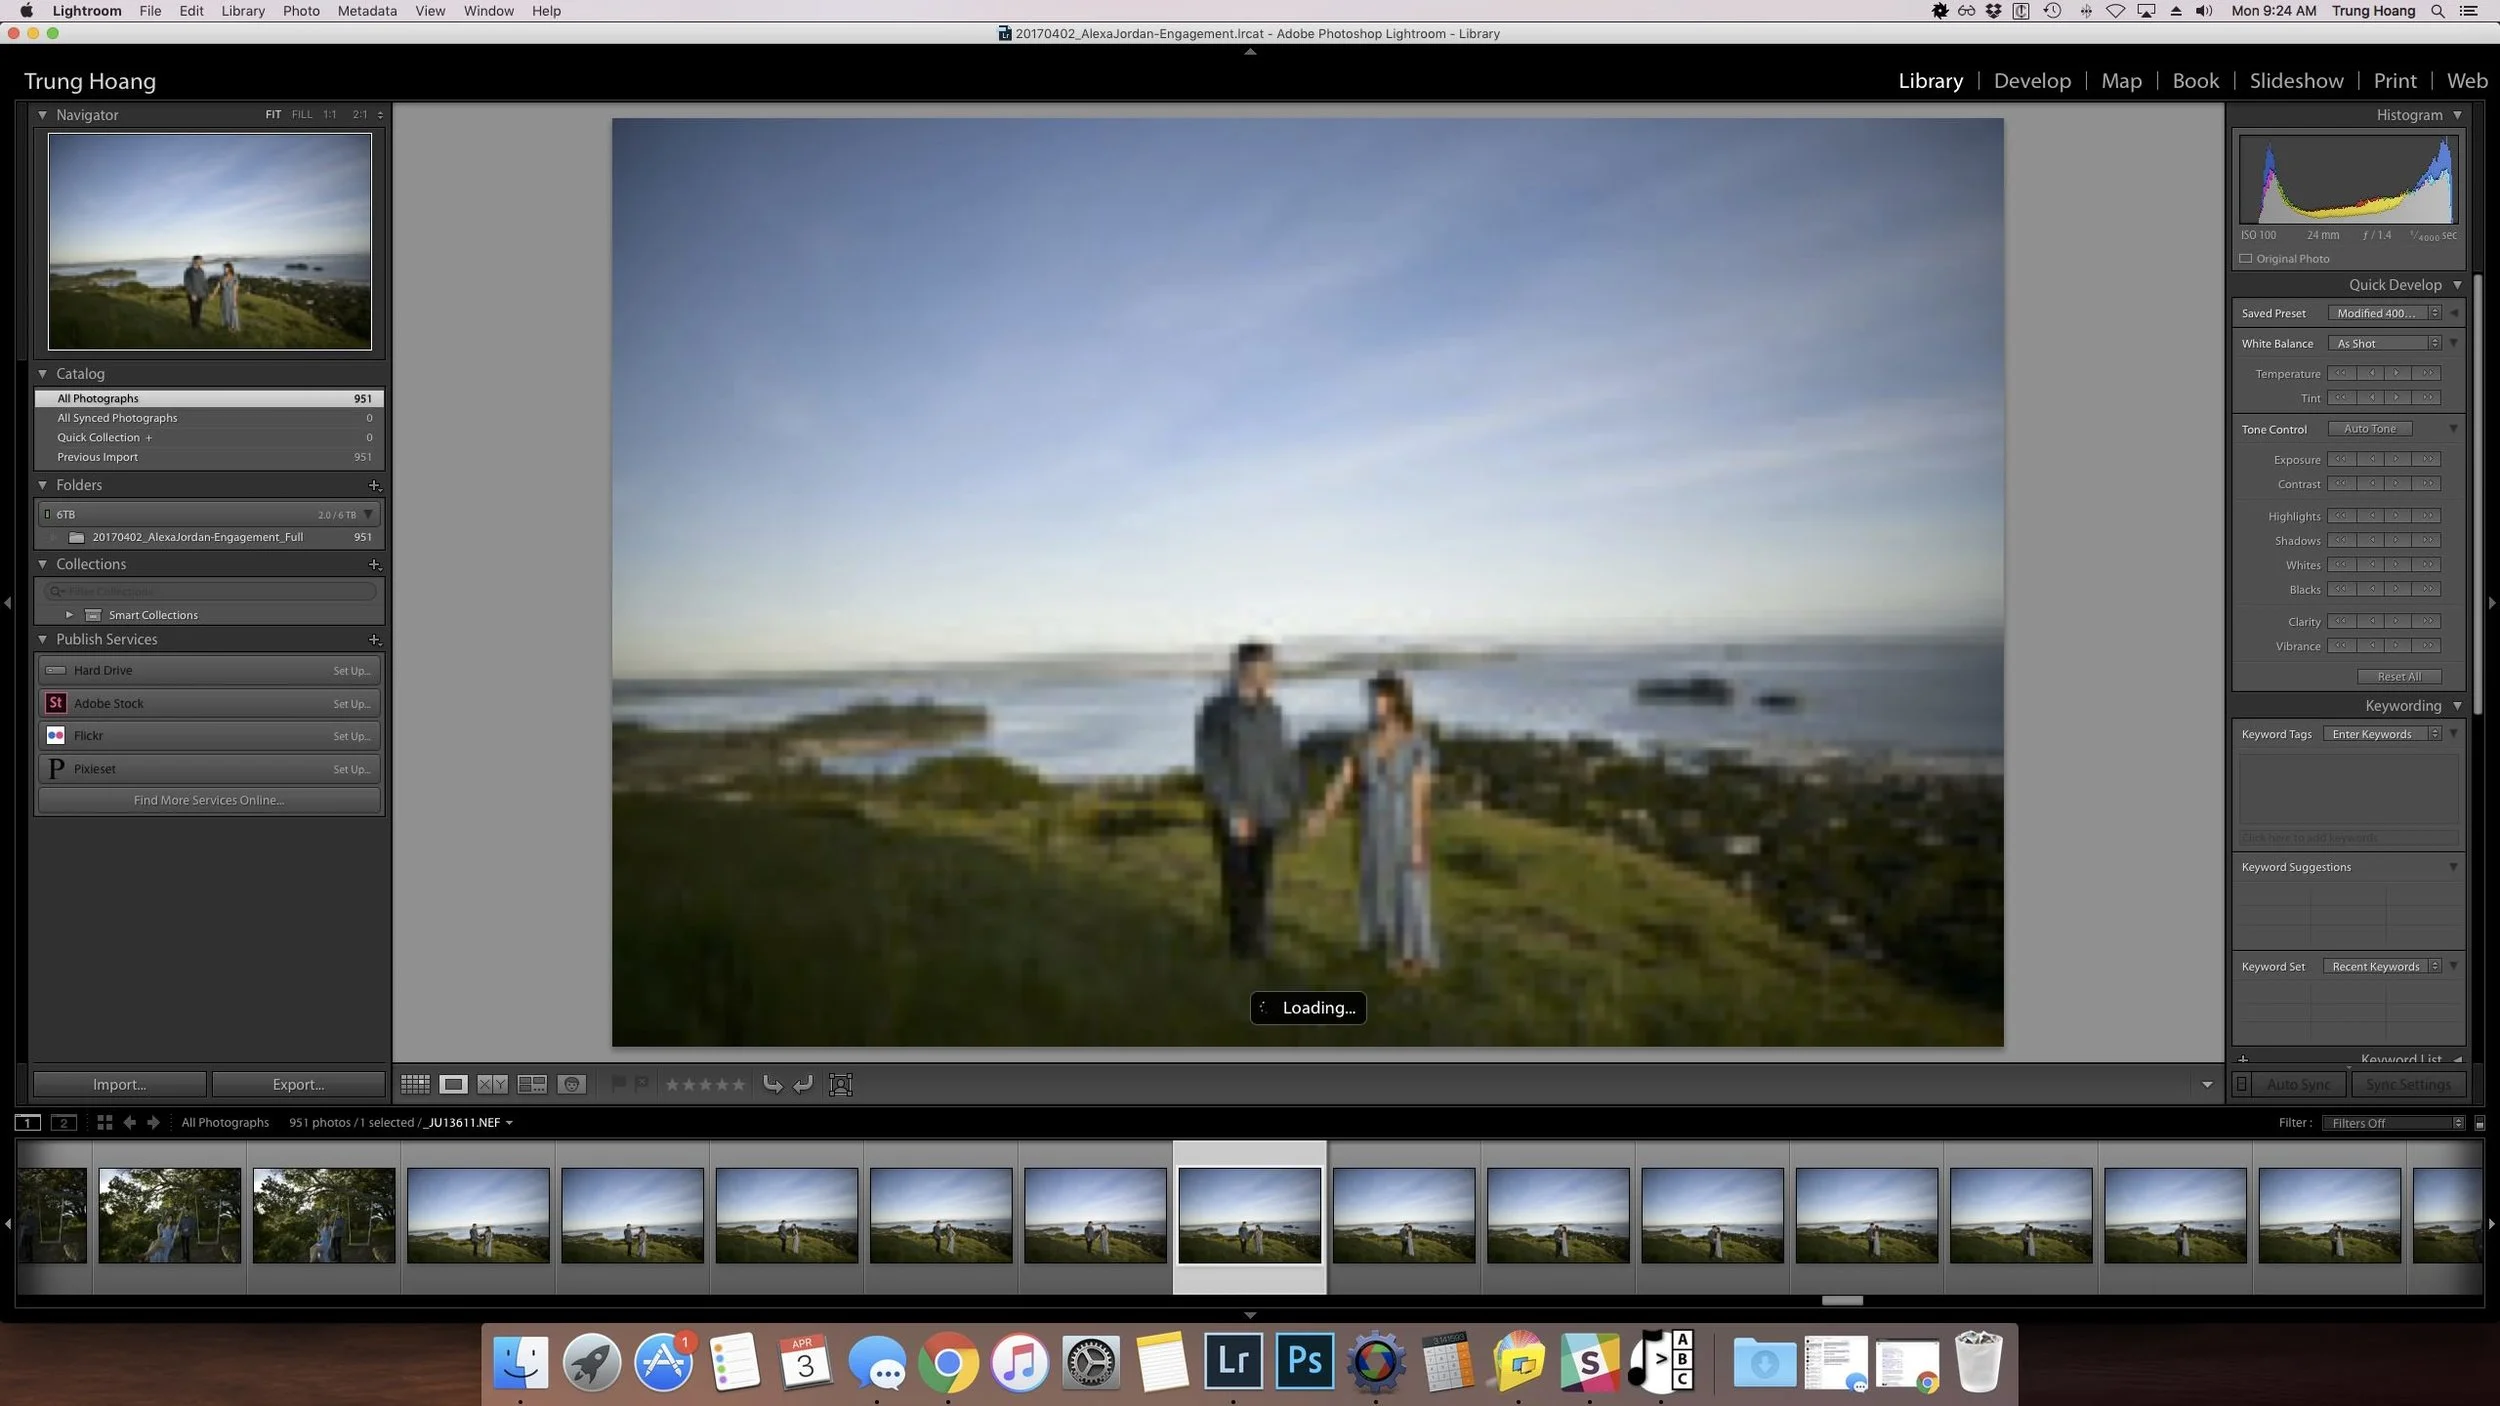
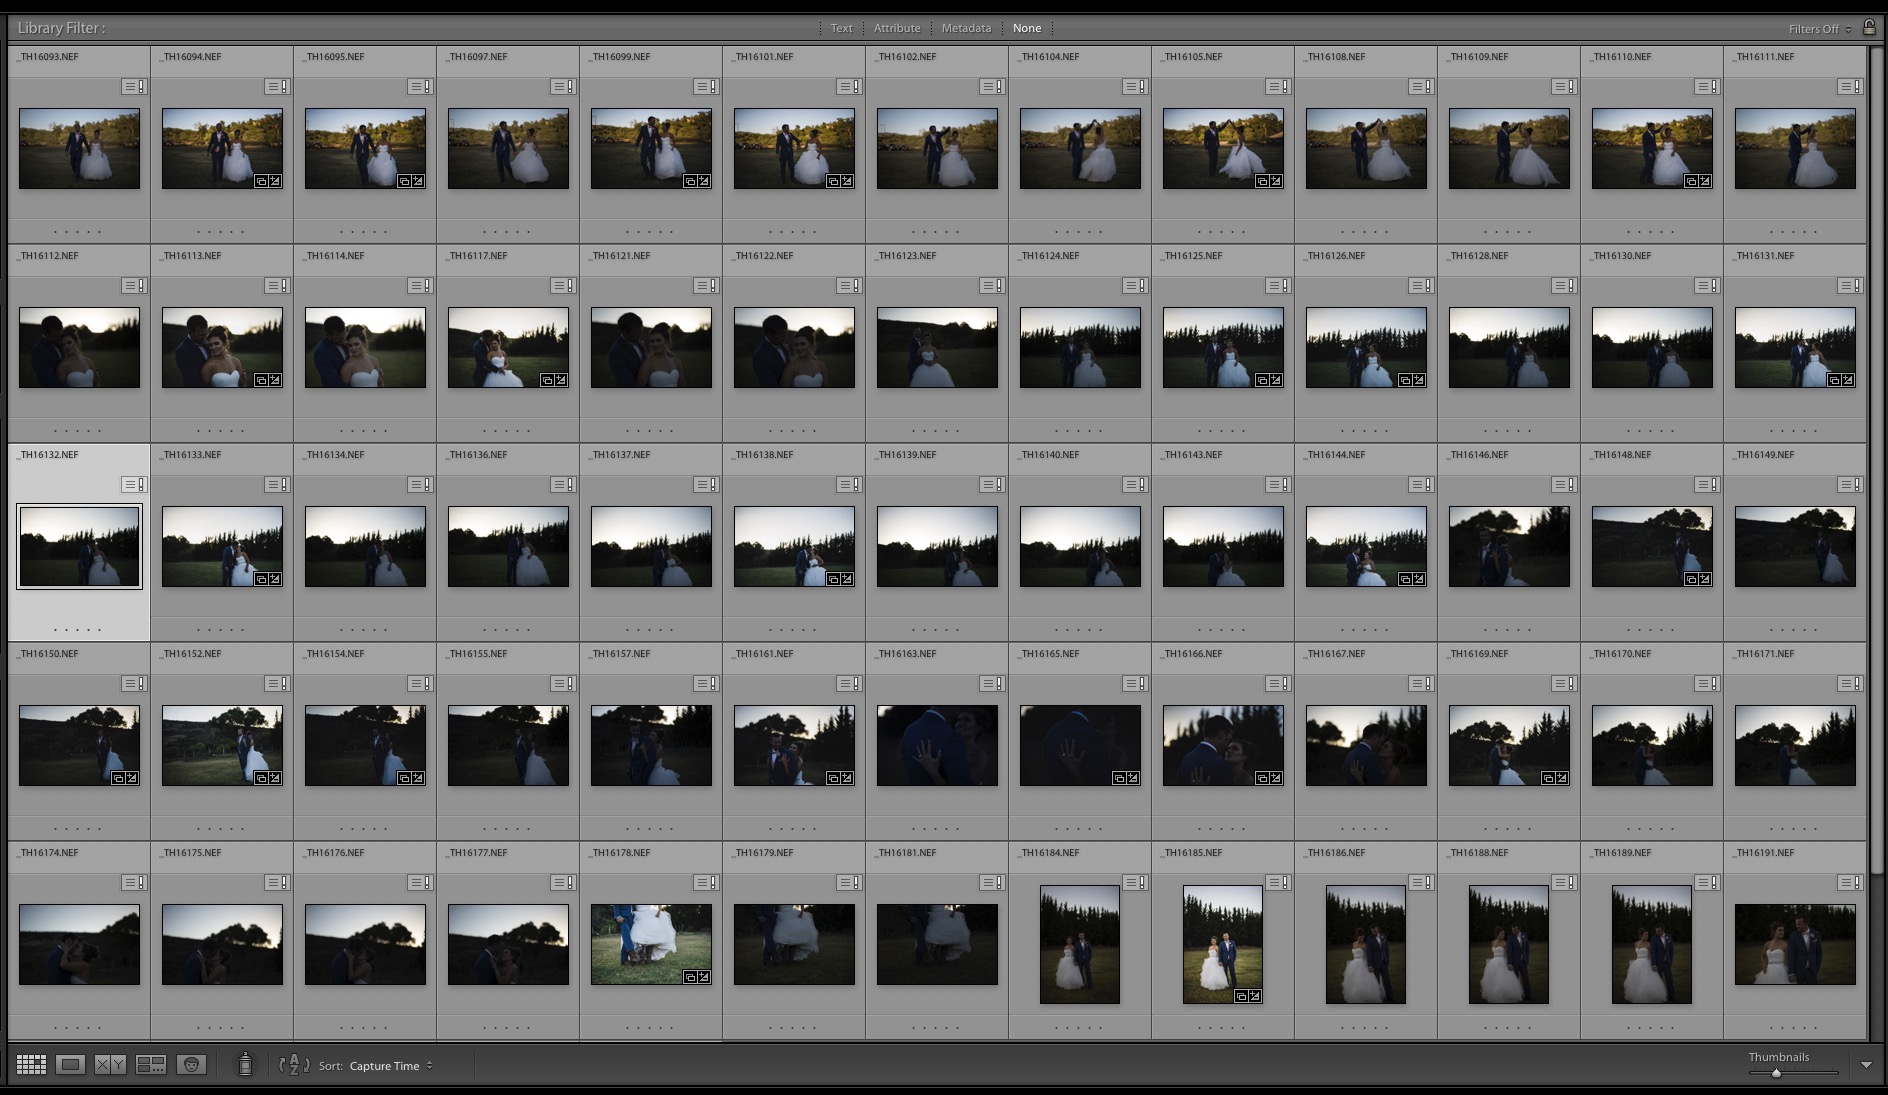
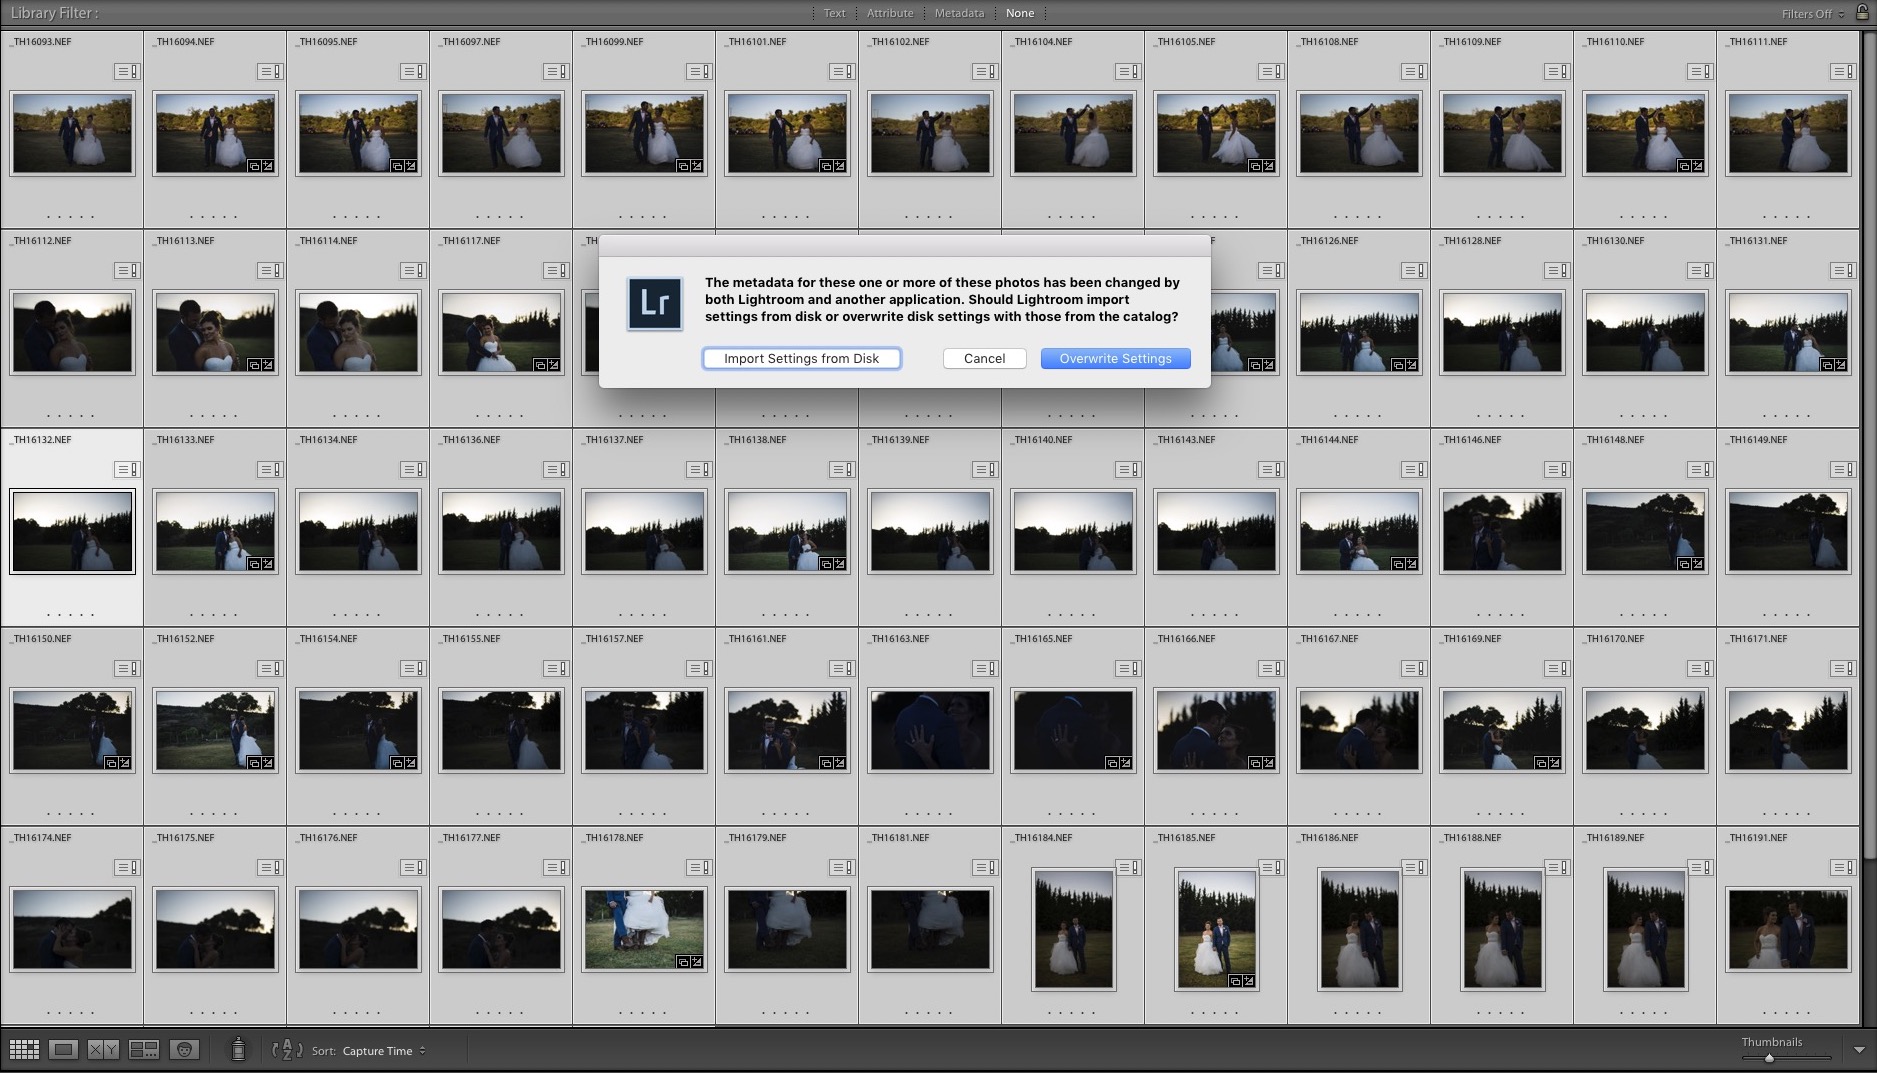
Does this (unfortunately) look familiar?
Flipping through and culling 3000 images to the delivered set can take forever as you wait 3-5 seconds for the preview to load. While 3-5 seconds doesn't sound like much, that's an additional 150-250 minutes just to go through all of the images! When you're simply culling for sharpness and content, speed is crucial.
One of the best ways to speed up that process is by using Photo Mechanic (or another RAW viewer such as FastRawViewer). Photo Mechanic allows you to quickly breeze through your RAW images, utilizing the embedded JPEG previews to render full-sized previews instantaneously.
Skimming through about 30 images in 8 seconds with zero lag.
As you can see in the quick video above, Photo Mechanic is fast. The source images in that example are on a RAID-1 external hard drive, so I don't even have the benefit of the super fast random reads of an SSD. You'll throw your computer out the window waiting for previews to load in Lightroom (and don't get me started on waiting for the 1:1 preview to load in case you want to zoom in).
The one downside is you're unable to view your images with any exposure adjustments or edits applied. This can be a little problematic when trying to inspect detail on intentionally underexposed images, but for me that's usually a relatively small number of images.
Setting up Photo Mechanic
In order to get the most out of Photo Mechanic, you have to optimize it for speed through a few settings.
Bear in mind this guide will be done in MacOS. If you’re a Windows user, the settings should be similar and the locations of things should be relatively similar, but may not be exact.
Once installed and opened, head into your ‘Preferences’
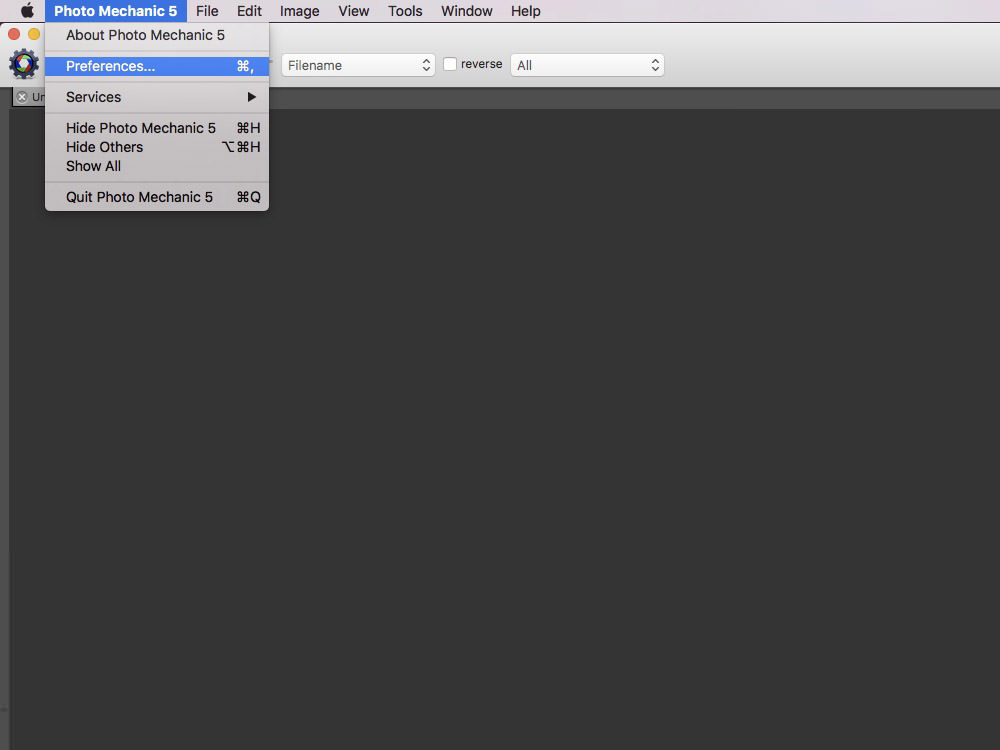
The first thing you want to decide is whether you’d like to work with Labels or Stars in Lightroom. Once you're in ‘Preferences’, head to Accessibility. On the right hand side, you’ll see ‘Single Key Shortcuts’. From here you can select whether you’d like your number system to change it’s ‘Color Class’ (which LR will interpret as Labels) or ‘Rating’ (which LR interprets as Stars).

Labels allows for a bit more flexibility, since you’re able to assign names to each of the labels. If your goal is yay or nay, this doesn’t make a huge difference. If you’d like to use the labels and rename them, head to General in the drop-down menu and you’ll be able to change the color and label name associated with numbers 1-8 (color classes as they're called in PM). 0 is always registered as ‘unlabeled’. I personally kept the default colors and just renamed a handful of the labels for my needs.

Next head to Contact Sheet in the drop-down menu. Make sure the boxes next to Generate high quality thumbnails is checked and High DPI Display Quality: is set to ‘Standard (fastest)’

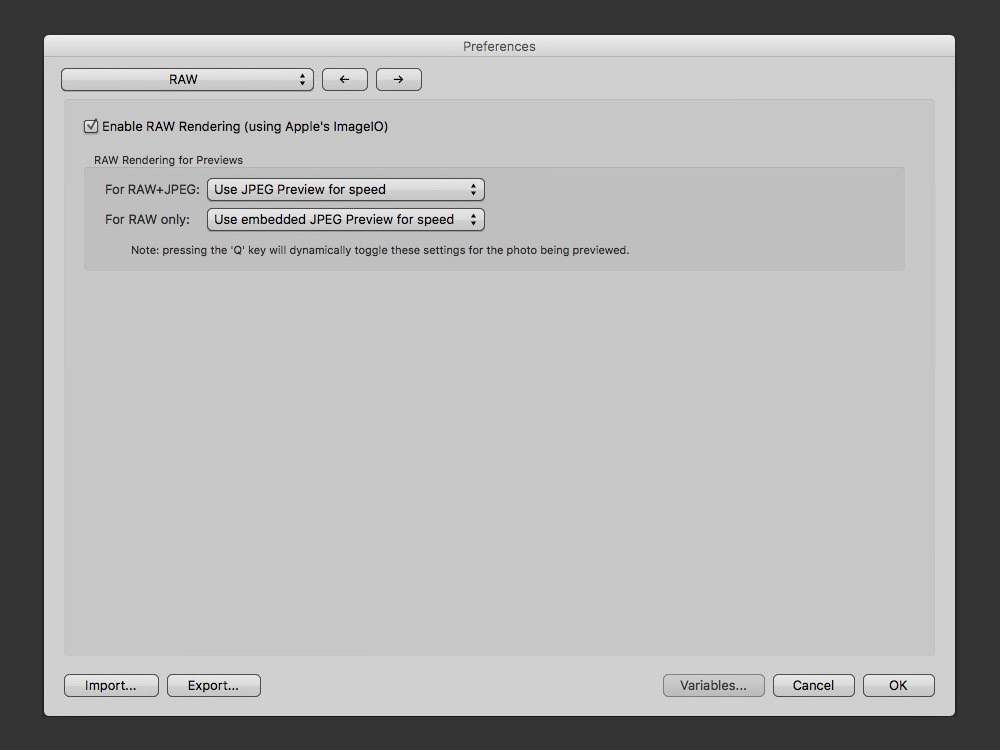
In the RAW menu, ensure Enable RAW Rendering is checked and For RAW only: is set to ‘Use embedded JPEG Preview for speed’.
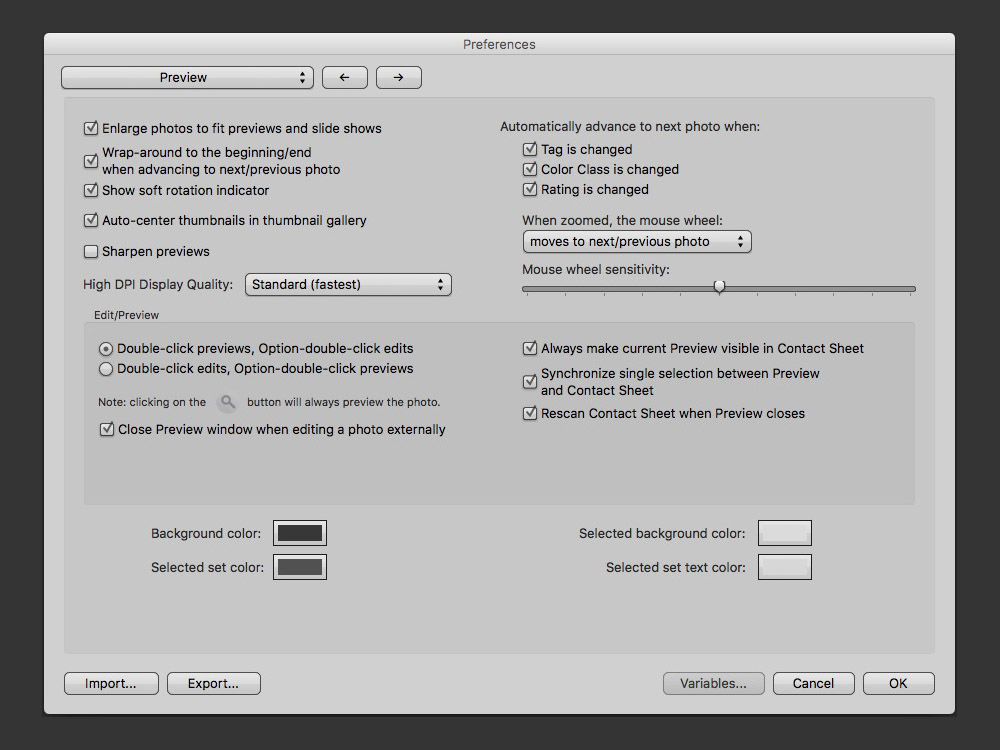
In the Preview menu, under Automatically advance to next photo when: check the boxes next to Tag is changed, Color Class is changed, and Rating is changed. Enabling this tells Photo Mechanic to go to the next photo once you’ve marked it with a color or rating, rather than requiring you to advance images manually after each tagging. High DPI Display Quality should already be set to Standard (fastest) from a previous menu.
In the Caching menu, adjust the Disk Cache and Memory Cache size as necessary. The more the better for both. I use 1024 for both the Disk Cache and Memory Cache, but I had my Memory Cache set to 512 for a while and didn’t notice much of a performance difference between the two.

Using Photo Mechanic
If you're used to importing your images into lightroom and walking away (or going to bed) as it builds previews, smart previews (see how I utilize Smart Previews to speed up my workflow and edit on multiple computers), no worries, you can still cull with Photo Mechanic! Just click here or scroll down to Culling in Photo Mechanic After Importing into Lightroom
Culling in Photo Mechanic Before Importing
If you’re planning on working with images as soon as possible, this is the way to go. In addition to speeding up the culling process, it saves additional time by reducing the number of images imported (and thus the number of previews needing to be rendered), though this may be moot if you typically import and walk away.
The process is simple, simply drag the folder containing all your images into the PM contact sheet window and you'll see all the thumbnails pop up and you're ready to go. Just double click an image and start rating using the number keys we had setup in the above instructions (as seen in the video above).
Once you're done culling, you'll need to sort out the good from the bad. To do that, return to the gridded contact sheet window and use the filters on the bottom right hand side to hide the rejected images from view.
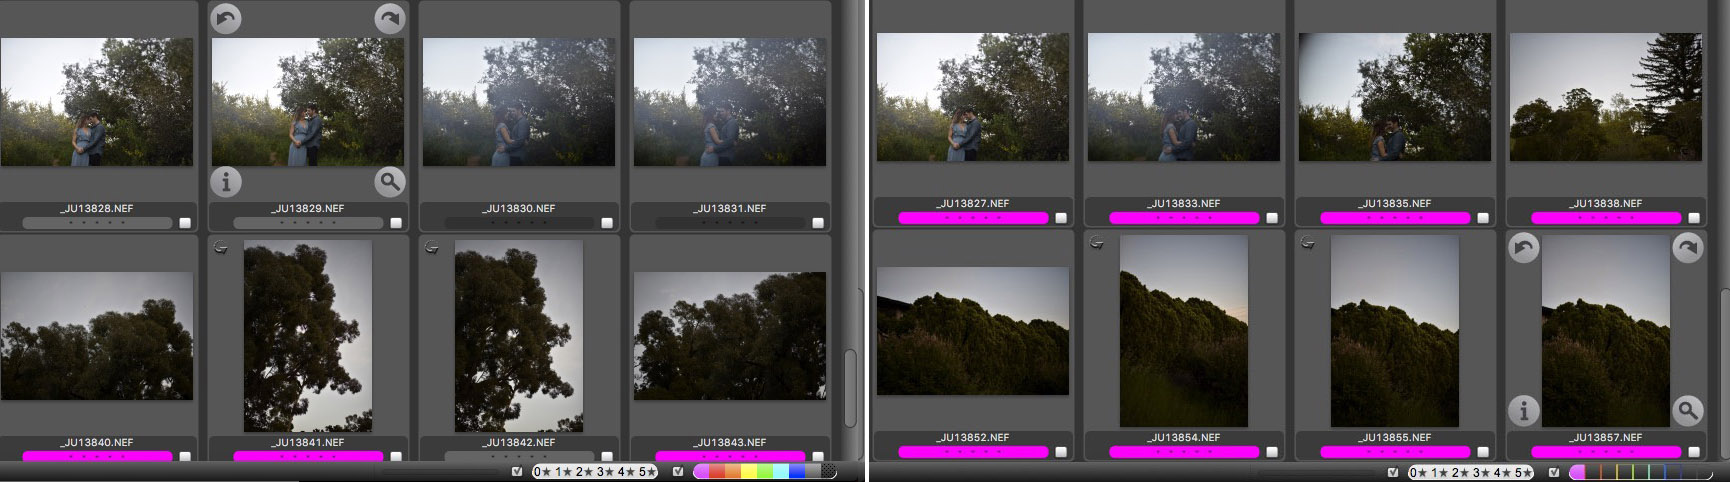
Images in Photo Mechanic unfiltered and filtered
After filtering, only the files you want to import should be visible. From here, simply select all of them in PM and drag them onto the Lightroom application icon in your dock. LR will automatically go into the import dialog and only check the boxes of the images you had selected in PM.
Import then enjoy the reduced import time and move forward with your workflow as you typically would.
Culling in Photo Mechanic After Importing into Lightroom
If you'd prefer to import your photos into Lightroom to get all of the previews and smart previews generated while you're out or passed out, before you've done any culling, there's a solution for you as well!
(Disclaimer: This process will remove any edits, keywords, or metadata changes you've made, including the application of any presets)
Go ahead and import your files into LR as you typically would. Once that's done, close LR and open up Photo Mechanic. You'll go through the same process as culling before importing, find the source folder where your images are located and drag it into PM. Double click an image and start rating using the number keys we had setup above.
Once you're done rating, open up Lightroom again.
You'll see all of your images you've rated will have a box with an exclamation mark on the top right of the thumbnail, indicating the metadata of the file or sidecar XMP file differs from the metadata Lightroom has, which is just as it should be. Highlight all of the images and click the box with the exclamation point. A prompt will appear stating: "The metadata for these one or more of these photos has been changed by both Lightroom and another application. Should Lightroom import settings from disk or overwrite the disk settings with those from the catalog?" Press Import Settings from Disk. This process will take a minute, depending on how many images you're updating.
Once it's done loading the XMP data, you need to sort out the images using the labeling or star system. If you used stars, it should be self explanatory, simply filter based on your rating. If you used labels, as I do, click Metadata in the Library Filter: bar at the top. You'll see four dropdown menus appear. In any of the 4 (I chose the far right in this example) and set the filter label to Label.

Once you've done that, you'll see the labels you specified in PM earlier and simply click on the label you'd like to filter into (e.g. Click the label you've assigned for rejected photos and flag them as rejected or remove them from the catalog).
And that's it! I hope this helped you better incorporate Photo Mechanic into your workflow. If you have any questions or comments, drop them in the comment section below and I'd love to hear them and/or try to answer them!
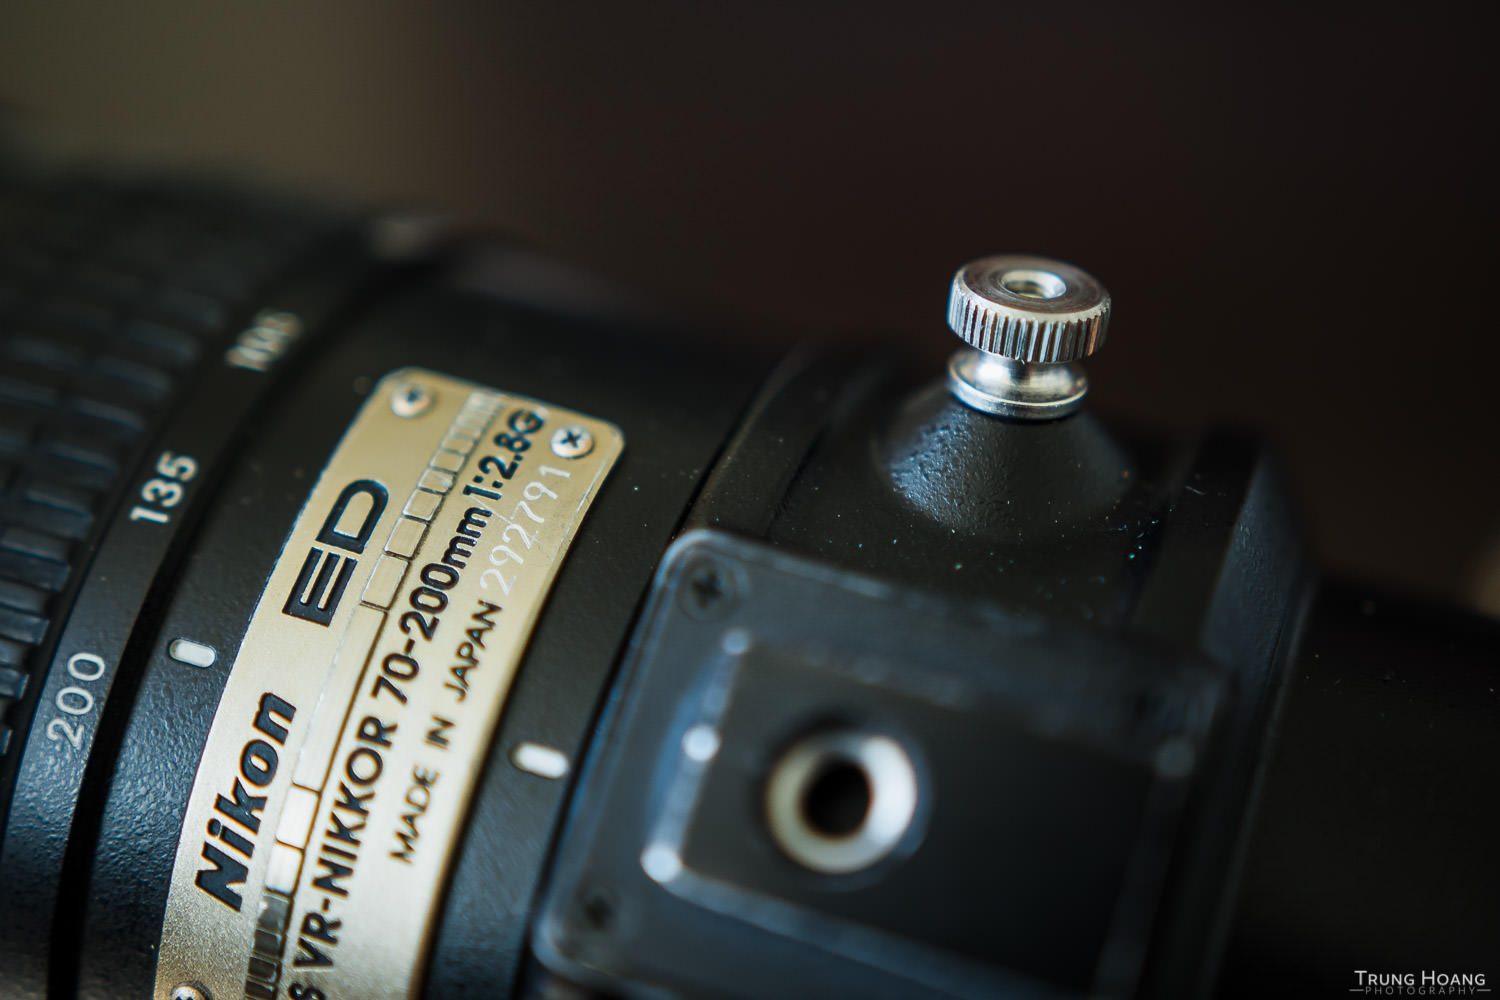
DIY // Nikon 70-200 f/2.8 VR Tripod Collar Screw Replacement
Lose your Nikon 70-200 tripod collar screw? Here's a DIY solution to remedy your ever spinning tripod collar.

Not too long ago while doing some general maintenance on my gear, I discovered that the tripod collar screw for my Nikon 70-200 f/2.8 VR was missing. Unsure where it could have gone, since it's (supposedly) captive, which means it's not supposed to fall out/off, even if it's unscrewed all the way. Puzzled, I went on to look for a replacement.
Upon my searches, a replacement collar screw was going to run me $35, which I thought was outrageous! Being the DIY-er that I am, I sought alternatives...
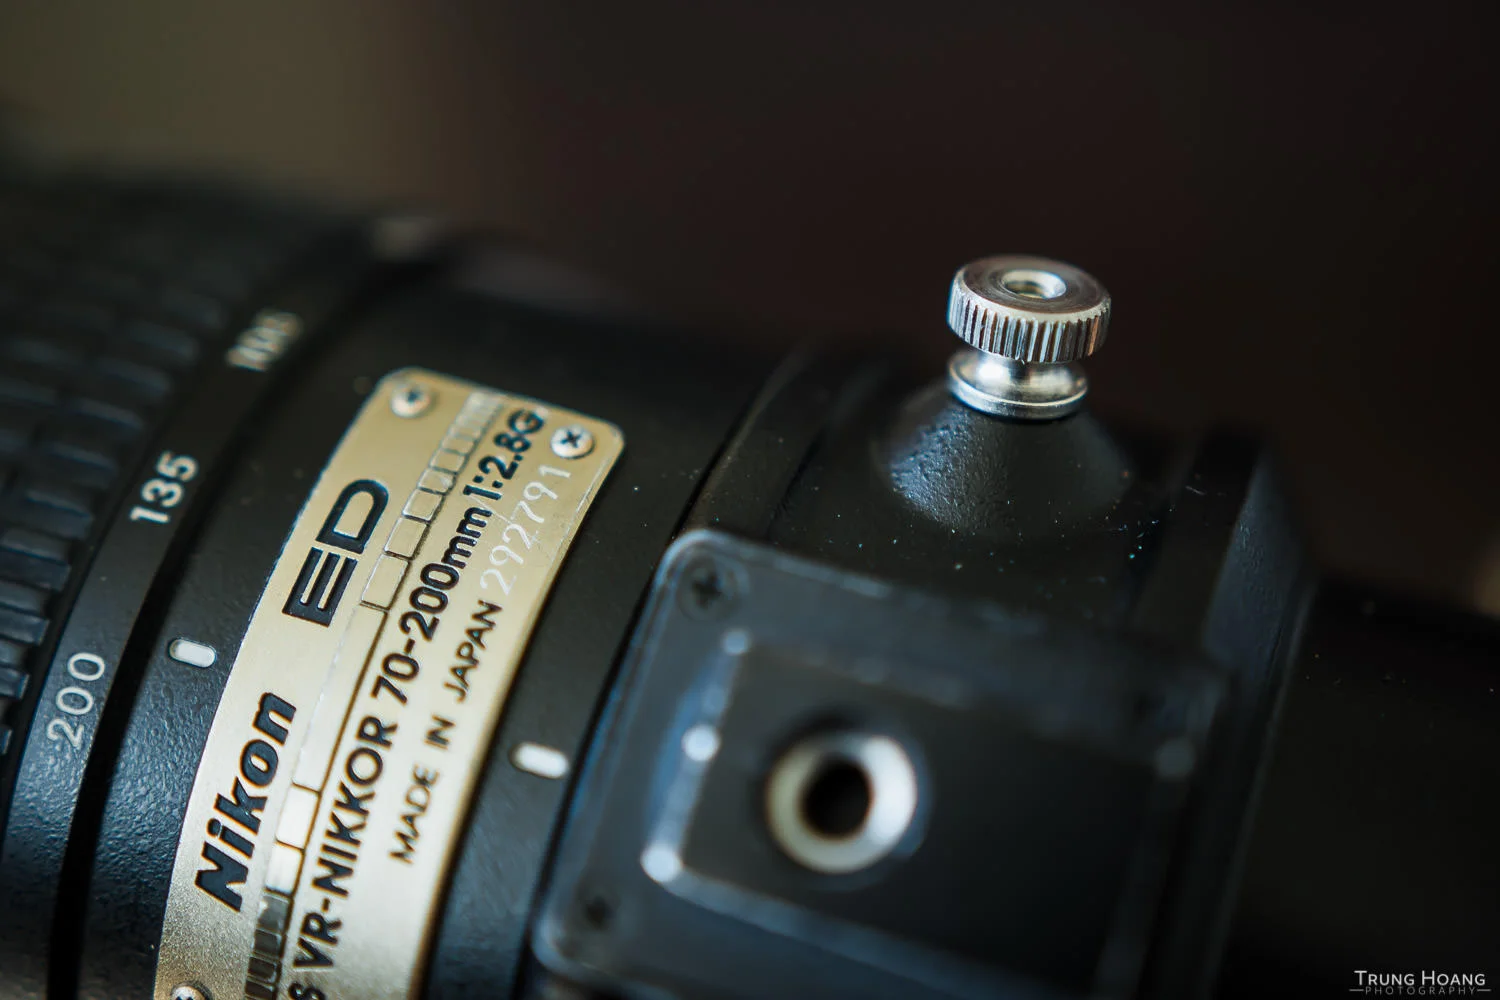
On the surface, a solution seemed pretty simple, a simple 1/4-20 screw, the same diameter and thread size as a basic tripod mount. It fit the bill, was able to tighten down and lock the collar, however it only took half a turn or so before it went from barely on to locked. I keep my collar loose fairly often, so this wasn't going to work out, or else I'd have to pocket the locking screw every time I loosened it. The reason it stopped so quickly? A tiny threaded post inside.

The pesky 6-32 screw stopping my progress
After a bit of hunting, the solution was a 6-32 x 1/4-20 slotted thick-wall insert. The typical purpose of the insert is to shrink a 1/4-20 threaded hole to allow the use of 6-32 threaded bolts/post. In this case, I wanted to fit a 6-32 threaded post into both the inside (lens post) and the outside where my knob would be affixed. With these particular inserts from McMaster-Carr, they're designed to be permanently affixed to the 1/4-20 hole they're inserted and they come delivered with a screw activated adhesive. It is CRUCIAL that this adhesive be throughly cleaned off (pink residue in the photo below) or else this baby is going to be stuck in your lens collar. I just ran it under warm water and scrubbed it all off with an old toothbrush.

Before cleaning off adhesive (left), and after (right)
Now the hard part is out of the way, the next step is to find a knob that'll fit. Unfortunately with this insert being used, your options for knobs become pretty limited, since 6-32 is a really small thread size. An easy solution is to use a PC desktop case screw. I tried it, but found it a little too clunky, so I found some knurled nuts that accepted a 6-32 thread and grabbed some 6-32 socket set screws (3/8") to bridge the adapter to the nuts.

6-32 knurled nuts in brass (left) and stainless steel (right). The stainless steel one allows the insert to sit deeper in the nut
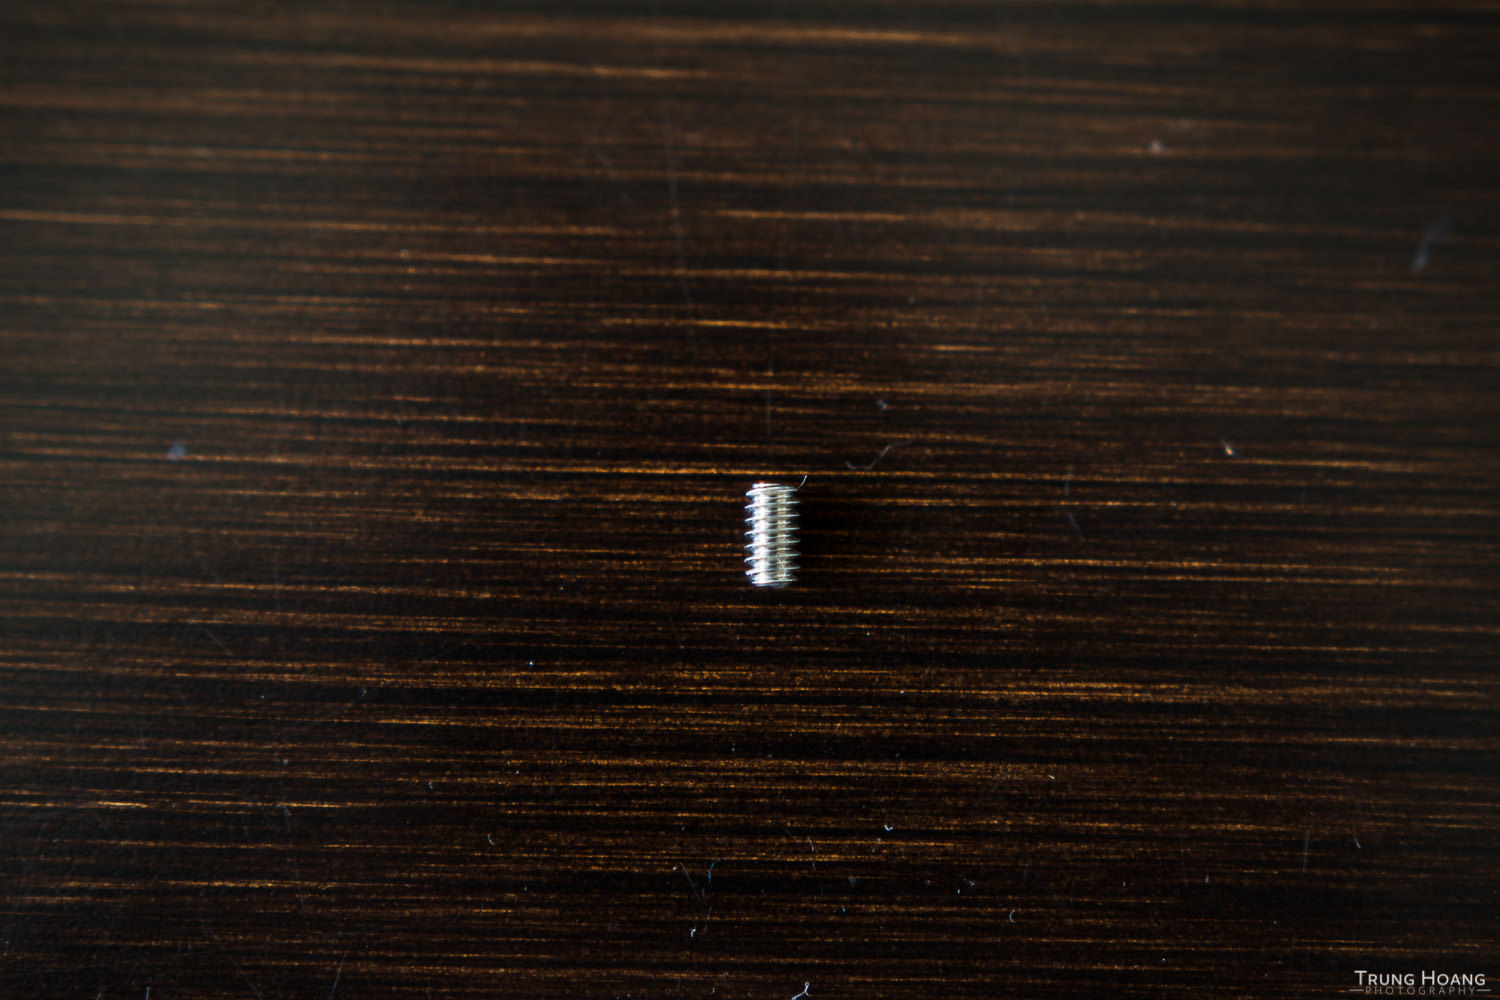
#6-32 socket set screw (a 1/4" is pictured, I found a 3/8" worked better. 1/2" would work as well)
First put the 3 parts together to gauge how deep to screw in the insert and the socket set screw. Once you've determined the stopping points of those two parts that allows you to lock the collar, mark where the socket screw needs to be stopped and begin affixing them permanently. I just used some maximum bond Krazy Glue I had on hand to adhere all the parts together, since it's a pretty low torque application. If you're concerned with it coming apart after a lot of use or have a tendency to lock things down really hard, feel free to use Loctite Threadlocker 242 or a really strong epoxy like JB Weld.

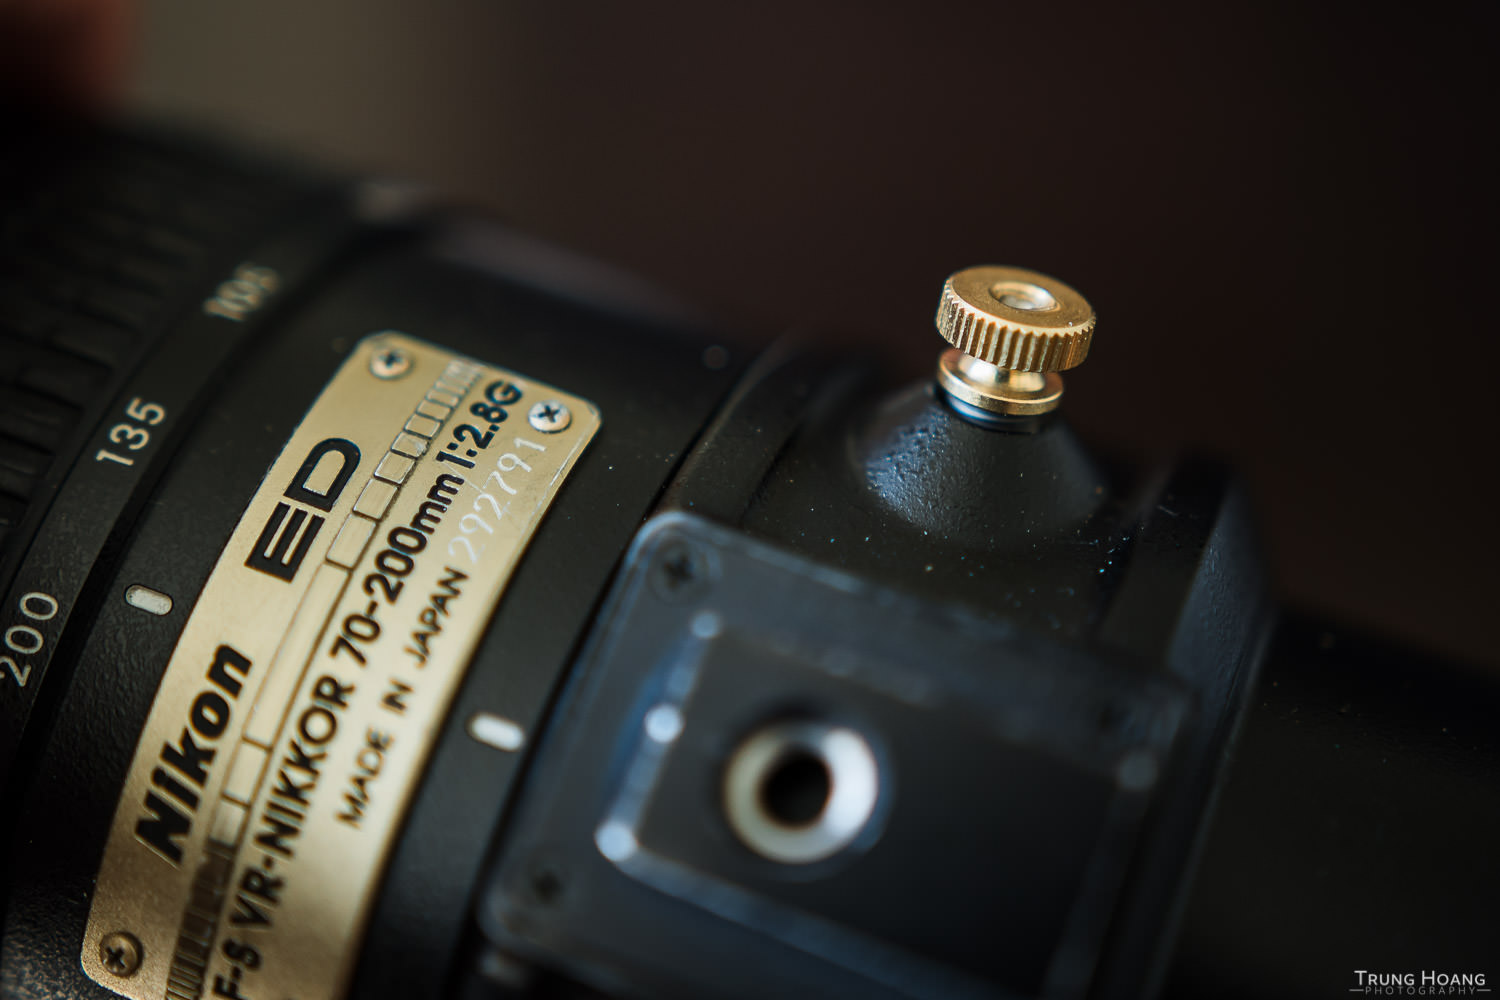
Finished screws! The stainless steel one hugs the inserts a little closer.
Its been a little over a month and I haven't had any issues with it so far. Here's a quick parts list and links to where I picked them up:
6-32 x 1/4-20 slotted thick wall insert from McMaster-Carr 10-pack - $13.60 shipped (in California. Shipping rates will vary based on your location)
Brass 6-32 knurled nuts from Home Depot 3-pack - $0.98 (in-store)
Stainless Steel 6-32 knurled nuts from Home Depot 2-pack - $1.35 (in-store)
Socket Set Screws 6-32 x 3/8" from Home Depot 2-pack - $0.62 (in-store)
Total: $15.57 + some glue ($5-7) for 2 Stainless Steel Replacement tripod collar screws.
The knurled nuts can be found in-store (locations may vary), but for some reason they have different links on their site, so if you want to do an in-store pickup that doesn't require shipping, search their page for 6-32 knurled nut and you should find ones you can pick up in store.
Too much work? If you're interested in having them made and delivered, I'd be happy to do so for $25 shipped to anywhere in the CONUS. You can place an order below.

Tripod Collar Screw Knob for the Nikon 70-200 f/2.8 VR (first gen)
This is a DIY replacement for the knob used to lock the tripod screw from spinning around and sliding off the lens.
Only available in brass
Let me know in the comments below if you have any thoughts or questions! Thanks for reading!