

How to replace the RAM in a 2018 Mac Mini
A guide to replace the, kinda-sorta user-replaceable, memory modules in a 2018 Mac Mini

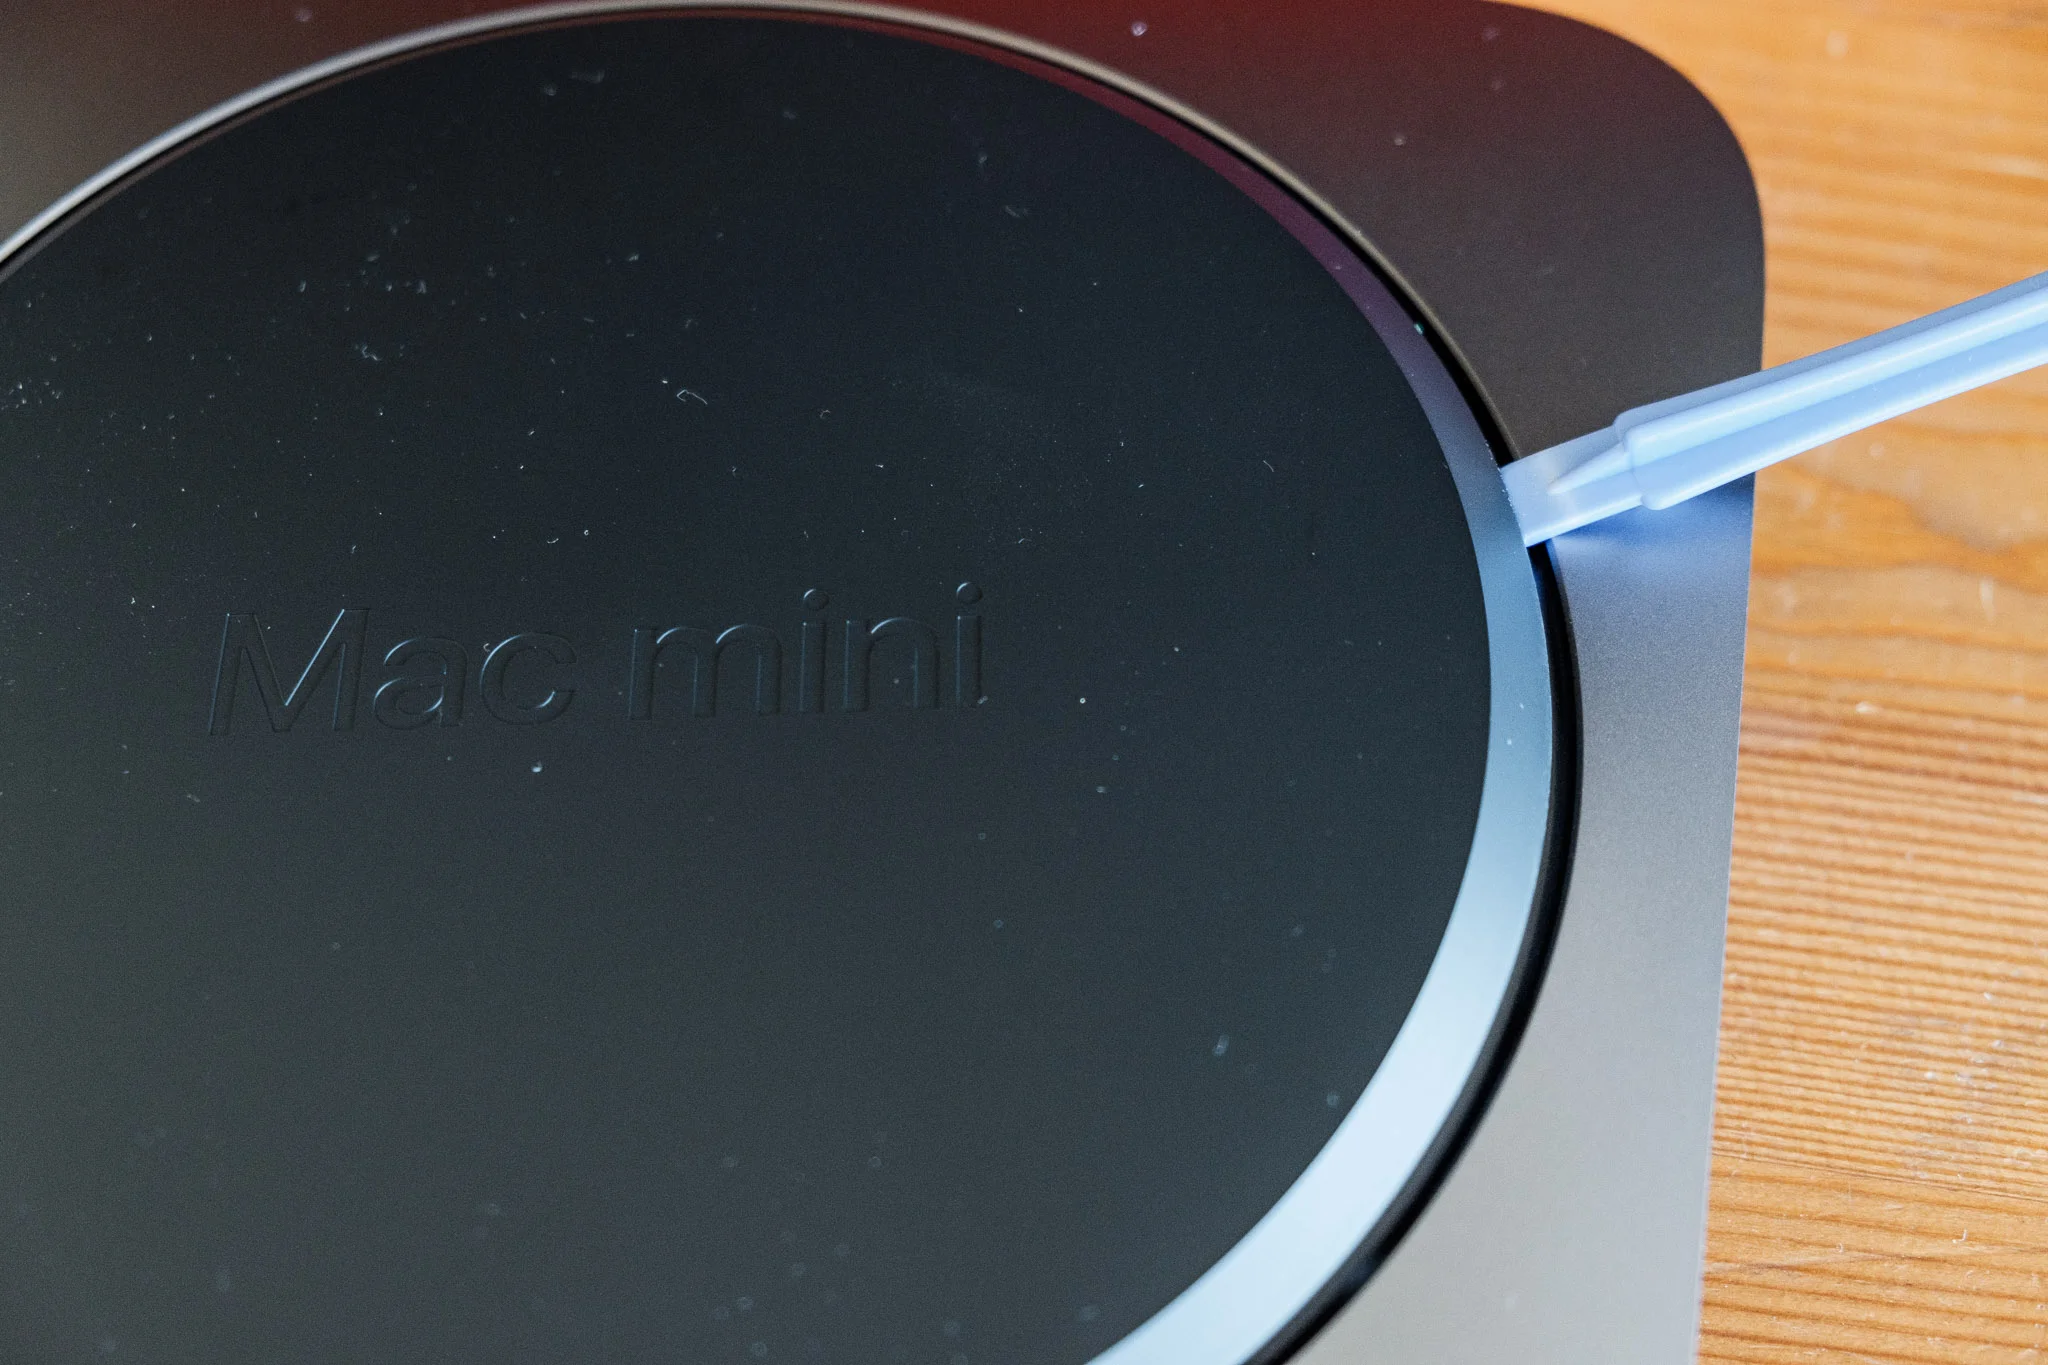
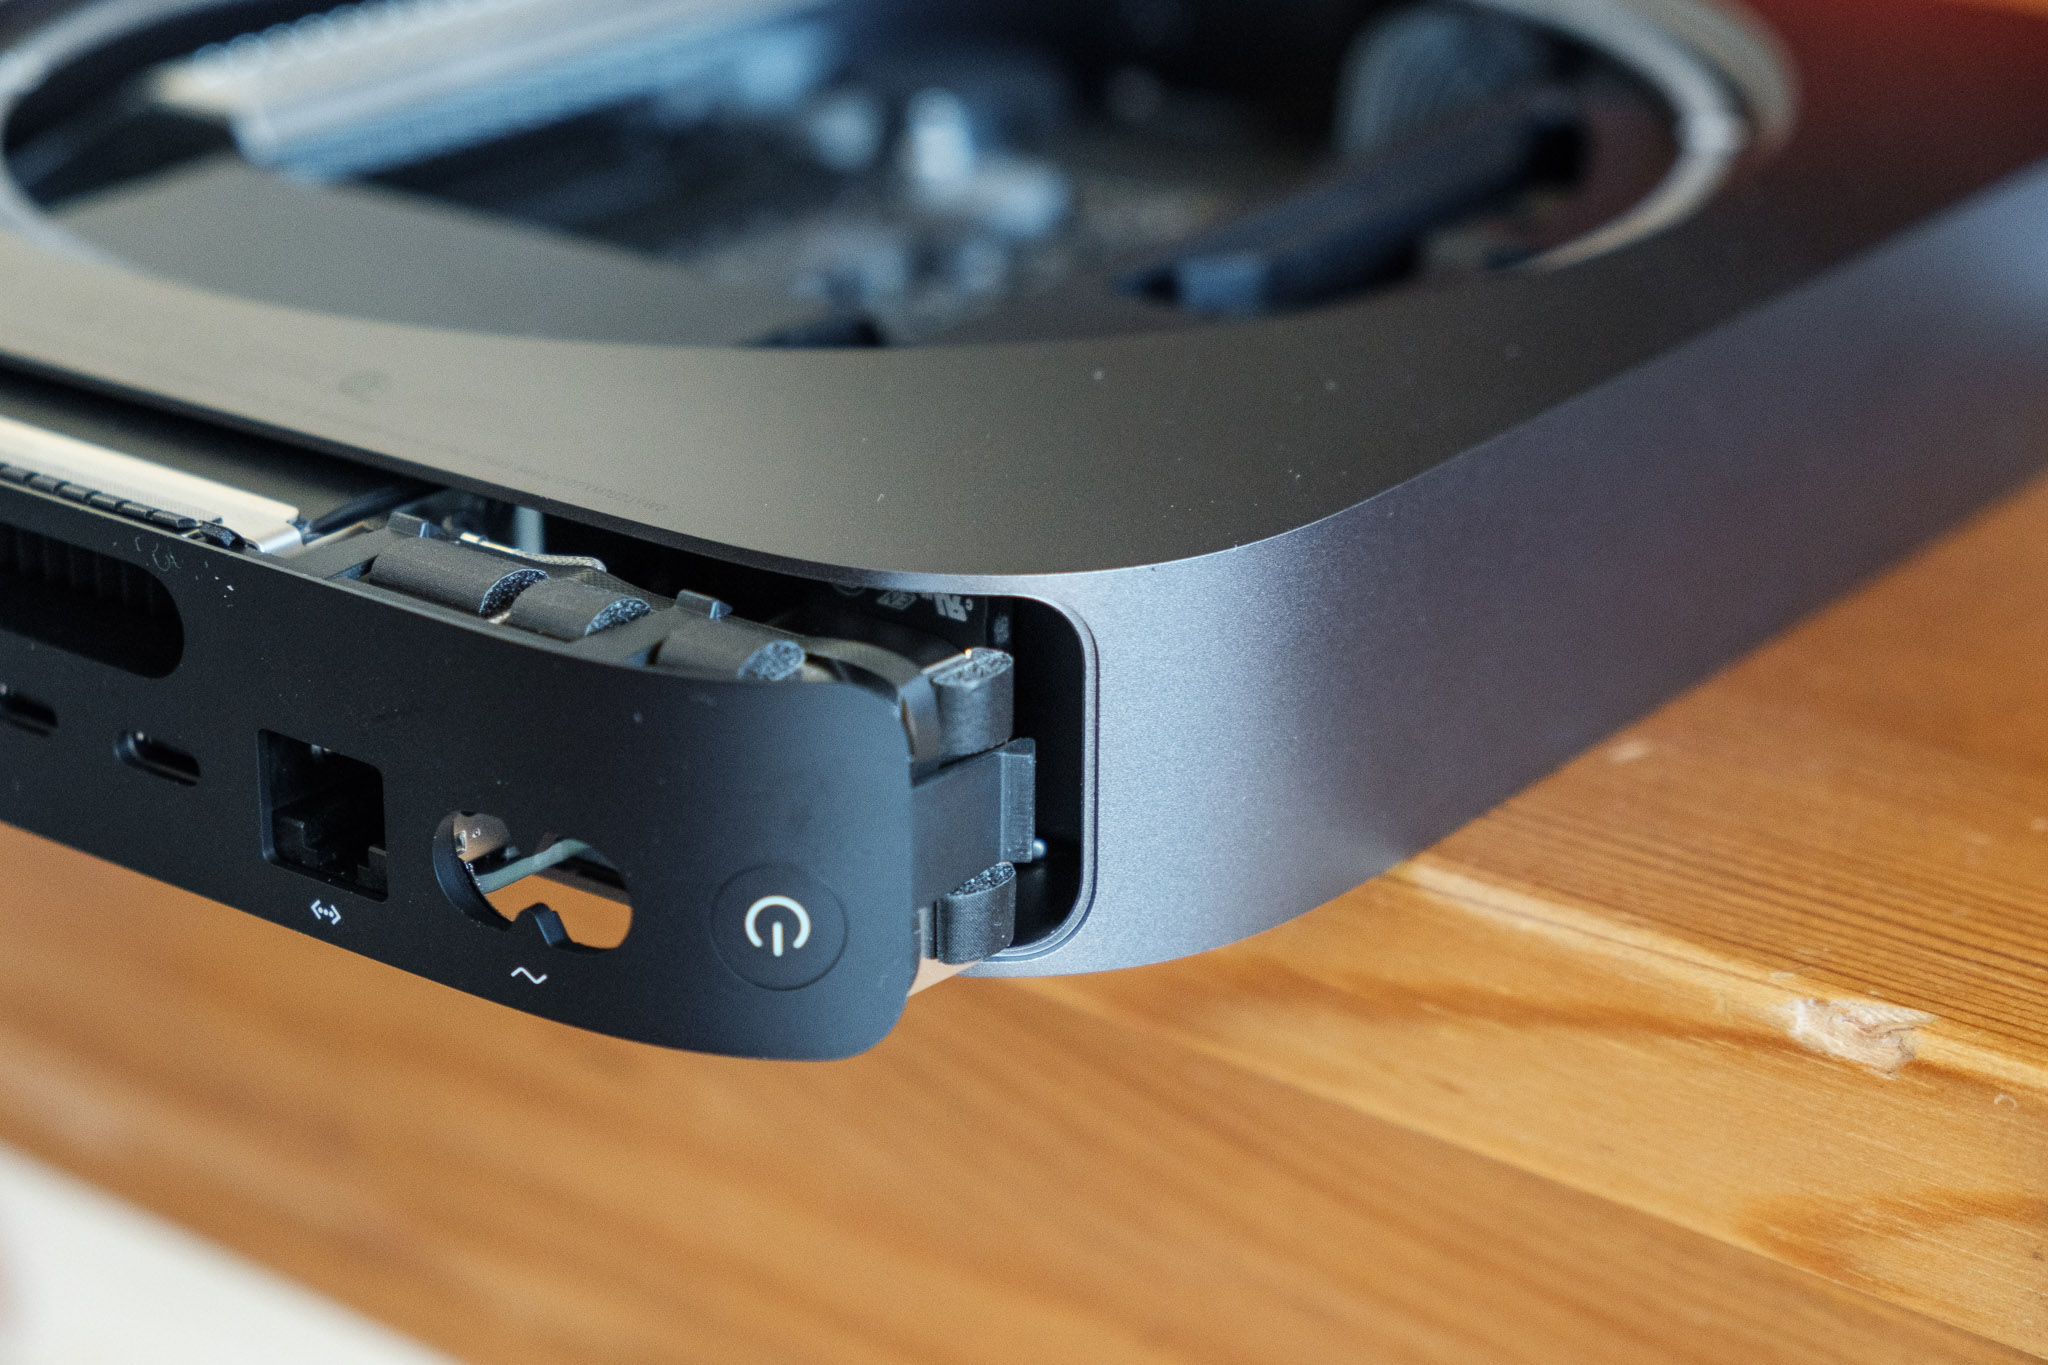
A brand new 2018 Mac Mini. Breaking into it and doing some upgrades before even powering it on.
After many years of waiting, a refresh of the Mac Mini has finally arrived, and unlike the extremely underwhelming 2014 refresh, Apple has graced us with a 6-core i7-8700 and user-replaceable SO-DIMM memory… sort of.
Per Apple’s support document detailing how to install/replace memory in a Mac Mini, they advise that only an Apple Store or Authorized Apple Service Provider can install/replace the RAM modules in a 2018 Mac Mini. With that said, is it possible to do it yourself? Sure is.
Disclaimer: At the time of writing, I cannot say whether or not doing this will void any warranty. Because of that, I advise you to proceed with caution should you decide to go forward with replacing your RAM modules.
Alright, let’s get to it.
What You Need

A 2018 Mac Mini
Replacement Memory Sticks
Memory I used: Crucial/Micron Ballistix Sport LT DDR4 2666 2x16gb
UPDATE: So it turns out the Memory pictured and linked above is underclocked to 2400 and boosted to 2666 via Intel XMP. I guess the mini doesn’t support that, so I will be/have replaced it with this memory Crucial 32GB Kit (16GBx2) DDR4 2666 MT/s (PC4-21300)
Torx Security T6 (also known as TR6, Tamperproof Torx T6, among other names)
The difference is tamperproof/security torx screws have a metal pin in the middle, therefore the screwdriver requires a hole in the center in order to get into the threads
Torx T10 driver (T9 could also work)
Some kind of plastic prying item, ideally a spudger (or a guitar pick)
Optional: Regular Torx T6
Optional: Mac Mini Logic Board Removal tool
Pick up a set with a TR6, TR9, Spudger, and Mac Mini Logic Board removal tool on Amazon
Procedure
Step 1: Remove bottom plastic plate
Pop open the bottom using a spudger, credit card, guitar pick, what have you. The bottom is clipped (with the ports facing you) at the top-middle and bottom left and right (imagine three corners of a triangle)
Step 2: Remove metal plate
Using a TR6 screwdriver, remove the six (6) screws holding the bottom metal plate. GENTLY lift the plate to reveal the wire connecting the antenna. Slide the plate off to the side to reveal a screw holding the antenna cable in place. Use a T6 (or your TR6) to remove the screw from the bracket then pop off the cable from the logic board.


Step 3: Remove the fan
The fan is held on by four (4) T6 screws. With the unit turned so the ports are facing away from you, the screws are along the two sides at an angle, on the bottom left, and bottom right. Remove those four screws and lift the fan up. Disconnect the cable from the logic board (the connector goes straight up).


Step 4: Remove the logic board from the aluminum body
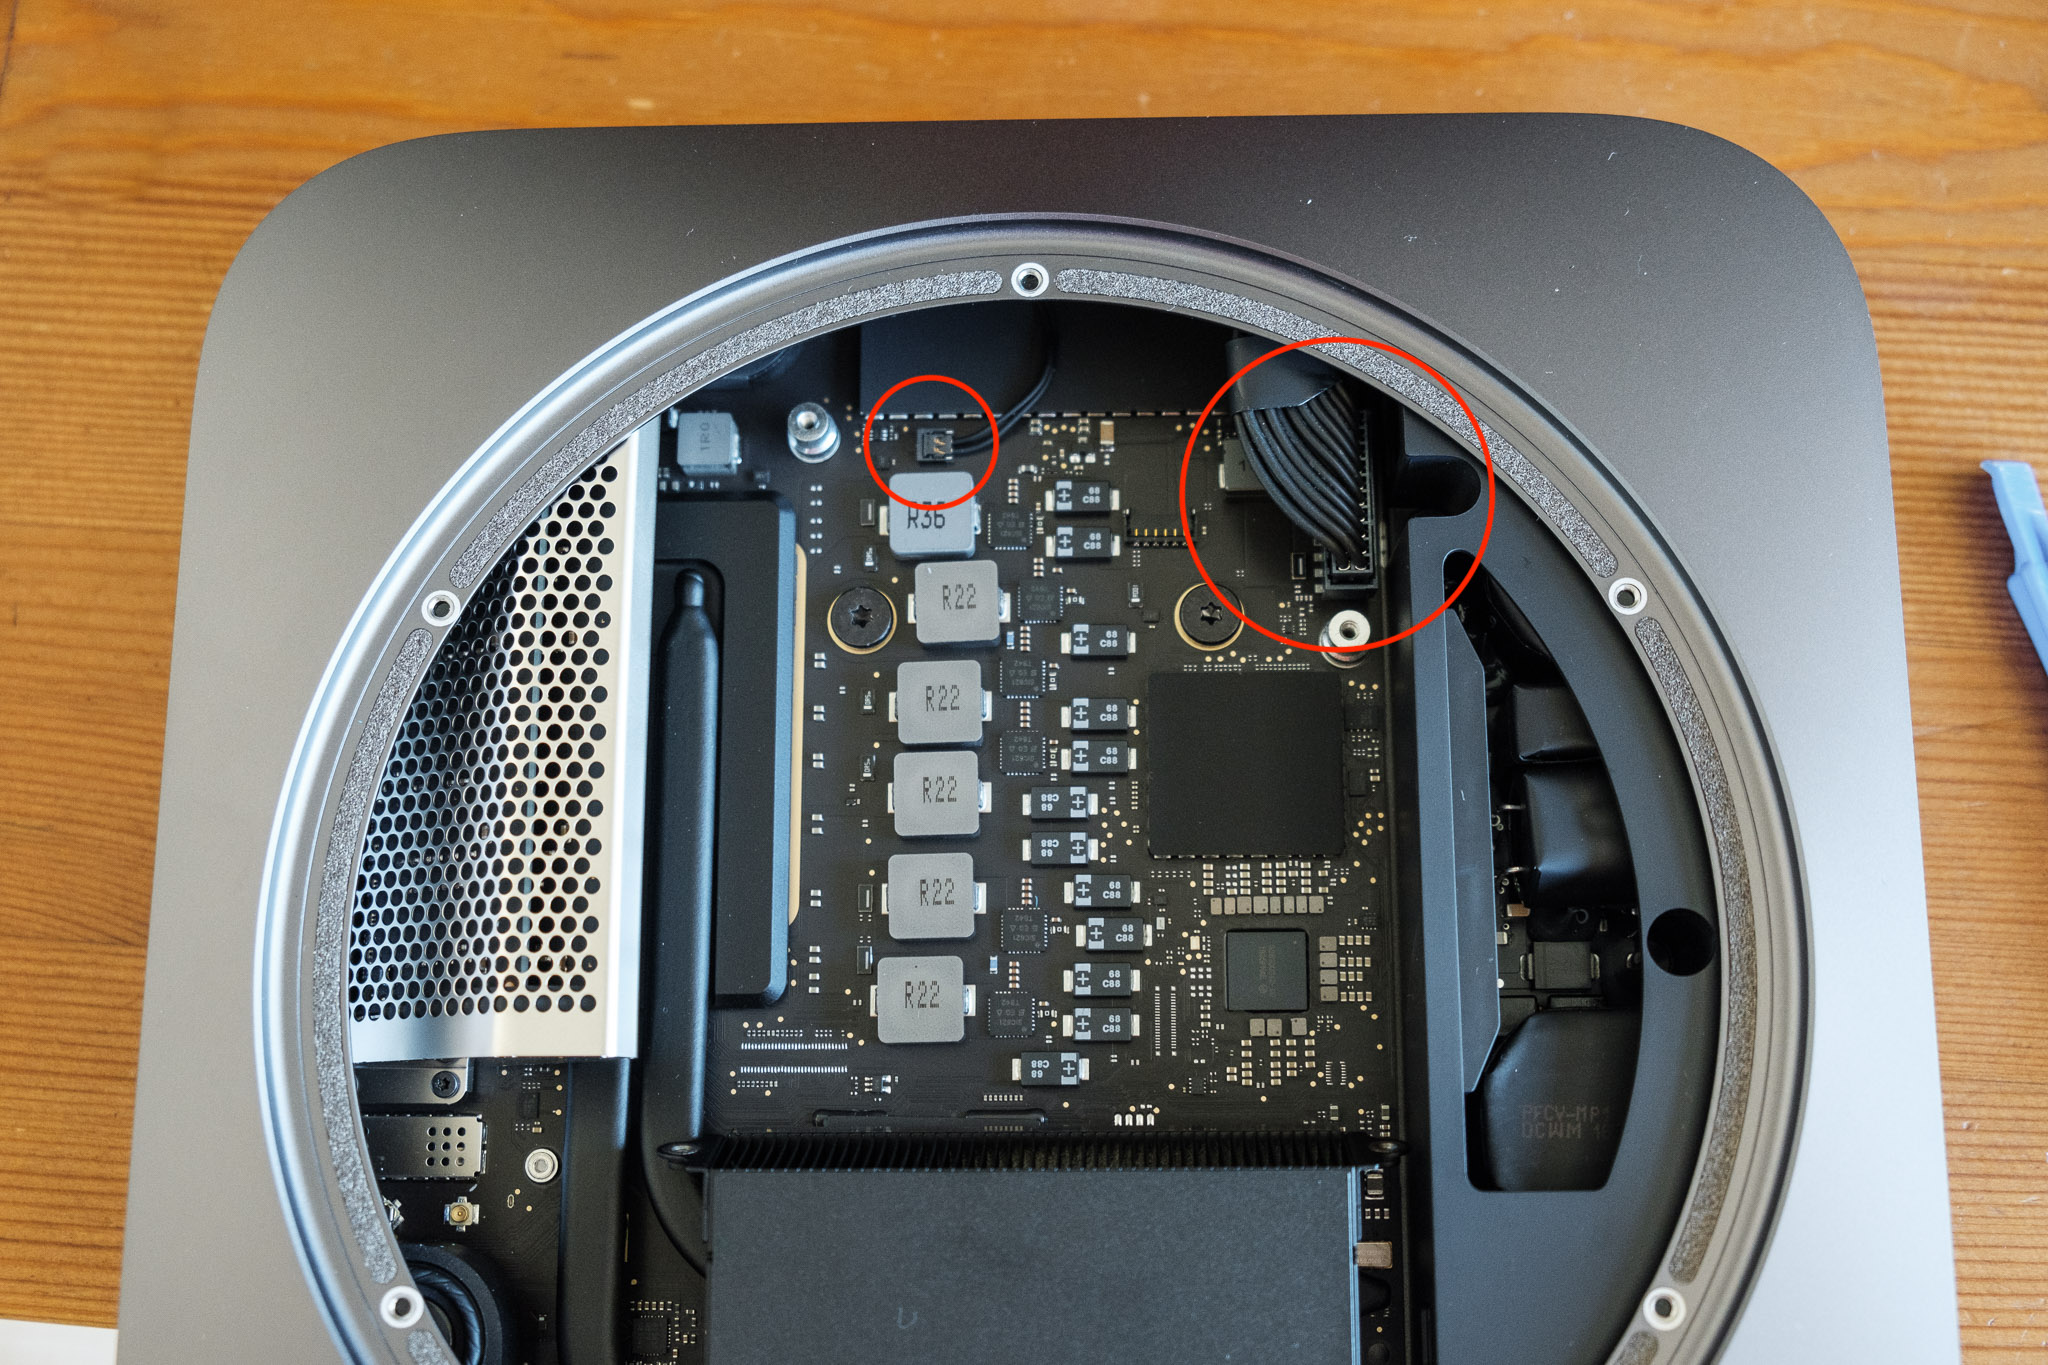
With the unit oriented with the ports facing you, disconnect the small cable in the far back (indicator light I believe?). This connector goes straight up. Next, unplug the big power connector on the right hand side. If there is not enough room to disconnect it fully at this moment, do not worry as you will be able to do so once you begin sliding out the logic board.
To remove the logic board, unscrew the two (2) T10 (or T9) screws in the upper middle of the logic board. With those removed, you can use a Mac Mini Logic Board removal tool or be ghetto like me and use two small screwdrivers to lever the logic board out of the casing. Once you get it moving a bit, you can also gently push the heatsink to push out the logic board.
If you didn’t fully unplug the power cable, do so now.
Pull the logic board out of the case and place the case aside.


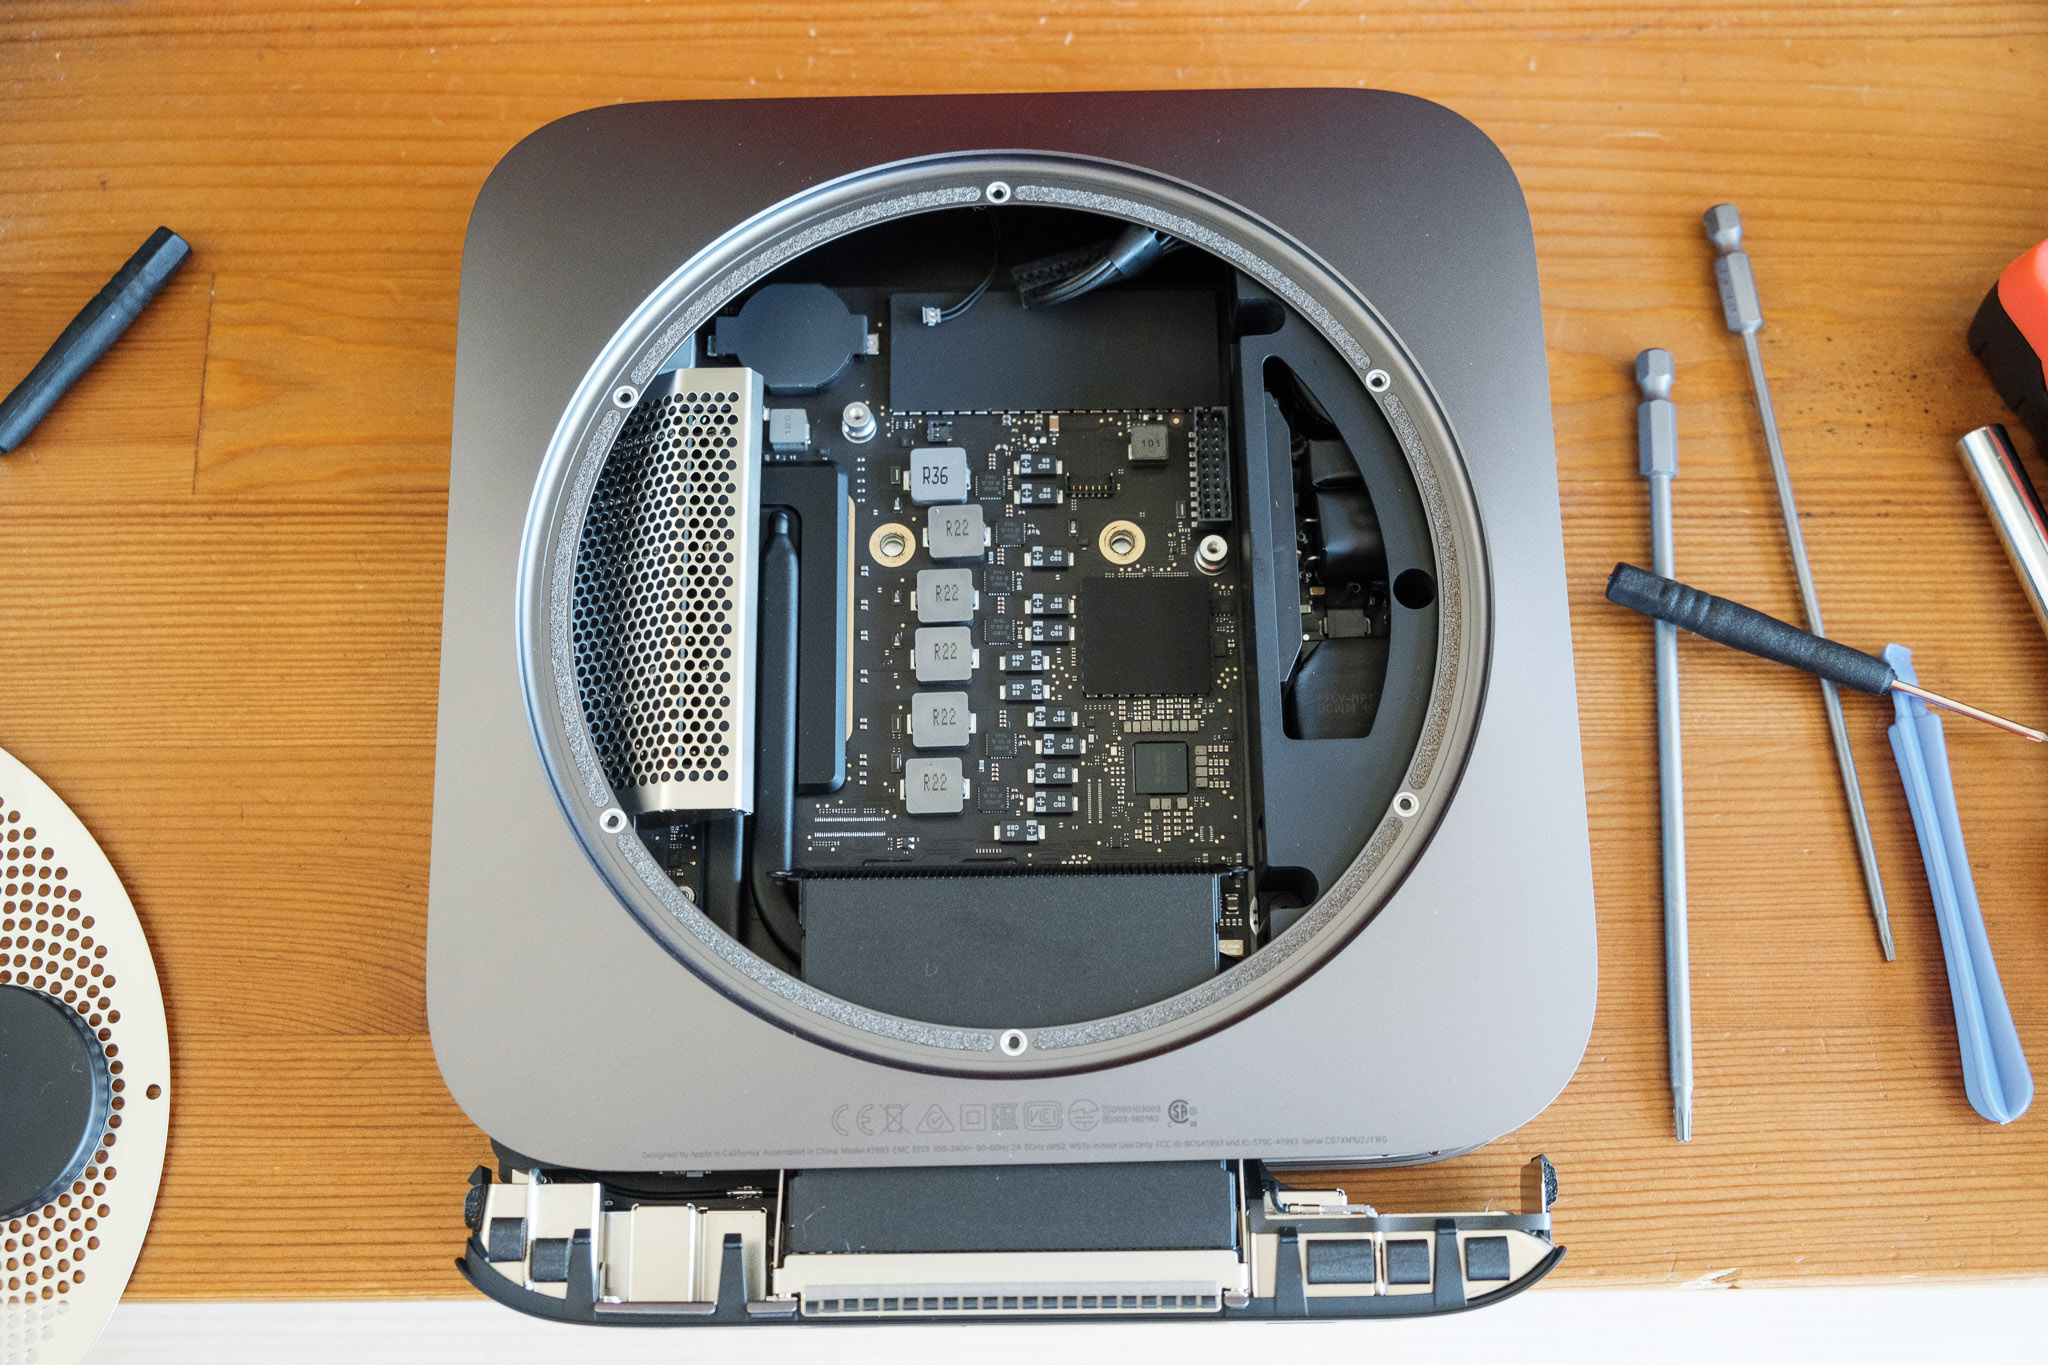


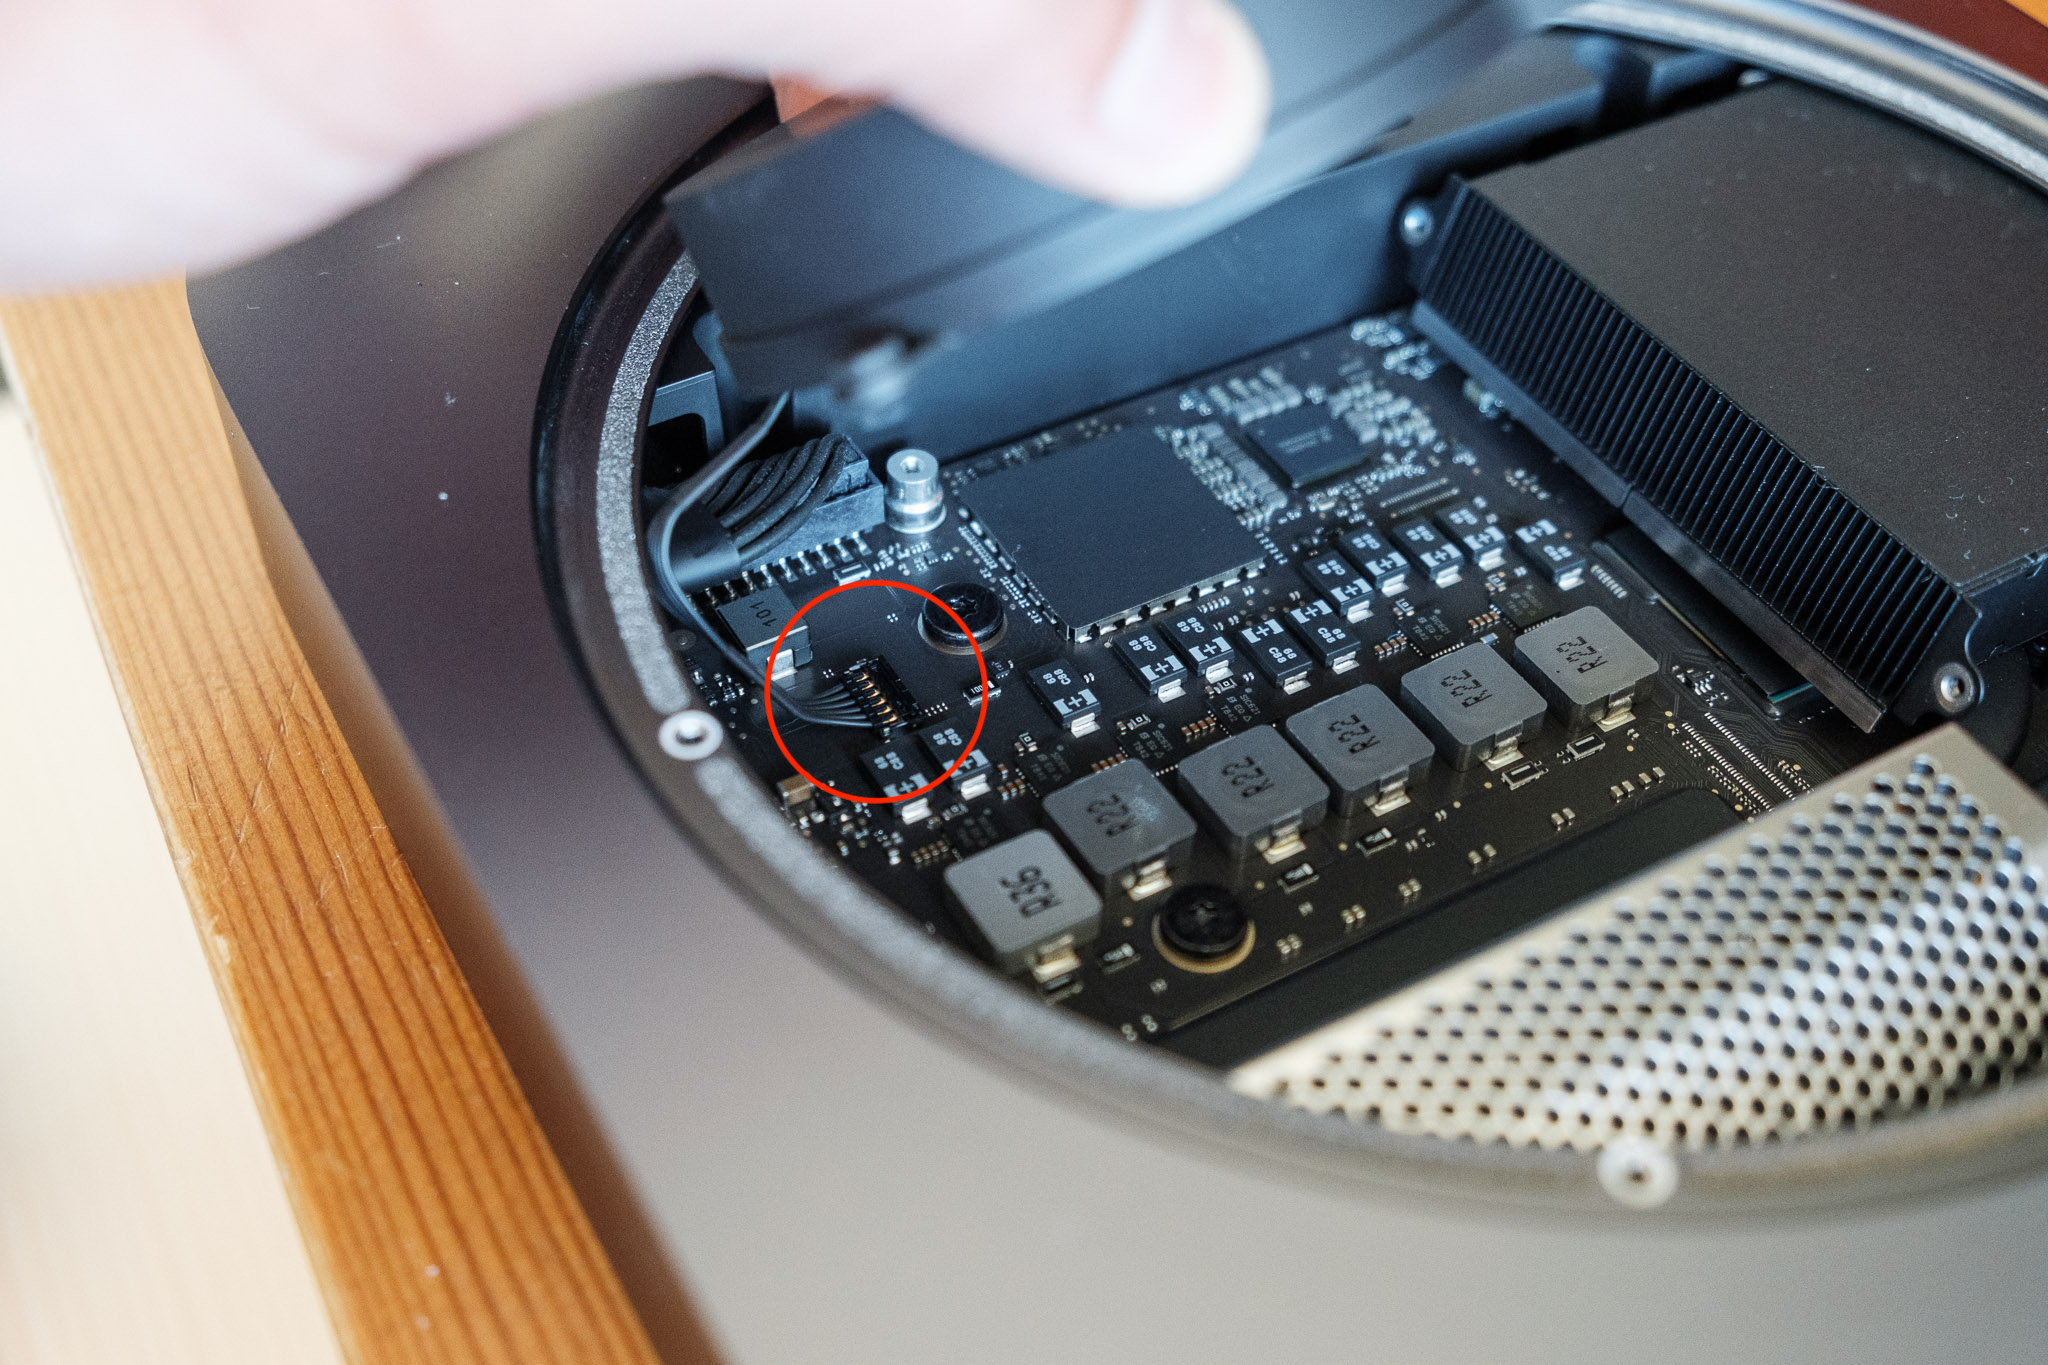
Step 5: Accessing and swapping out the RAM modules
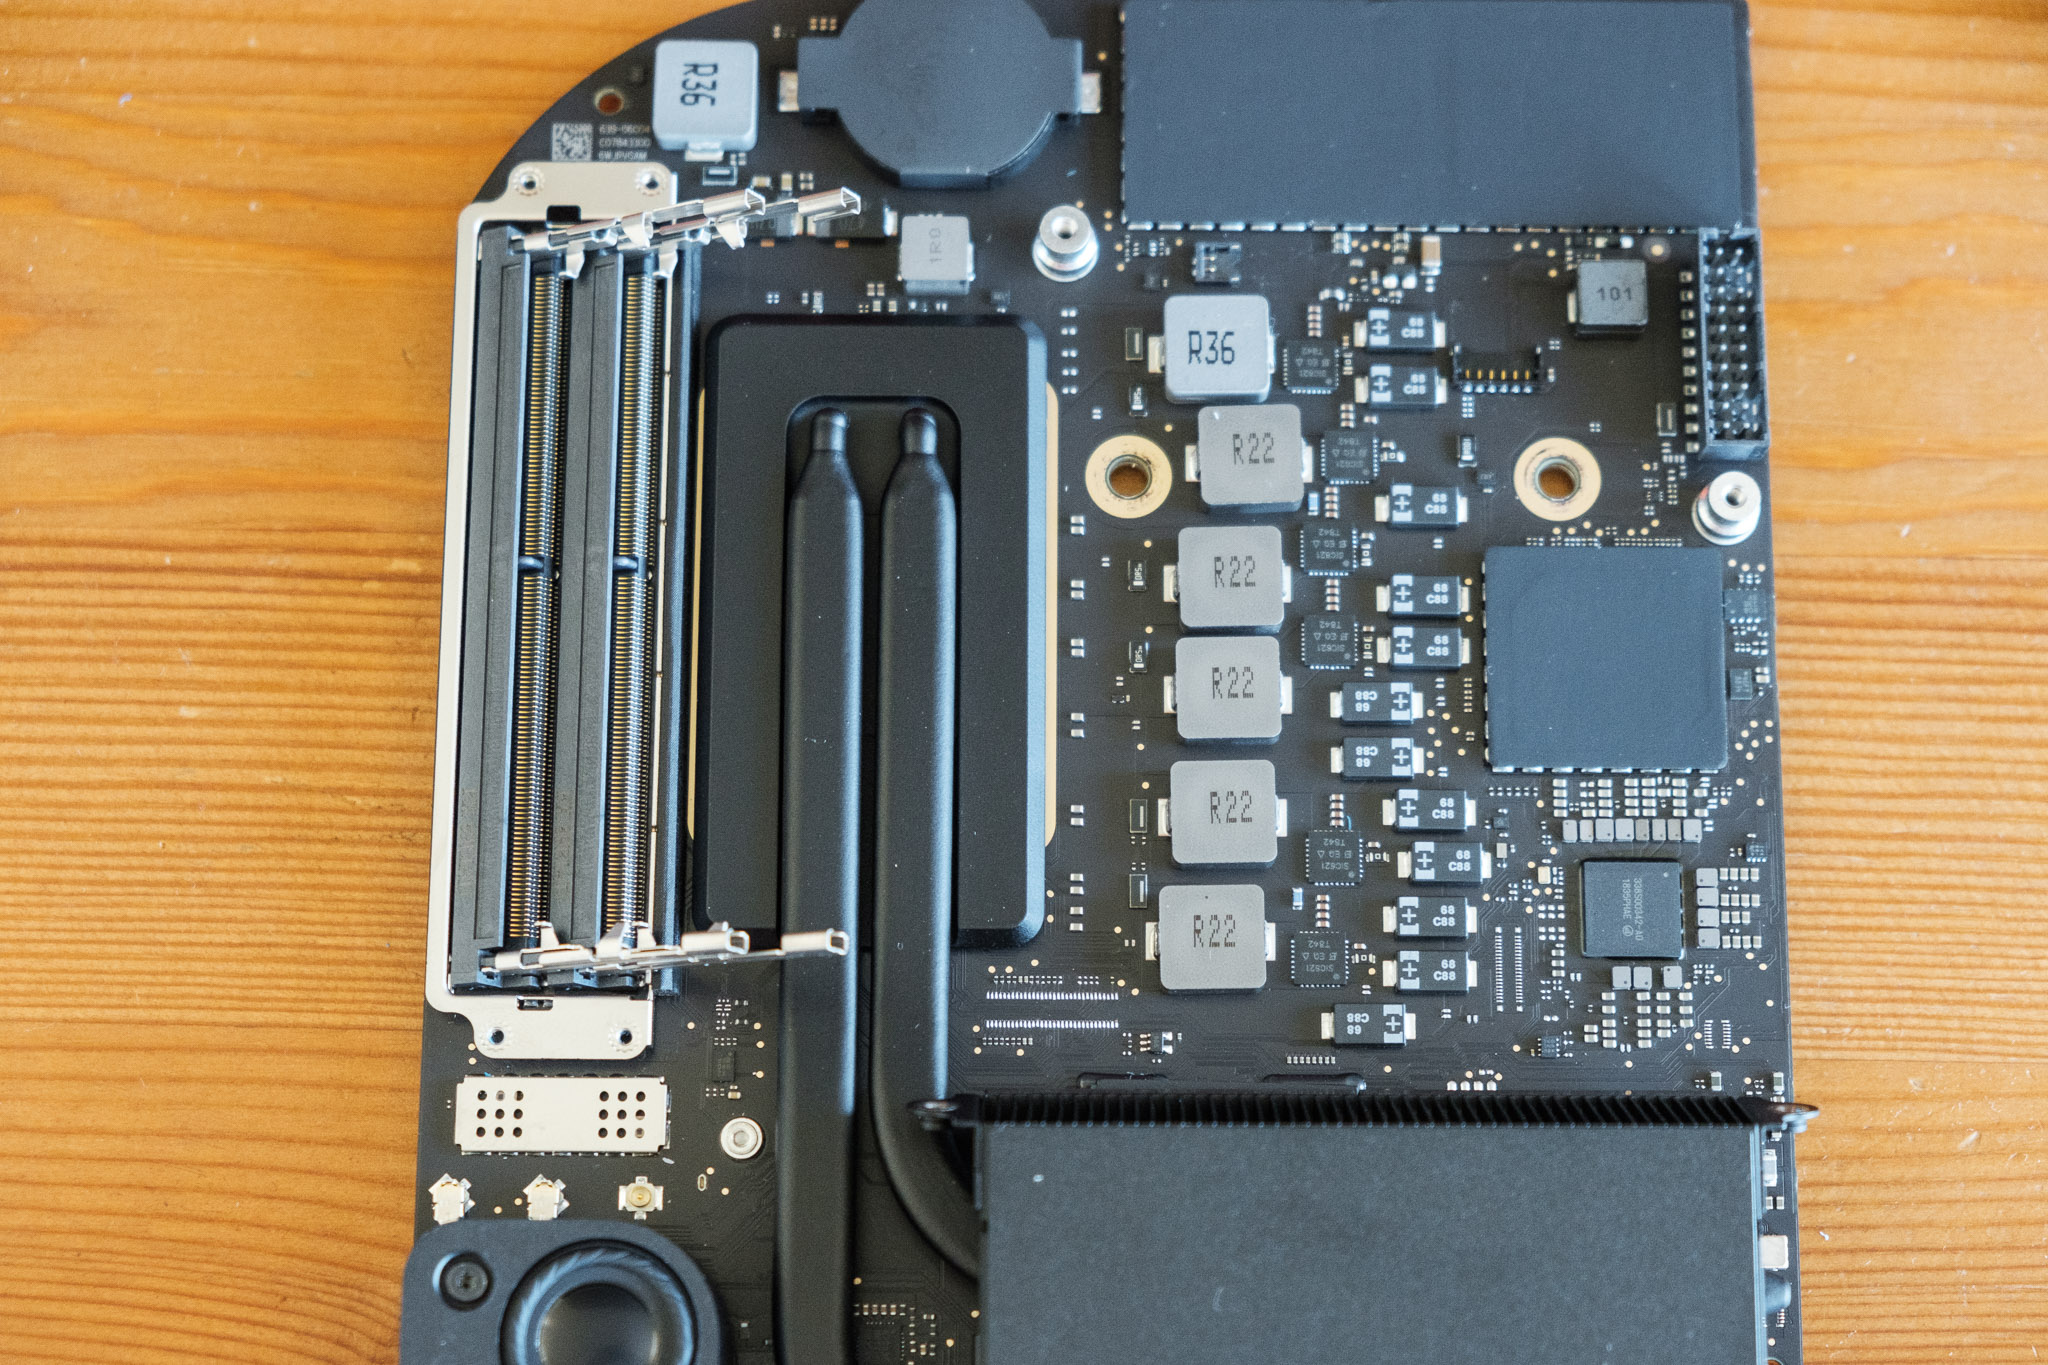
With the logic board unearthed, only a metal cage and some rubber guards keep you from the memory modules.
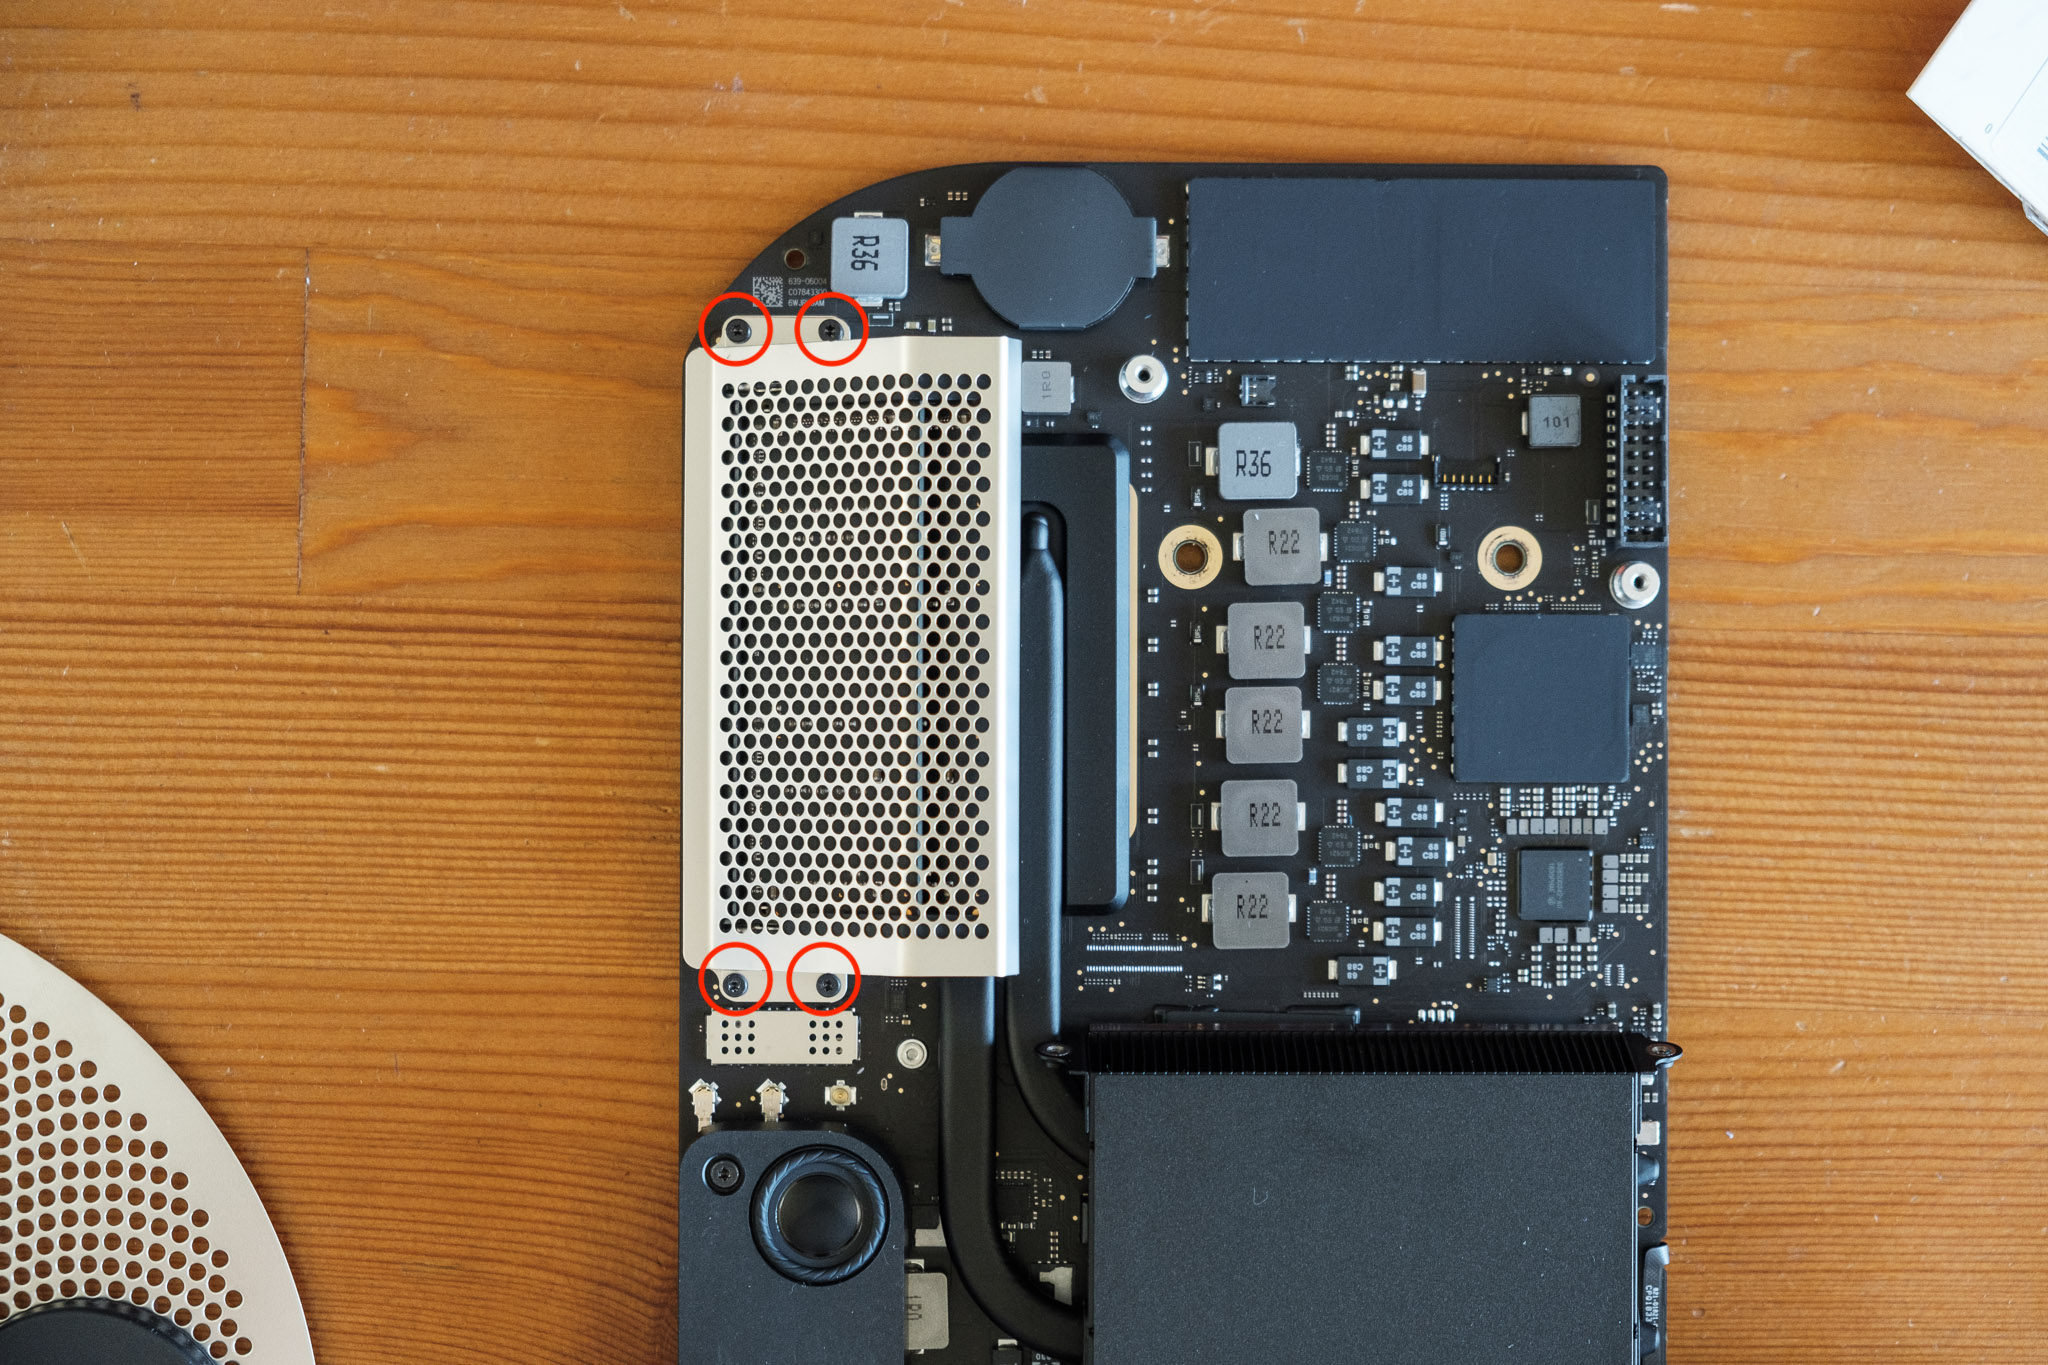
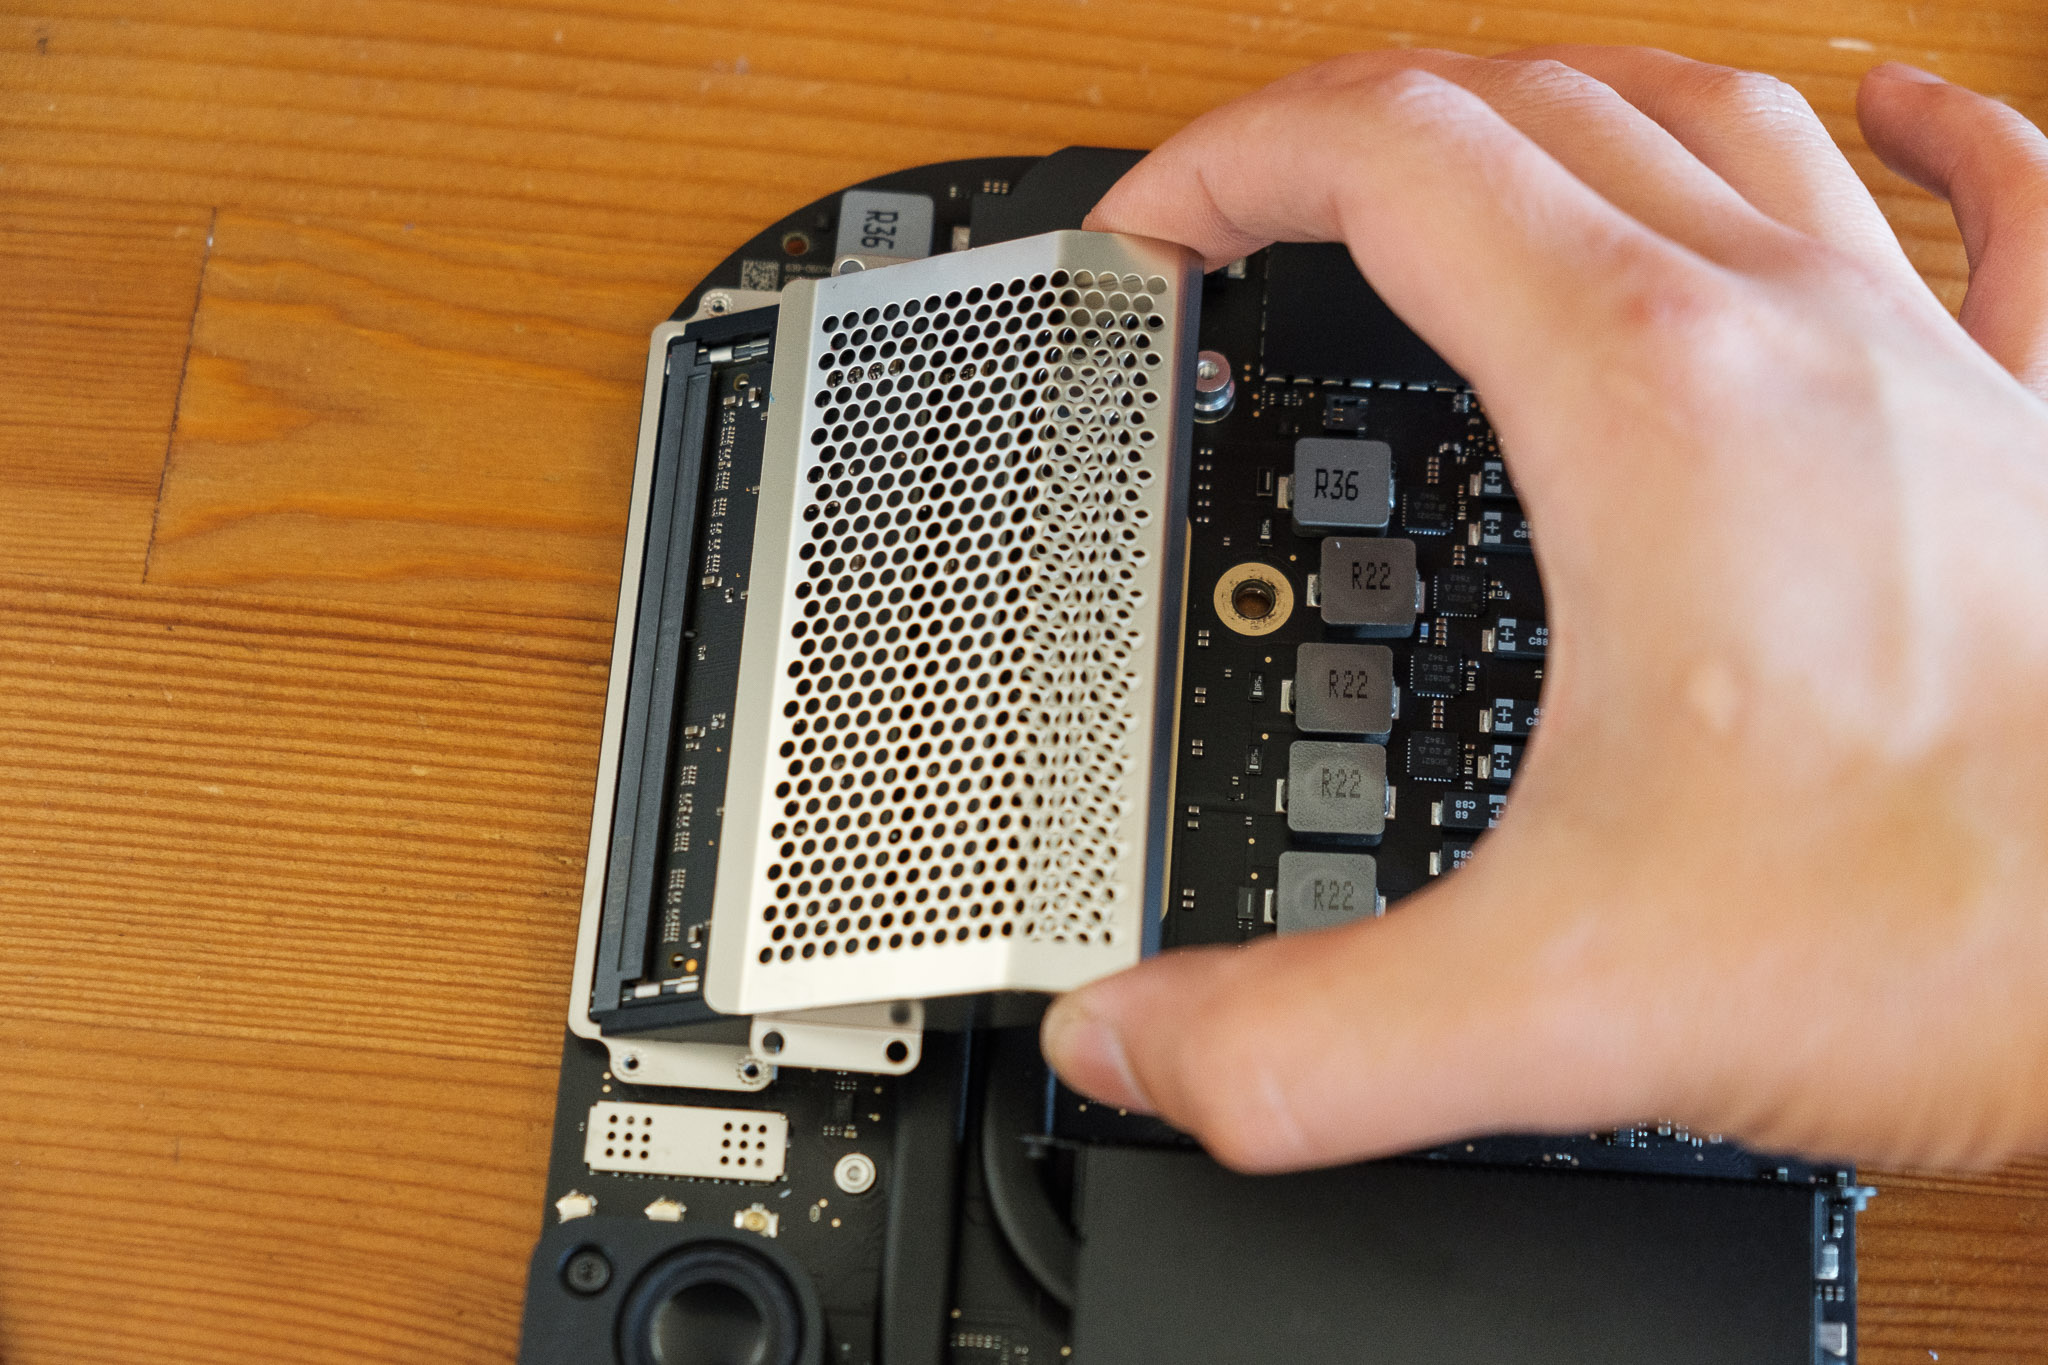
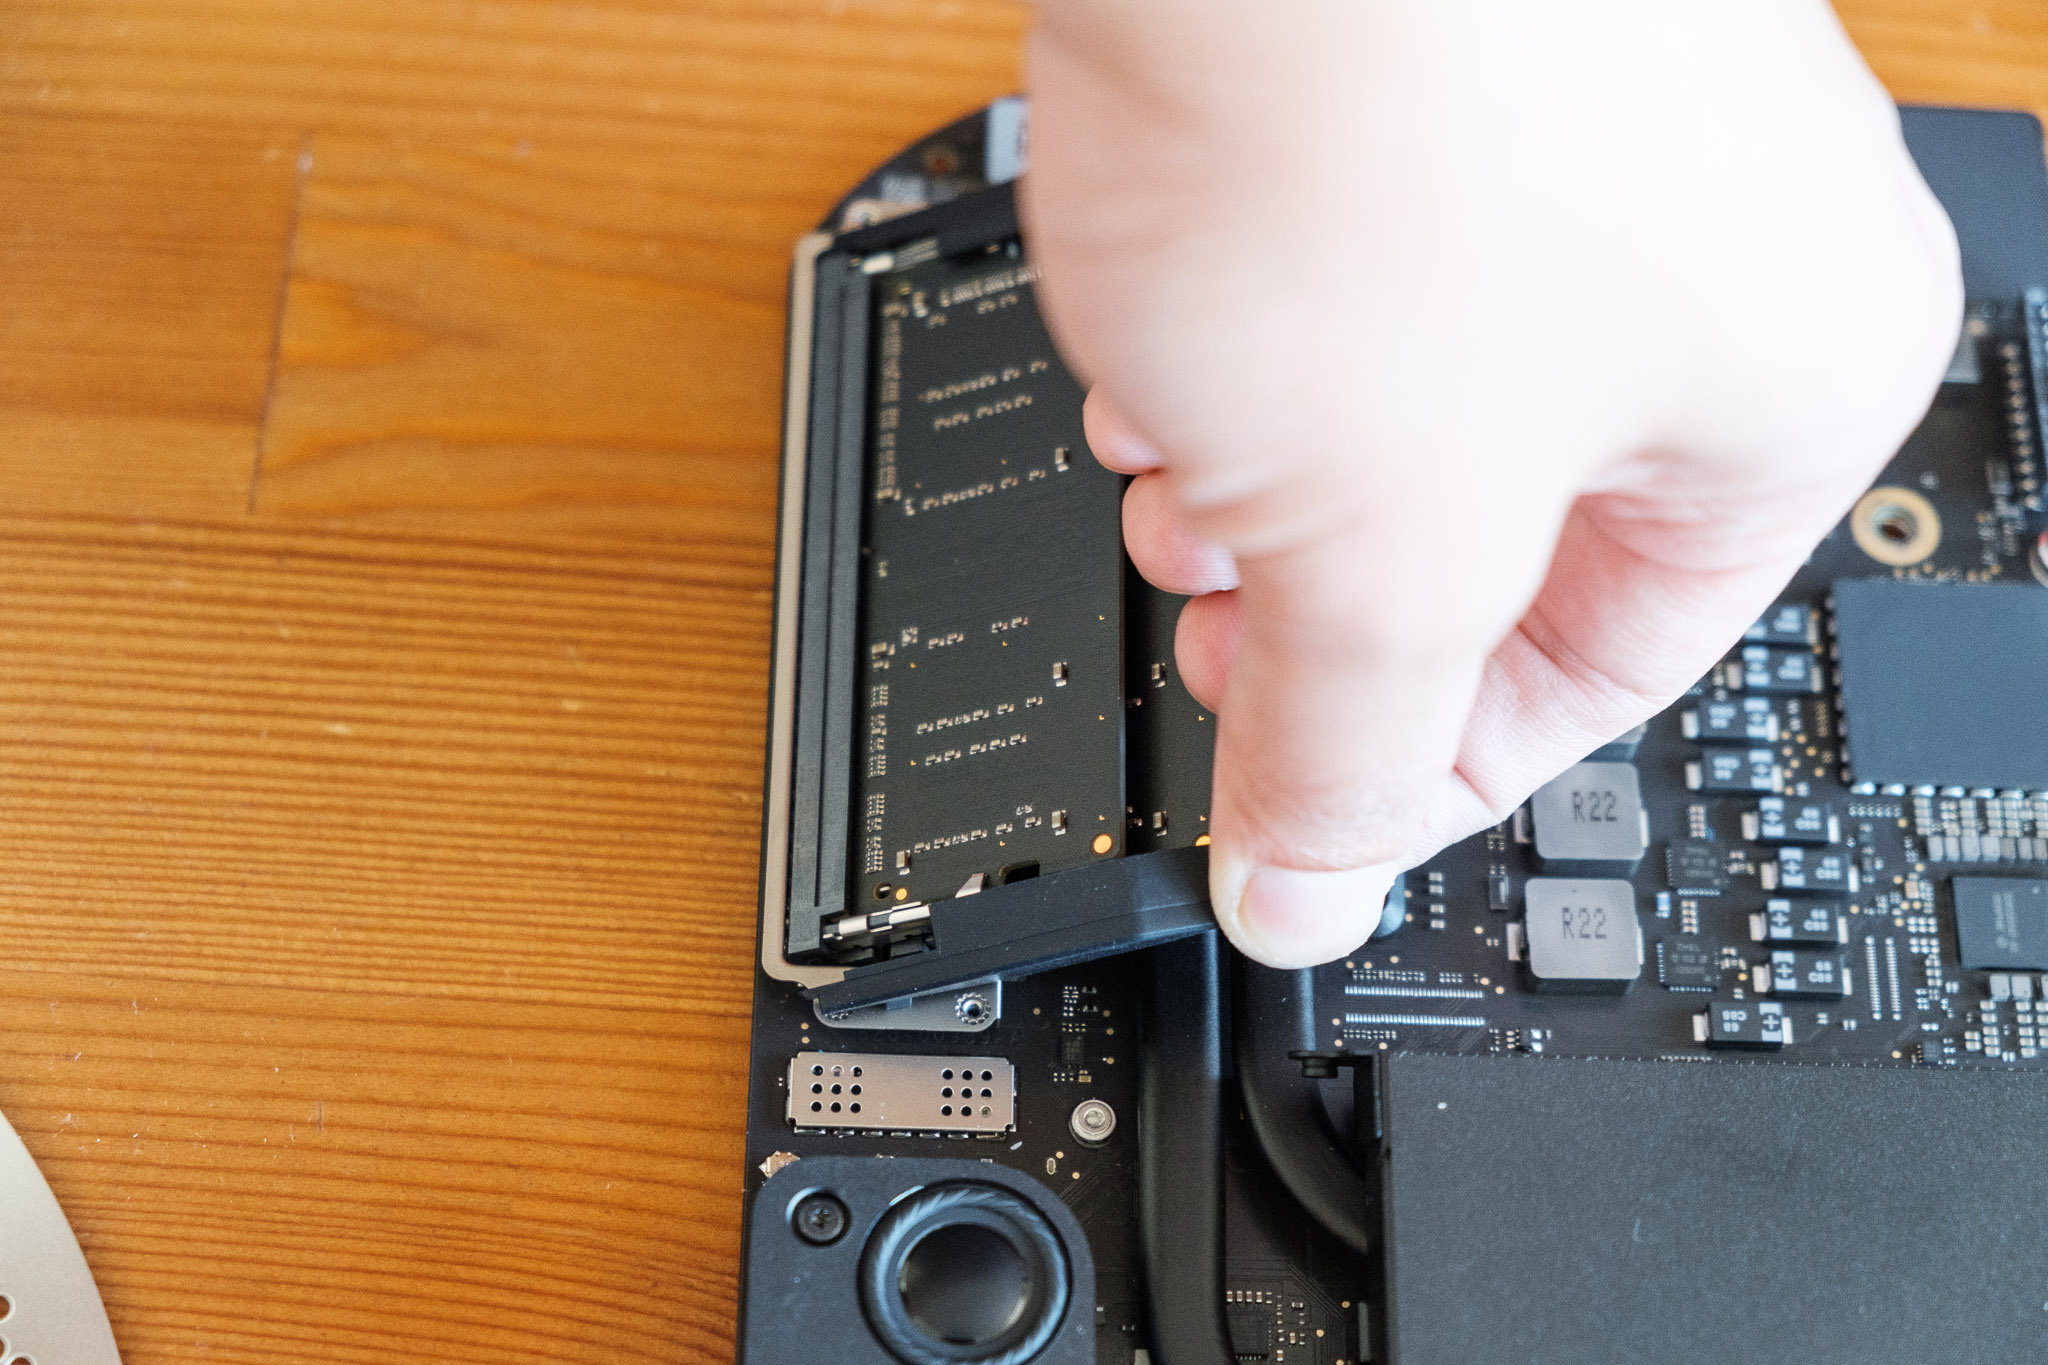
Remove the four (4) T6 screws from the outside of the cage. With the screws removed, slide the memory cage diagonally, at the same angle which the RAM modules are fitted. With the cage removed, pull the rubber stoppers off at the same angle (you may need to wiggle them free a bit).
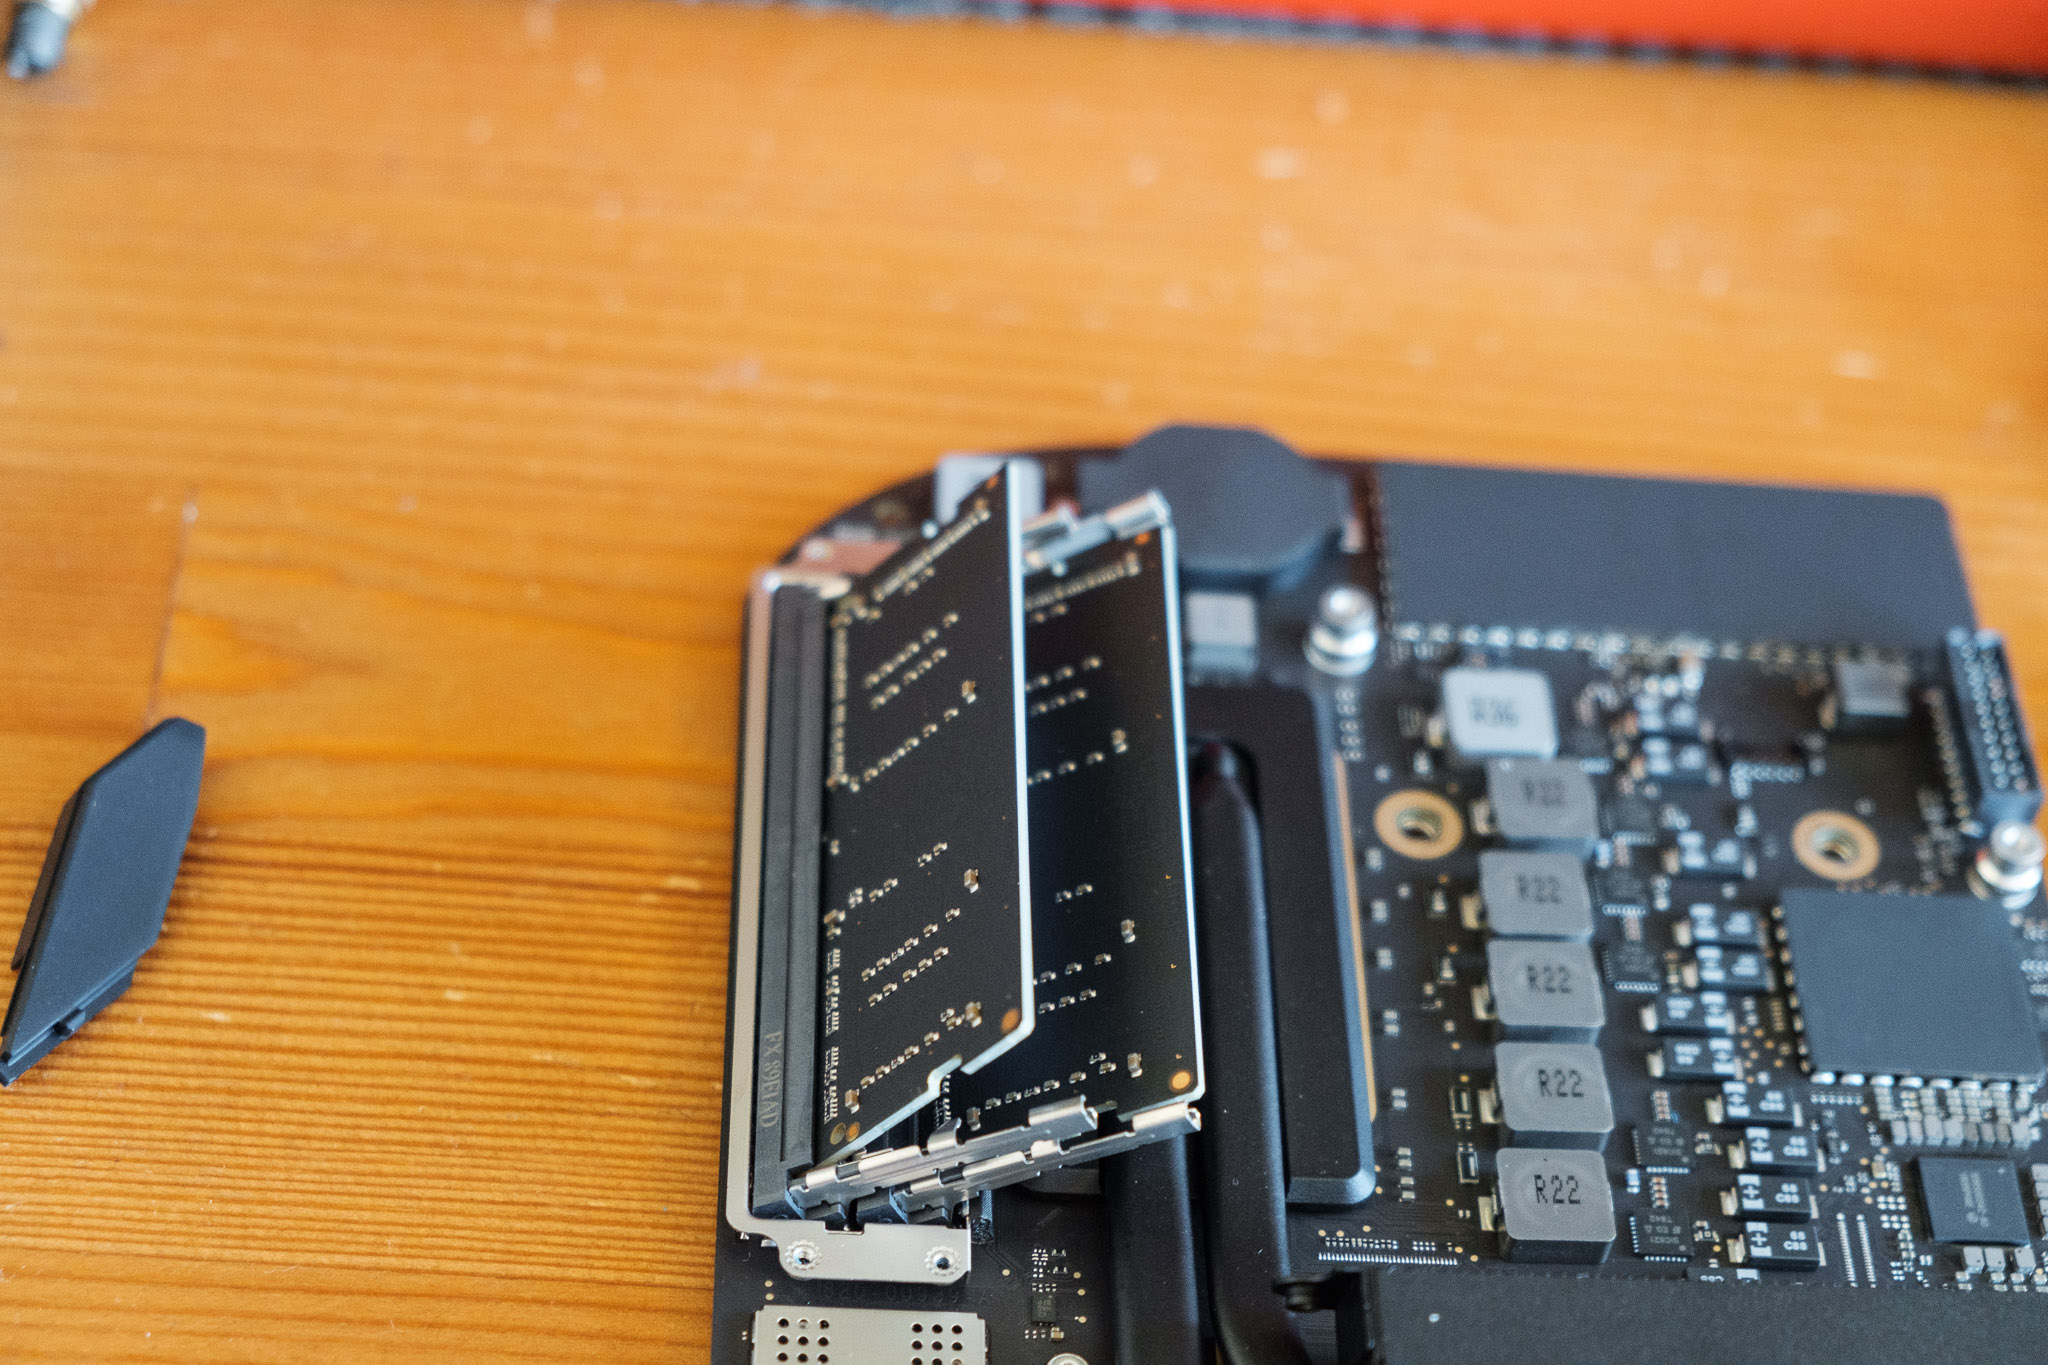
To release the memory, gently spread the thin metal clips holding the modules. The memory will spring upwards when free. Pull out the module. Do that for both modules.
To re-seat the new modules, place them into the slots, ensuring you have the correct orientation for the pins, and press them firmly down in the same angle which they were when popped free of the metal clips. Once in firmly, gently press down on the memory module to fasten it into the two metal clips. It may feel firm, but they’ll click into place. Do this with both modules.


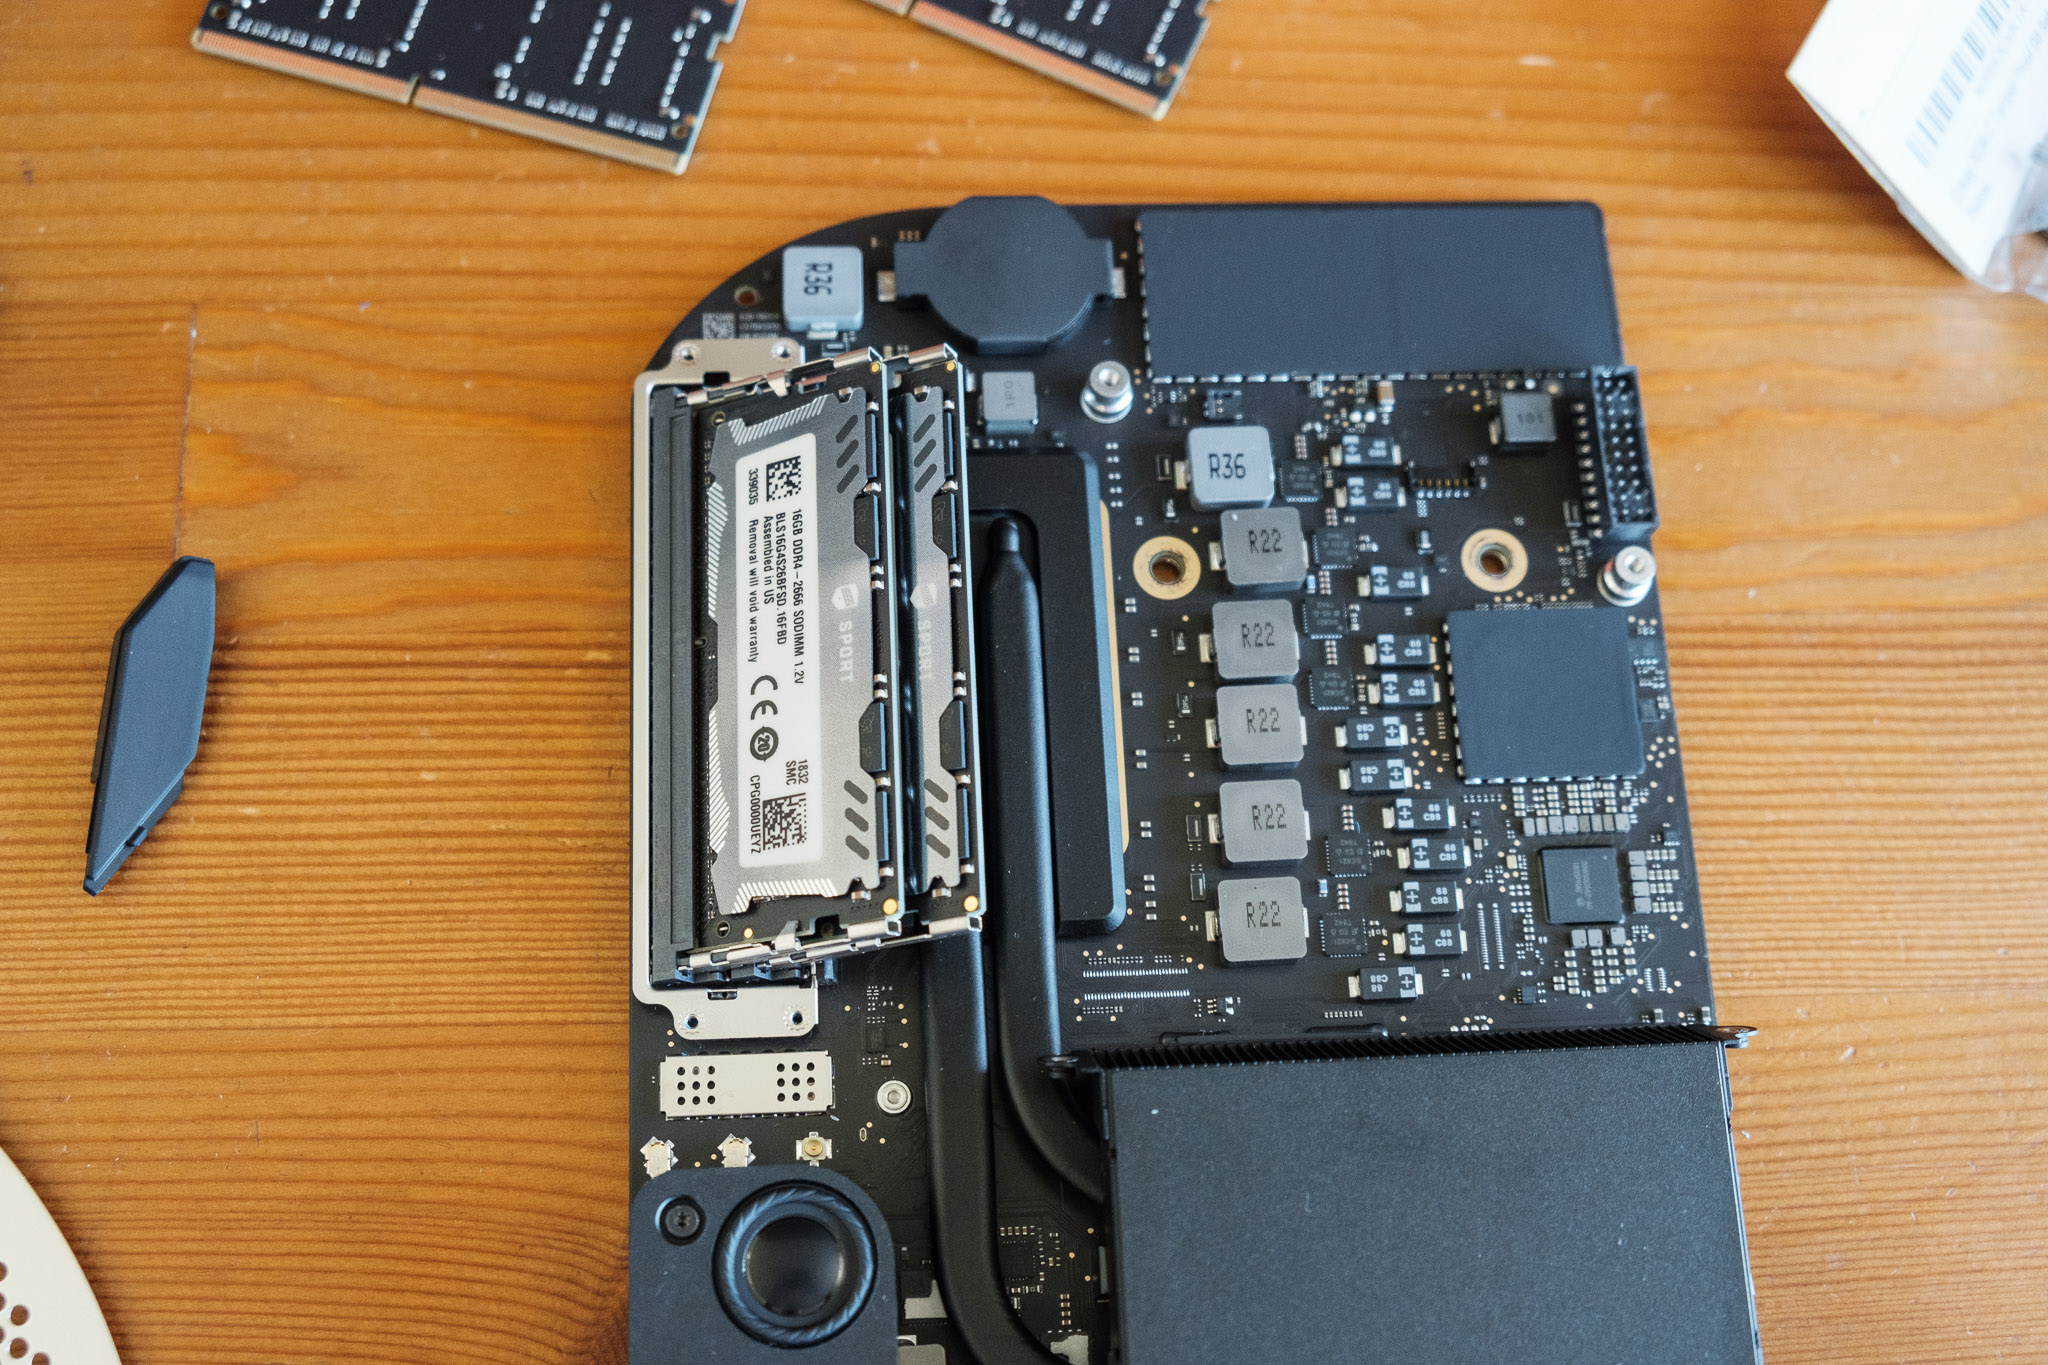
Once you’ve seated both modules, you’re done! Just reverse disassembly and you’ll be good to go! Couple of things to take note of when re-assembling.
The rubber RAM guards slide in through the memory clips. The guards have little tongues that slide through a slot on the clips.
There’s two clips on the side of the ports when you slide back in the logic board. Depressing those a touch when re-inserting ensures you don’t accidentally snap one off if you go in at a slight angle
Don’t forget to reconnect the various cables, especially the fan and antenna cables.

Hope that was helpful. If you have any questions or need clarification, leave a comment and I’d be happy to help!
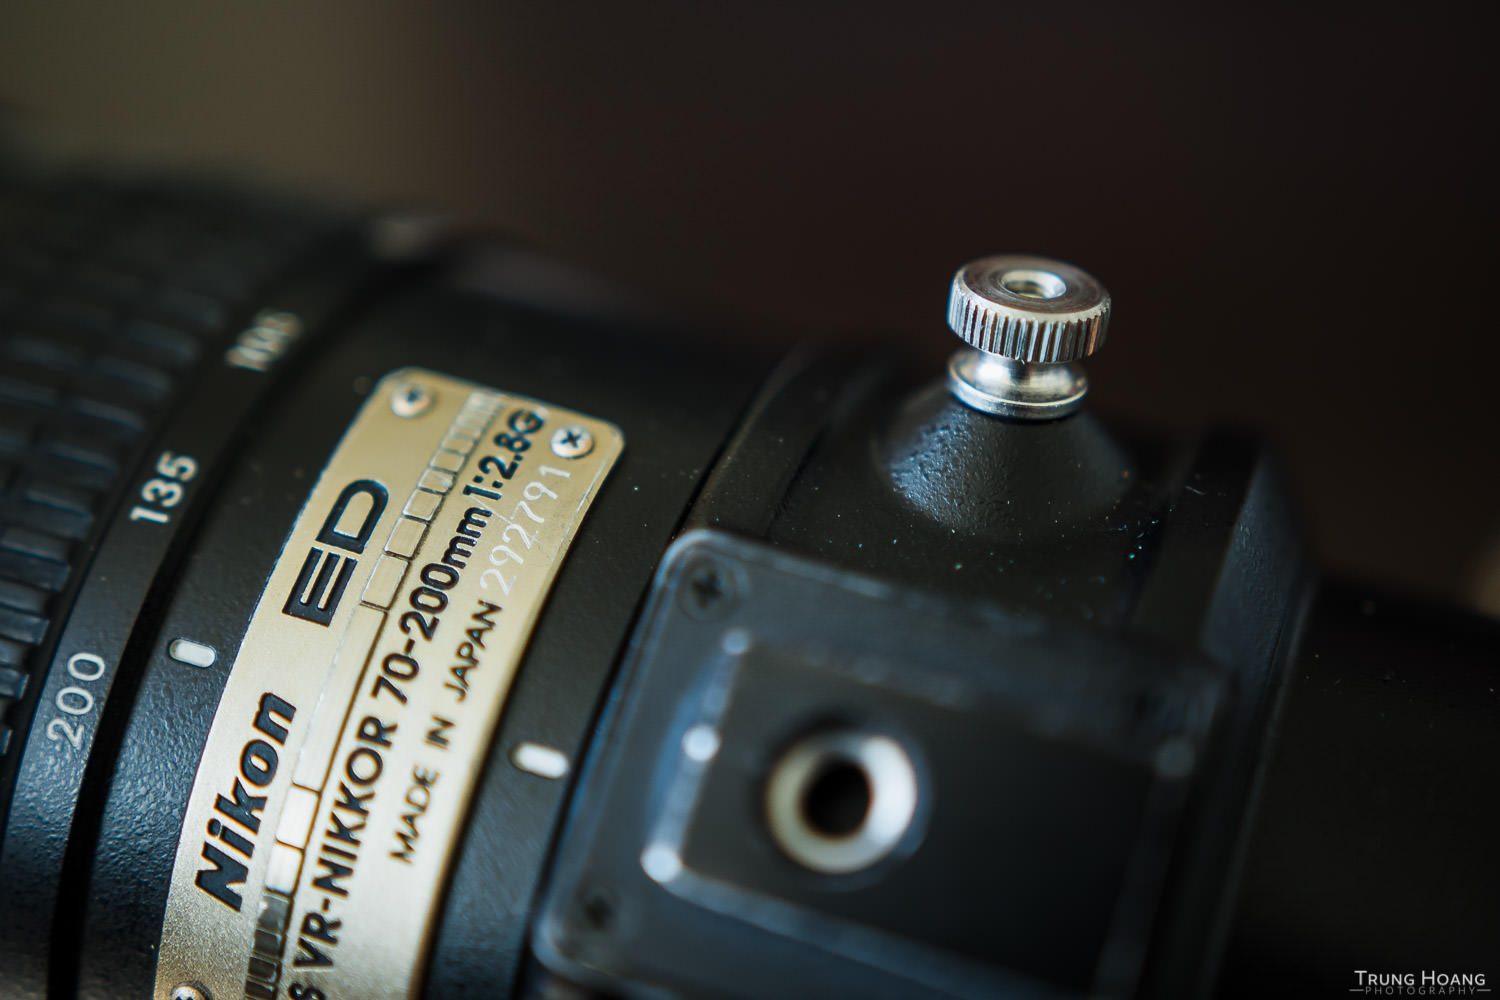
DIY // Nikon 70-200 f/2.8 VR Tripod Collar Screw Replacement
Lose your Nikon 70-200 tripod collar screw? Here's a DIY solution to remedy your ever spinning tripod collar.

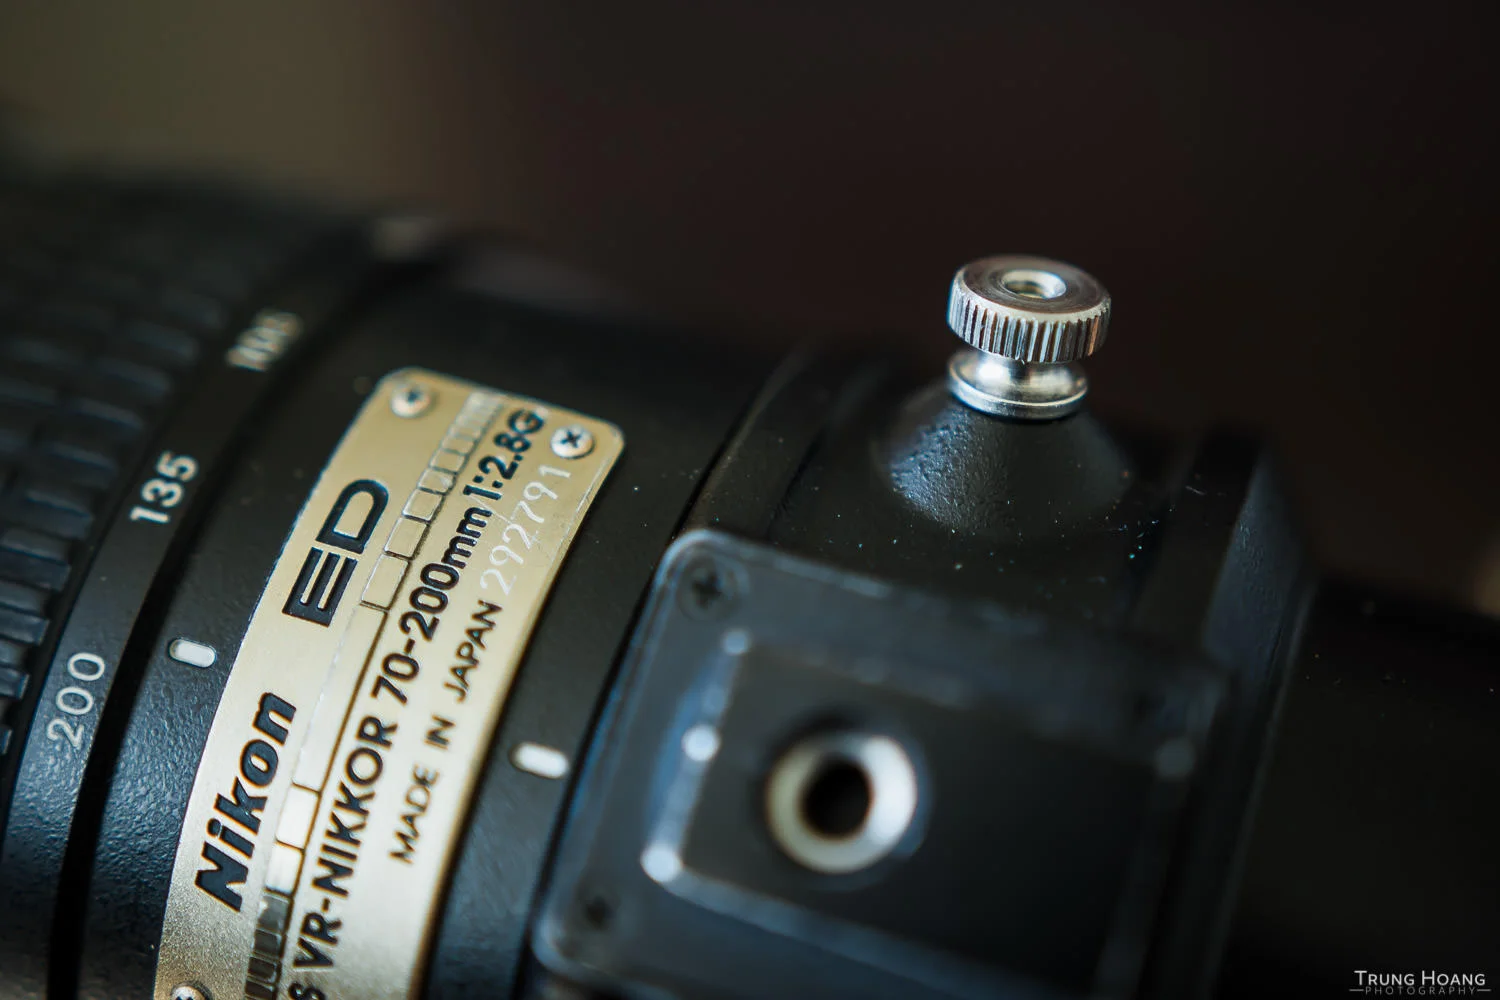
Not too long ago while doing some general maintenance on my gear, I discovered that the tripod collar screw for my Nikon 70-200 f/2.8 VR was missing. Unsure where it could have gone, since it's (supposedly) captive, which means it's not supposed to fall out/off, even if it's unscrewed all the way. Puzzled, I went on to look for a replacement.
Upon my searches, a replacement collar screw was going to run me $35, which I thought was outrageous! Being the DIY-er that I am, I sought alternatives...
On the surface, a solution seemed pretty simple, a simple 1/4-20 screw, the same diameter and thread size as a basic tripod mount. It fit the bill, was able to tighten down and lock the collar, however it only took half a turn or so before it went from barely on to locked. I keep my collar loose fairly often, so this wasn't going to work out, or else I'd have to pocket the locking screw every time I loosened it. The reason it stopped so quickly? A tiny threaded post inside.

The pesky 6-32 screw stopping my progress
After a bit of hunting, the solution was a 6-32 x 1/4-20 slotted thick-wall insert. The typical purpose of the insert is to shrink a 1/4-20 threaded hole to allow the use of 6-32 threaded bolts/post. In this case, I wanted to fit a 6-32 threaded post into both the inside (lens post) and the outside where my knob would be affixed. With these particular inserts from McMaster-Carr, they're designed to be permanently affixed to the 1/4-20 hole they're inserted and they come delivered with a screw activated adhesive. It is CRUCIAL that this adhesive be throughly cleaned off (pink residue in the photo below) or else this baby is going to be stuck in your lens collar. I just ran it under warm water and scrubbed it all off with an old toothbrush.

Before cleaning off adhesive (left), and after (right)
Now the hard part is out of the way, the next step is to find a knob that'll fit. Unfortunately with this insert being used, your options for knobs become pretty limited, since 6-32 is a really small thread size. An easy solution is to use a PC desktop case screw. I tried it, but found it a little too clunky, so I found some knurled nuts that accepted a 6-32 thread and grabbed some 6-32 socket set screws (3/8") to bridge the adapter to the nuts.

6-32 knurled nuts in brass (left) and stainless steel (right). The stainless steel one allows the insert to sit deeper in the nut
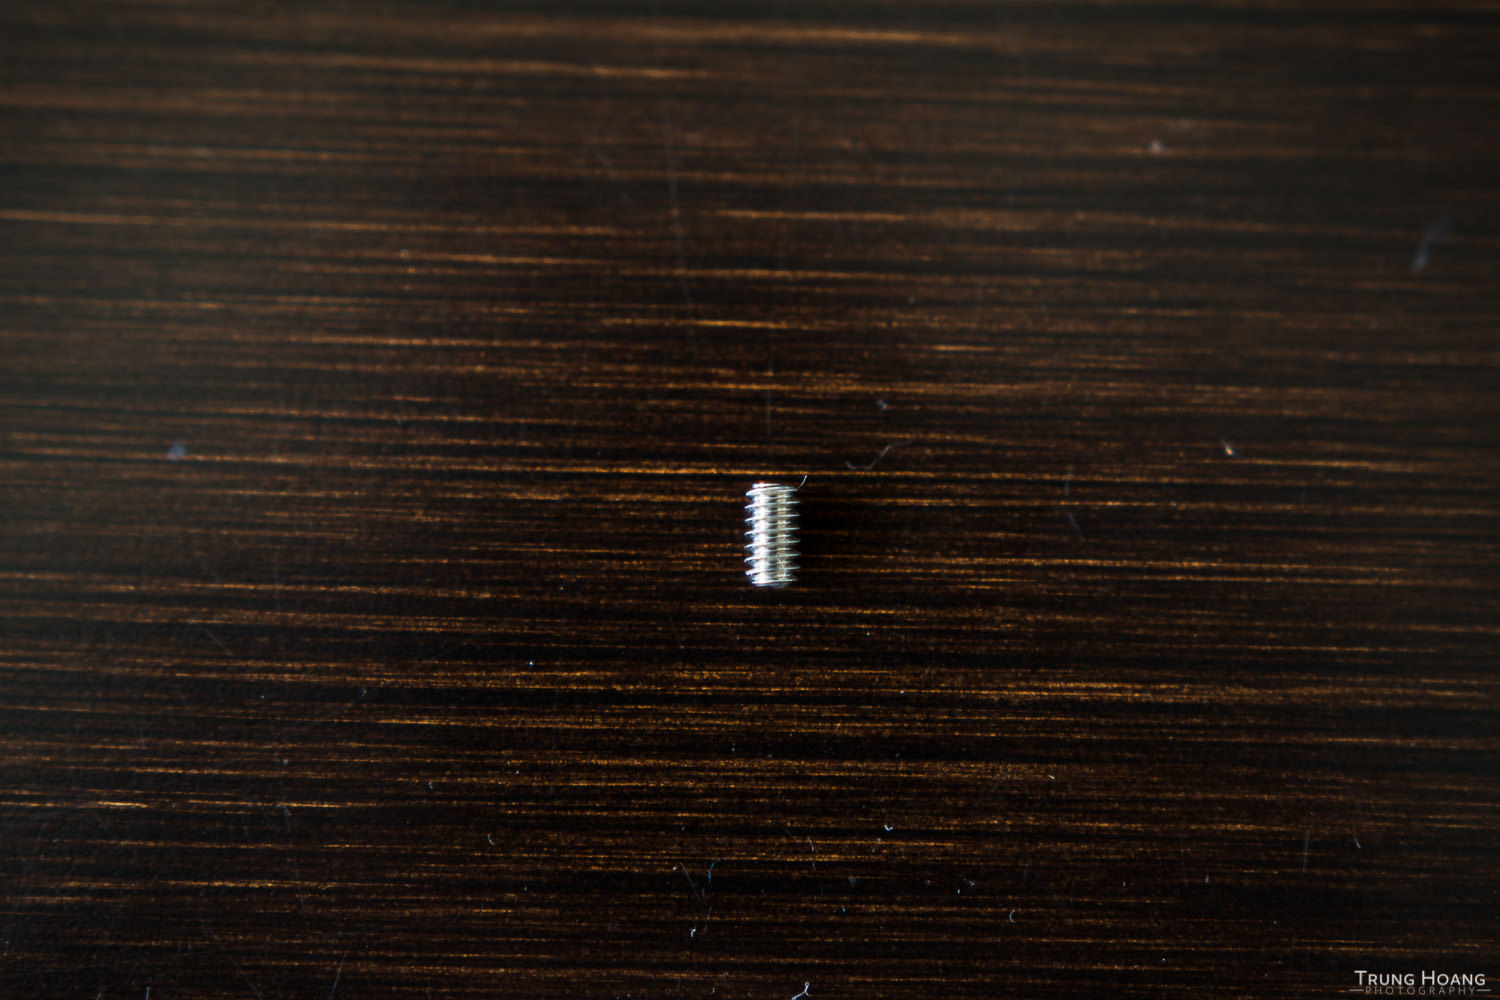
#6-32 socket set screw (a 1/4" is pictured, I found a 3/8" worked better. 1/2" would work as well)
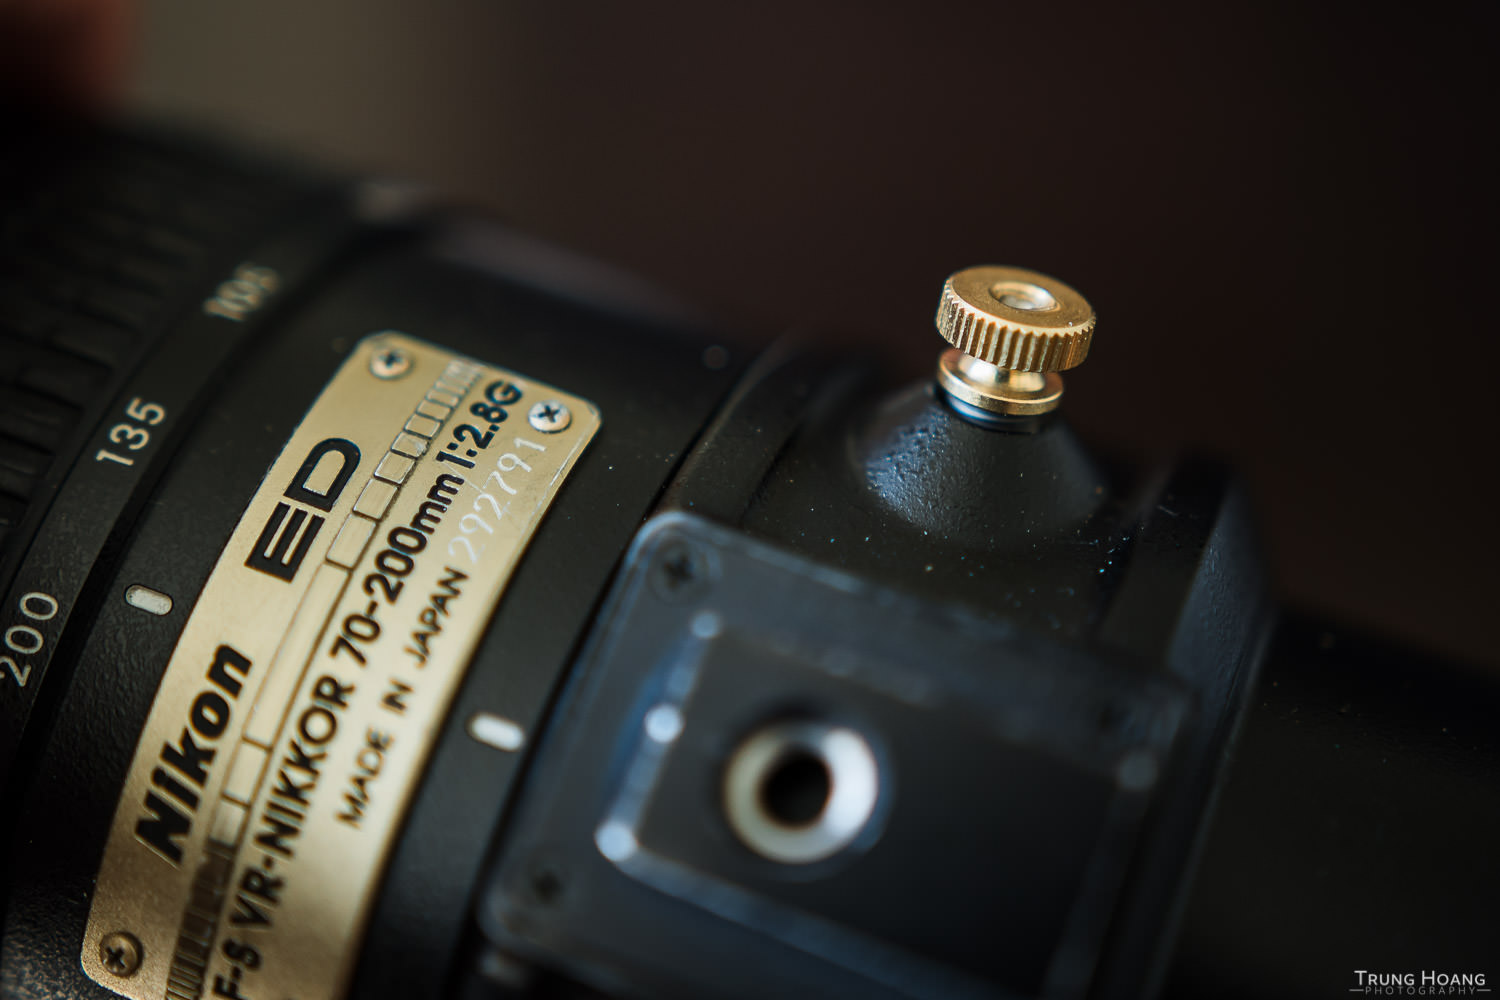
First put the 3 parts together to gauge how deep to screw in the insert and the socket set screw. Once you've determined the stopping points of those two parts that allows you to lock the collar, mark where the socket screw needs to be stopped and begin affixing them permanently. I just used some maximum bond Krazy Glue I had on hand to adhere all the parts together, since it's a pretty low torque application. If you're concerned with it coming apart after a lot of use or have a tendency to lock things down really hard, feel free to use Loctite Threadlocker 242 or a really strong epoxy like JB Weld.

Finished screws! The stainless steel one hugs the inserts a little closer.
Its been a little over a month and I haven't had any issues with it so far. Here's a quick parts list and links to where I picked them up:
6-32 x 1/4-20 slotted thick wall insert from McMaster-Carr 10-pack - $13.60 shipped (in California. Shipping rates will vary based on your location)
Brass 6-32 knurled nuts from Home Depot 3-pack - $0.98 (in-store)
Stainless Steel 6-32 knurled nuts from Home Depot 2-pack - $1.35 (in-store)
Socket Set Screws 6-32 x 3/8" from Home Depot 2-pack - $0.62 (in-store)
Total: $15.57 + some glue ($5-7) for 2 Stainless Steel Replacement tripod collar screws.
The knurled nuts can be found in-store (locations may vary), but for some reason they have different links on their site, so if you want to do an in-store pickup that doesn't require shipping, search their page for 6-32 knurled nut and you should find ones you can pick up in store.
Too much work? If you're interested in having them made and delivered, I'd be happy to do so for $25 shipped to anywhere in the CONUS. You can place an order below.

Tripod Collar Screw Knob for the Nikon 70-200 f/2.8 VR (first gen)
This is a DIY replacement for the knob used to lock the tripod screw from spinning around and sliding off the lens.
Only available in brass
Let me know in the comments below if you have any thoughts or questions! Thanks for reading!